The topic of painting the kitchen cupboard doors was raised immediately after the first viewing of the house. Don’t get me wrong the individual components of the kitchen; the slate floor, ivory Howdens units, oak worktop, grey gloss metro tiles and cool neutral walls were all fabulous in their own right. However, combined together they just didn’t work for me. This room lacks sunlight and after about 11am the ivory cupboard doors seemed to develop a nicotine stain tinge and the room always felt dark.
You may remember my previous kitchen pinning session revealed I had a penchant for pale floors and dual-painted trendy grey cupboards (not dissimilar to Charlotte’s inspiration). However, with a limited budget the worktops and flooring had to stay and I had to disregard my dreams of a DeVOL style kitchen and instead decided to tackle those cupboard doors.
Professional Respray
Like Charlotte, I was quoted an astronomical sum of money to spray the kitchen. Think around the region of £3K. (Yes, that much!) I was so convinced a DIY job would be so laborious I nearly caved and then James reminded me I would be blowing the bathroom budget and wouldn’t be allowed a new bath for at least two years. I quickly changed my mind. I will point out here a kitchen respray could be perfect for you if you have a smaller or older kitchen which shows a lot of signs of wear and tear. They repair all the doors and make good but this wasn’t a requirement for us as the original kitchen was very new.
DIY Respray
On to option two, the spray gun which was right up my street as I’ve always fancied a paint sprayer. They look to make light work out of any job and it appeared it would be a breeze to recoat the many doors and drawers. James rigged up a Dexter style booth in the garage and went off to transform a door using a Black and Decker Hand Held Spray System. One thing we hadn’t anticipated was the volume of air the gun produces to distribute the paint, and the fact unless you have a completely dust-free environment your surface will end up caked in whatever particles are around. Essentially our cupboard door ended up covered in a load of dust. Not really the finish I was after.
DIY Paint Brush and Roller
The only remaining option was to call in the troops and paint the kitchen doors by hand. My dad is a painter and decorator by trade and very kindly offered to help with the project. He’s obviously a professional at this game and his roller technique is second-to-none but I don’t want you to think you can’t do this yourself – you need good planning, patience and a few pairs of hands. In fact we treated the whole project like a bit of a production line with James focused on prepping and priming and my dad leading on the painting. I helped out a little and in total we spent about 35 man hours transforming the 22 doors and 10 drawer fronts for around £100.
I can’t tell you how many comments and emails I’ve received about this project so I’m hoping to answer a few of your questions in this post. Here we go with step-by-step instructions on our technique for tackling the laminate coated wooden doors.
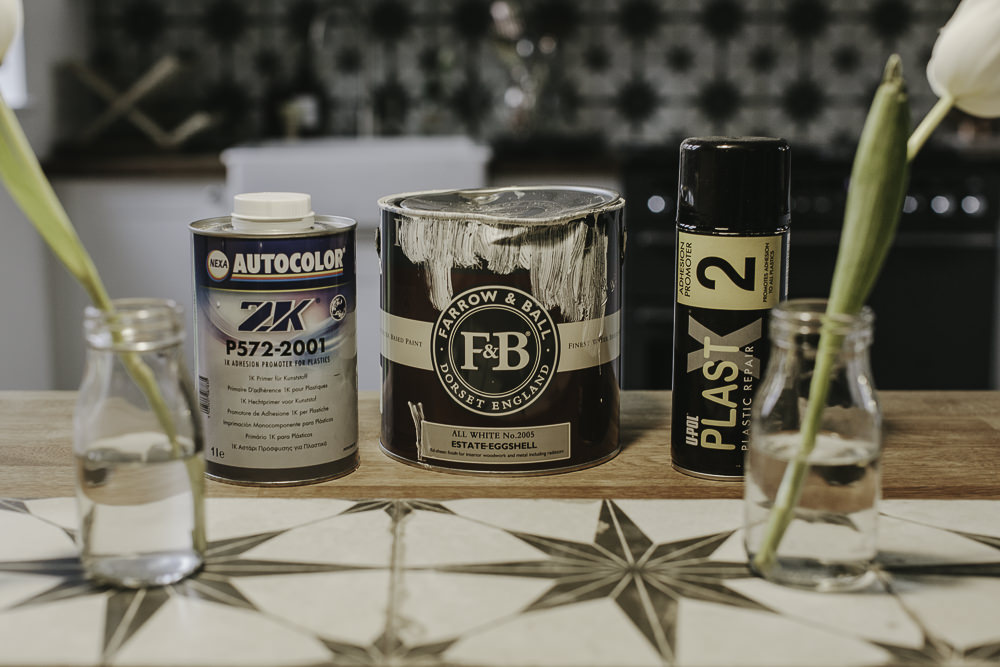
Products We Used
- Good quality mini gloss roller with fine sponge and various high quality paint brushes
- 2.5 litres of eggshell paint. We used Farrow and Ball All White Estate Eggshell.
- Adhesion promoter for plastics. We used the U-POL spray version which you can find on eBay. A friend who works in the paint spraying industry recommended this as although the doors are wooden they have a laminate coating.
Step-By-Step
- Roughly create a pencil drawing of your kitchen giving each individual cupboard and drawer a number
- Remove all doors from hinges. Leave hinge in place on the cabinet so you can easily rehang later without having to adjust.
- In the hole on the door where the hinge resided, pencil in the number of the corresponding cupboard or drawer making it doddle to relocate later on
- If you’re planning on changing the location of your handles or knobs, fill in the hole with filler and leave to dry
- Lightly sand door with a normal grade of sandpaper
- Take doors and drawer fronts to a well ventilated area and apply the adhesion primer. James used a spray version for the fronts and a liquid version applied with a brush for the cabinet edges.
- Apply two coats of chosen paint with a mini roller using a brush for the smaller areas. As we wanted a low sheen finish we used Farrow and Ball Estate Eggshell and applied to both the front and back.
- Leave to dry and then rehang doors in position.
We didn’t feel the need to add any varnish to the doors as the finish is so robust. It’s been about three months since the paint job and so far they are holding up really well to a good clean down with a sponge and various visiting toddler hands. I know it sounds ridiculous but I can’t explain how happy it makes me to see the sink match (rather than clash) with the cupboards.
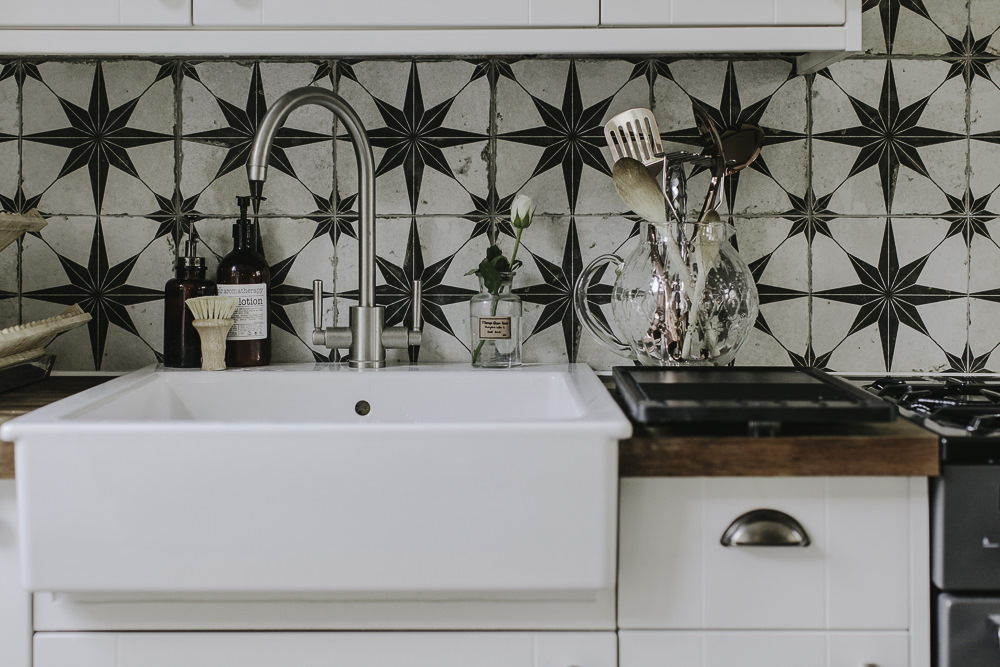
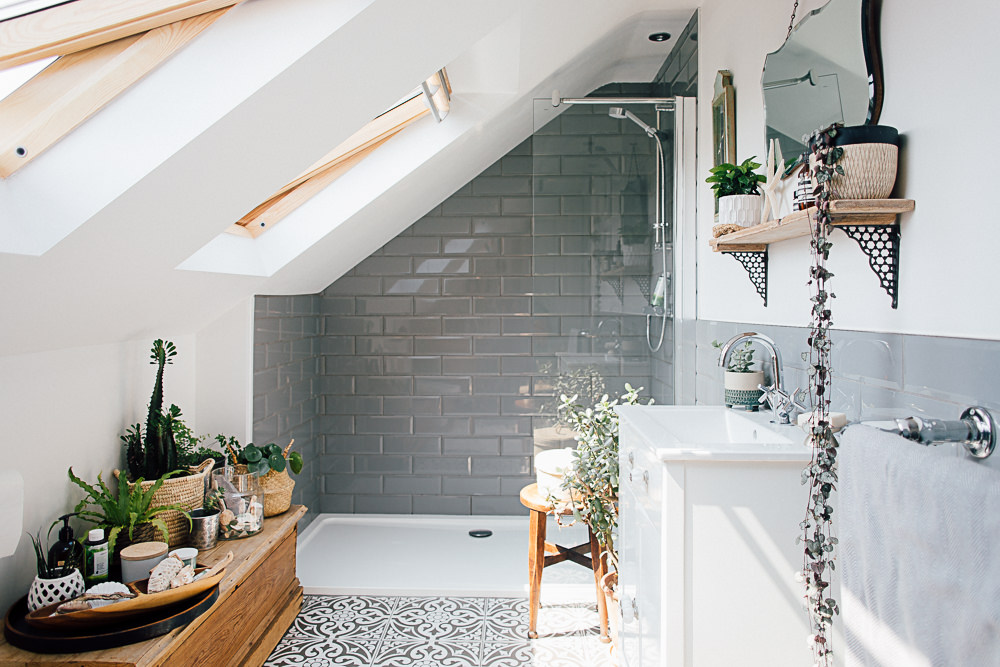
I’ll be back soon with all the snaps of the whole kitchen and all the sources but I will mention the nickel knobs were an absolute steal from Screwfix, the splashback is formed from Heritage Star tiles from Porcelain Superstore and those copper utensils in the header were gifted to me by the very lovely people at Wilko. Until then feel free to ask any questions around the kitchen door makeover and I’ll try my best to answer.



Gorgeous Lauren! Well done. Those tiles ?? can’t wait to see the full reveal
Thanks Carly. I dithered about the tiles for ages but I’m so glad we took the plunge!
Looks stunning Lauren. Can the same effect be achieved with PVC coated doors or this another post entirely?
Hi Karen, would that be internal or external pvc doors? x
Internal kitchen cupboards Lauren.
Will ask my paint sprayer friend and get back to you x
Turns out our cupboards actually had a PVC laminate finish too so you should be fine with this technique. If it’s a super shiny surface then you’ll need to give them a thorough sand beforehand x
Those tiles are life itself!
Some brilliant tips Lauren, I know from painting our kitchen (a much more slapdash effort) how tough it is, but you’ve given some great advice here for anyone taking the plunge.
I can vouch for the durability of F&B on ‘foodie areas’ too. Our kitchen cupboards and dining table/chairs all take a bashing – including a daily coating of toddler food which sometimes almost needs to be chiselled off! xxx
Thanks lovely lady.
I’m pleasantly surprised by the F&B durability. I painted the cupboard doors in our first place with cupboard paint and they were always a bit streaky and shiny. Loving the robust, yet practically matte finish. Glad to hear yours are standing up to the test! x
You should see the kip of E’s dining chair, it’s a daily battle against dried weetabix or unidentified foodstuff. I can spray it and scrub away to my hearts content and that F&B just doesn’t budge… I’m so impressed! We used Bone in the kitchen and it seems the light tones are just as durable.
I also need to add how perfectly styled your kitchen is! Of course it is! ?xx
Dried weetabix is like glue! Very impressive!
I have to point out the kitchen no longer looks like this. It’s full of saws, wood and a work bench as we’ve started on the laundry cupboard thing.
Haha… You know, one day you’re going to run out of rooms to decorate and you won’t know what to do with yourself!
Start all over again, right?!
Hi Lauren, fab post. Those cupboards look amazing and he kitchen is gorgeous!
We’re your cupboards wood or laminate before hand? We have some rather nasty orange wood laminate cupboards that is simply love to update…
Heather
X
Hi Heather, they had a laminate finish on the top and are mdf/ wooden underneath the coating. In fact I just went on to check on the Howden’s site and they are pvc laminate x
Heather my cupboards were exactly the same gloomy, awful orangey laminate… go for it! x
Well done Lauren! I hand painted our kitchen cupboards by hand too when we moved in. Ours were wood without a laminate finish but very dark, so I used 2 coasts of primer followed by 3 coats of eggshell in an off white. It took me about 3 months! However, they looked amazing and 8 years later are still going strong.
Oh wow, three months. I can believe it though. There’s a lot of drying time in-between. Glad to hear yours are still holding up well.
Your kitchen looks absolutely fab Lauren! Thank you so much for this post. We’re moving house soon and like you, the kitchen is a little dark being on the north side of the house so I was planning to paint the doors as they’re pale ‘wood’ laminate and rather dated but had no idea how to do it and on a budget. We’re planning to swap the kitchen and living room over at some point so hubby has given me a strict budget for interim sprucing! Which brand of roller did you use?
Hi Naomi, sorry I don’t know the actual brand but if you go for a superfine foam one you should be okay.
Fab, thanks. Don’t want to balls it up!
THOSE TILES THOUGH (caps lock fully intentional)
Haha Philippa. I’m glad you like x
Really useful post, thanks. We had ours professionally done by our decorator but if I fancy a colour change should now feel brave enough to do it ourselves! One further tip I have is that, particularly if you are doing a darker colour (ours is navy blue), keep on hand a pot of the paint to do any touch ups as necessary as we do have a few chips which we have had to paint over. Totally agree, those tiles are gorg!!
Excellent tip Catherine x
I almost didn’t visit Rock My Style today, but now I am very glad I did as I’m now a little bit in love with your kitchen.
It’s ok though because I’ve just had this conversation with my husband, poking his head round the study door.
Him: “Those tiles are spectacular”
Me: “They fall precisely into our price bracket too”
Him: “I’d be very happy with them”
Thanks for stopping by Rebecca!
Very pleased you’ve manage to persuade your husband. Sometimes all they need is a pretty picture 🙂
Such a useful post Lauren! Its amazing what a bit of paint can do, its totally transformed those cupboards. We have a uPVC front door which I am desperate to change to a wooden stained glass number. As we have prioritised the main rooms in the house first, this is on the backburner. I have often thought about taking a paint brush to it though while I wait for my dream. Never have been quite brave enough though! xx
I’m not sure if you saw a home tour we did last year where the lovely homeowner, Lottie arranged for her uPVC windows to be sprayed – http://rockmystyle.co.uk/charlottes-relaxed-revamp-part-two/
I didn’t even realise you could do that! Maybe worth checking our for your door? x
Ooh thanks Lauren – will check it out!! x
Sarah – we sprayed our uPVC windows and back door and our garage doors (though not sure what material they are?) and it looks amazing! We have a mix or wooden and plastic windows (for some unknown reason) and it worked really well. I would defintitely recommend as it will transform your door! Also was really quick. x
Kitchen goals. Love the look.
Did you spray/paint the adhesive to the kickboards & edges of cupboards too (the bits you can’t remove)?
Currently doing our fireplace in f&b so really glad to hear the paint is so durable as my mum keeps saying it needs a wax (despite the shop saying it didn’t).
Hi Sarah, we used a liquid version applied with a paint brush for the edges of the cupboards. James removed all the kickboards and sprayed them and then later on we replaced all the plinths that run across the top of the cabinets.
I’ve got F&B on my fireplace in the living room and it’s really durable 🙂
So happy to see this post. I’m trying to convince husband to do the same with our kitchen. What did you do about the inside of the doors and units. AHve you painted those too or left them as they were?
Hi Angela, the insides were fine as they were plain white (though we did paint the inside of the glass cabinet dark grey). The 35 hours included painting both sides of the doors – will add this in to the post now actually. Fingers crossed you can convince your husband x
Looks brilliant Lauren! And I want to do this to our kitchen very desperately, thanks so much for the tips x
Best of luck Milly x
Thank you so much for this post Lauren. I’ve really been considering painting our wood effect laminate cupboards but been unsure whether they would withstand life with two small grubby people running about but your post and the comments have given me confidence! Also a fab idea to fill in holes as would love knobs and cuphandles rather than our chrome handles. Would you be able to recommend a filler for this job? x
Hi Ella, it might be best to use a wood filler rather than all-purpose one so it sands back to a smoother finish x
Hey Lauren! Brilliant post and it’s given me the balls to give mine ago! You have a beautiful kitchen! Can I ask where the cup handles are from us it screw fix too? Thank you! Mary x
Great post, hopefully it’ll convince the husband to let us attempt ours. We have long chrome handles on our cupboards so we’ll need to remove and fill all the holes first 🙁
Where are the tiles from?
thanks!
Hi Lauren, love the post! Oooh, those tiles. We are about to do the same with our kitchen and utility room cupboards, but in the mean time we’ve been drawing murals and shopping lists on them with chalk pens. After our repaint one cupboard might still be a shopping list as it is super handy!
Hi, Can you tell me what make and size are the drawer pulls in your lovely kitchen? It seems that Screwfix don’t do a satin nickle one to match the knobs you have on the doors. I’ve looked for satin nickel ones but cant seem to find the ones in your photo. Many thanks.
Hi Charlotte, sorry we only replaced the door knobs. The drawer pulls were already here when we moved in. I wonder if they were maybe from Howdens like the kitchen units?
Thank you for posting, love the final look!
Can you please tell me why you decided to use an adhesive promoter rather than a primer? I have been doing a lot of research and I can’t really find a clear choice between the two when painting over laminate… We are repainting our wardrobe doors so it would have a fair bit of use and I really don’t want the finish to end up chipping! So far we’ve been recommended to use a spray on either an adhesive promoter or Zinneser BIN primer!
Hi,
Brilliant post and your kitchen looks amazing. Can I ask how may cans of the adhesive spray you used? an why you decided to use the liquid version?
Thanks
Thanks Mark, we used the liquid version for bits that weren’t easy to remove and take outside – so the carcass edges etc.
I think we used two cans of adhesion primer for the doors, drawer fronts etc.
It’s so nice to here someone not bashing Farrow and Ball, I’ve just had some cupboards made for a new kitchen and twice now the cupboards have been sent back to me with packaging marks which won’t come out unless they are re-painted! The supplier has said that it’s my fault for wanting them to use Farrow and Ball which they find doesn’t dry, but I could sent them back for a third time for them to repaint as long as I cover the cost of painting as they are refusing to come up to repaint them, they never told me this but I also find it strange as all our floorboards have been painted in Farrow and Ball and we’ve had no problems! Your kitchen looks lovely 😊
Hi Lauren,
Great job and love the new tiles! It’s great to see there are so many people who would have a go at painting their own kitchen cabinets.
We supply unpainted kitchens units primed and ready: https://thewhitekitchencompany.com
They’re made in solid oak, second to none on quality but half the price 😉
Thanks for the article, I’ll repost it on our social media.😊
LOVE this kitchen and currently thinking about doing the same to our laminate kitchen cupboards. I appreciate the farrow and ball paint itself is actually very exornsive if you’re on a budget, would you be able to let us know how much you actually spent on the paint for your cupboards so I could have a rough pricing guide please
X
Hi Jade, I can’t be sure off the top off my head but it was only one 2.5 litre tin so about £55-£60 I think. You hardly use any paint per door. x
Your kitchen looks amazing, I started a very similar project in my kitchen which had yellow laminated coated mdf doors. I peeled off the laminate and painted the cupboards with primer and Farrow and Ball in Wimborne White. However I downed tools over a year ago and haven’t finished! I was just trying to get my motivation back so was looking for inspiration when I stumbled across yours! the motivation is back! I was going for the light grey batik tiles which have random patterns on them, but i do love your tiles! they work so well with the white cupboards and wood worktop which is what I am going for! thanks for the inspo!
Hi Lauren, your cabinets look great and I’m planning on doing the same with my horrible plastic wood-effect cabinets. Would the liquid primer be ok for the doors too? I live in a flat and don’t fancy spraying the doors inside. And where did you purchase the primer from?
Thanks, Poppy
Hi Lauren, how long did you leave on the adhesion primer before painting? Thank you x
Hi Lauren, it dried virtually straight away so say about ten minutes?
Amazing work done Lauren! Well done!
Hi Lauren,
Could i ask whether the Farrow & Ball was thinned before application with roller/brush? Or was it taken straight from the tin?
Thanks!