
Last year I went to a festive floral workshop and made my first ever Christmas door wreath. I actually really enjoyed the whole process (mulled wine and Quality Street on tap helped with the creativity obviously).
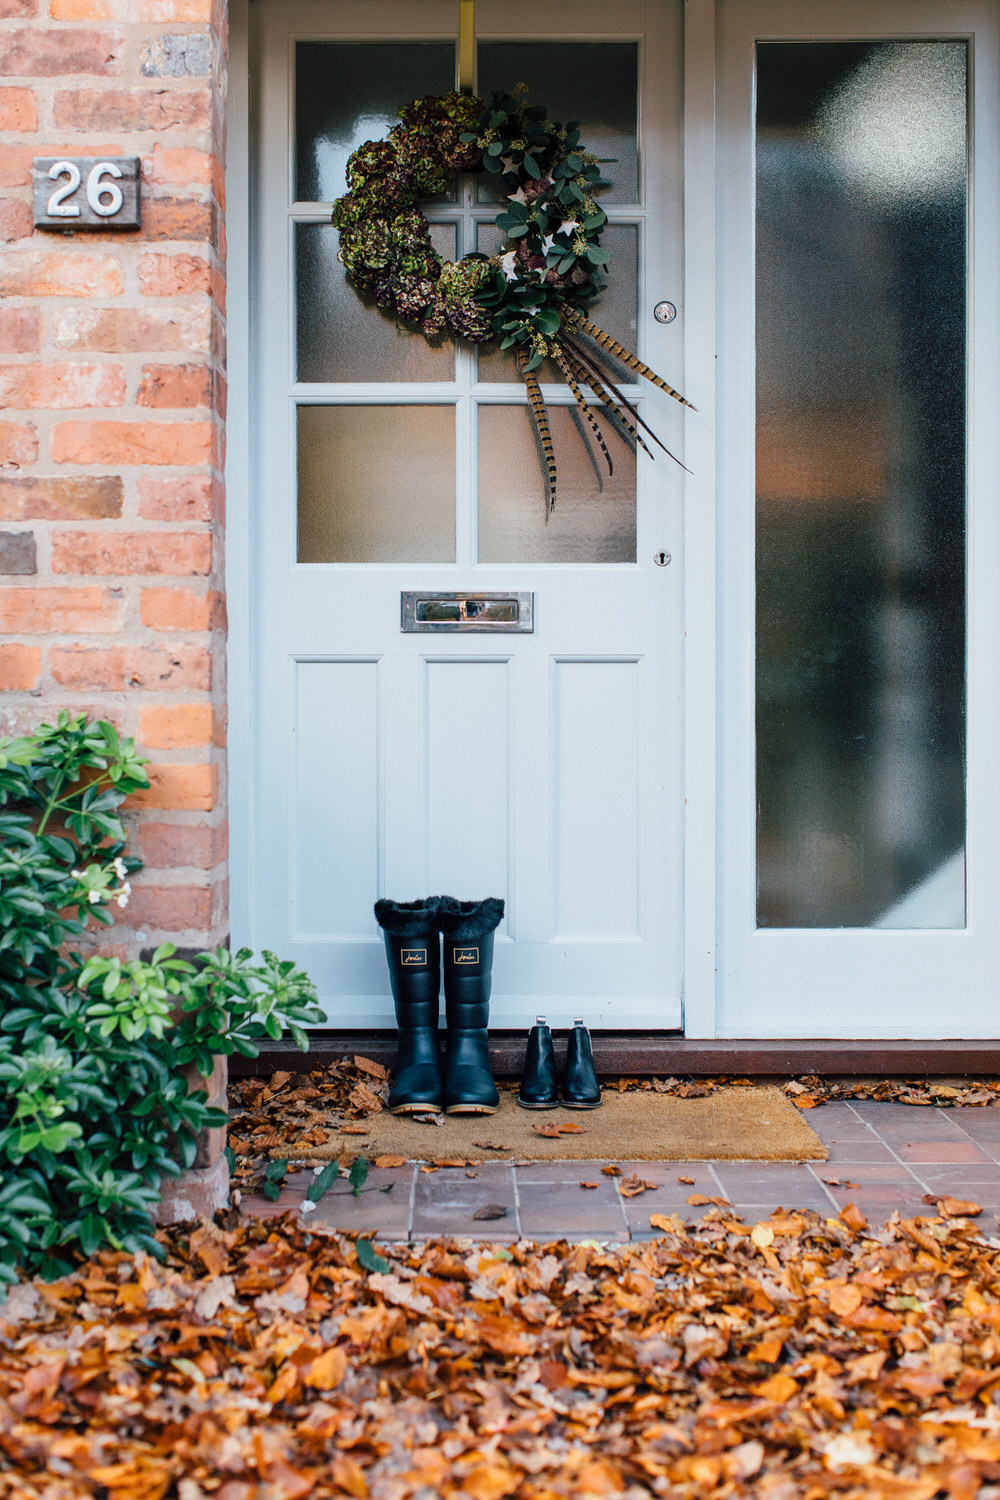
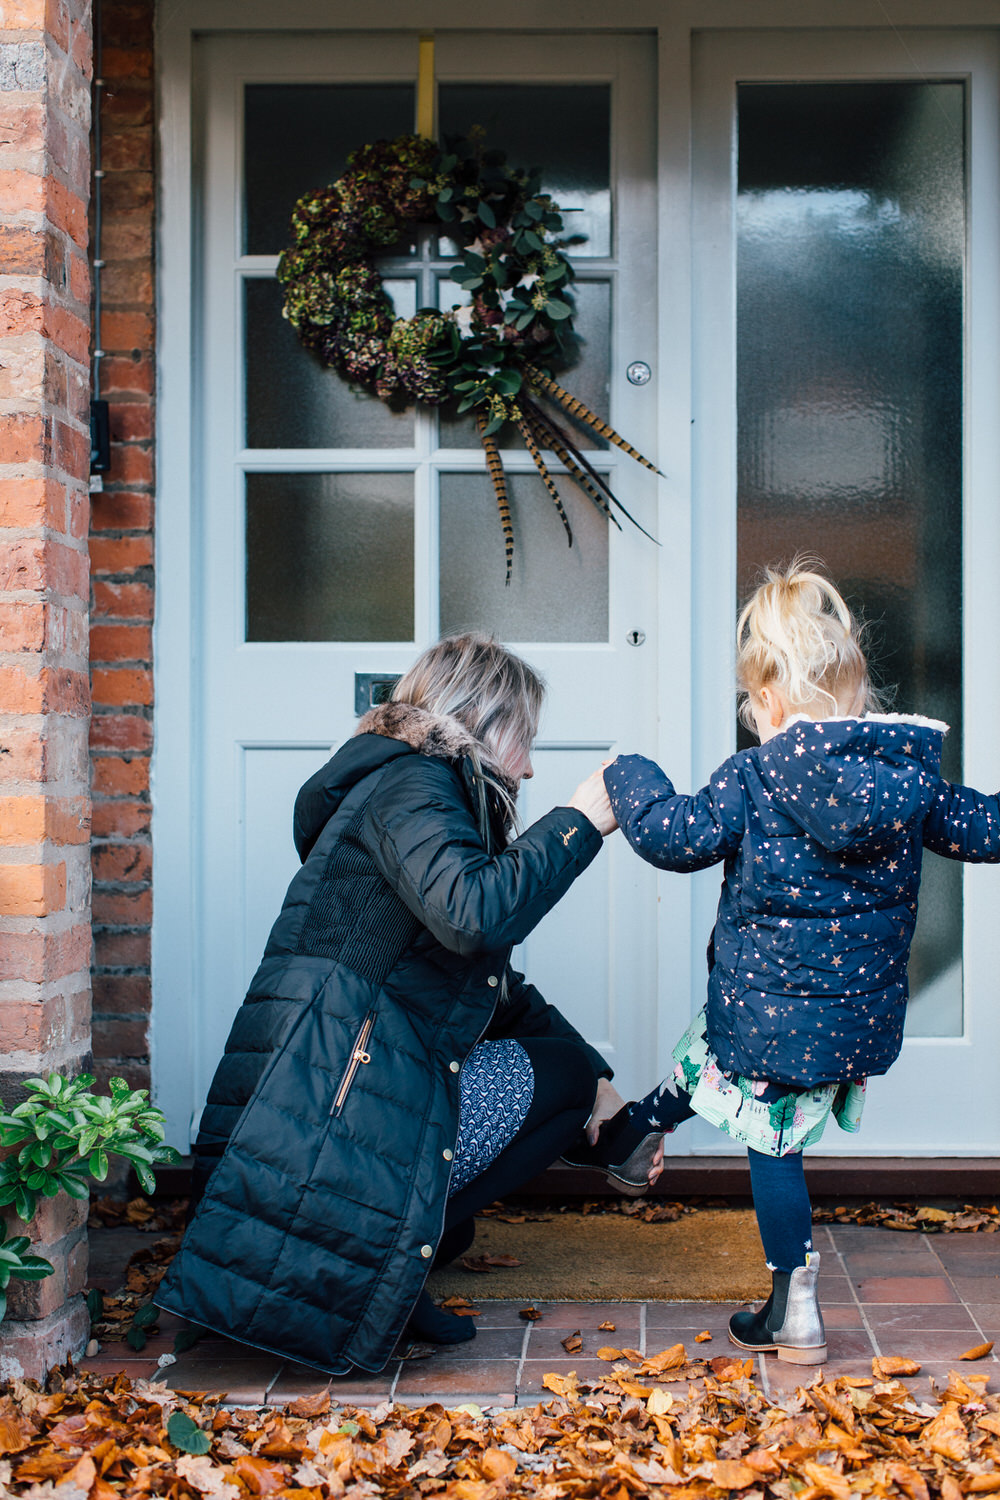
I took a fairly minimalist approach (also see, didn’t have a clue what I was doing) with lots of the “base” moss on show, eucalyptus, pheasant feathers and a few scattered white stars.
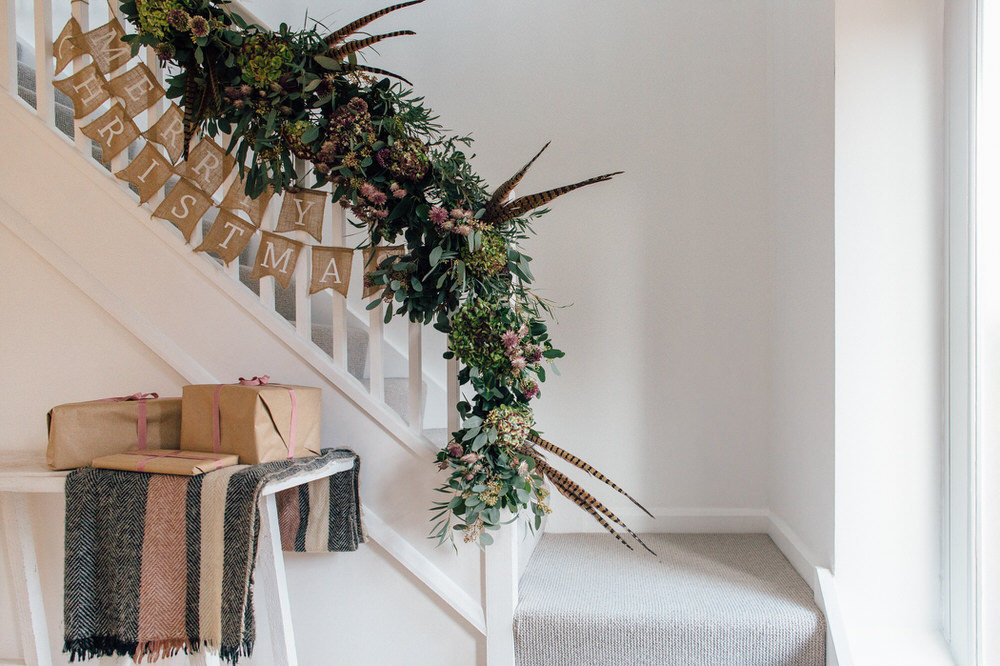
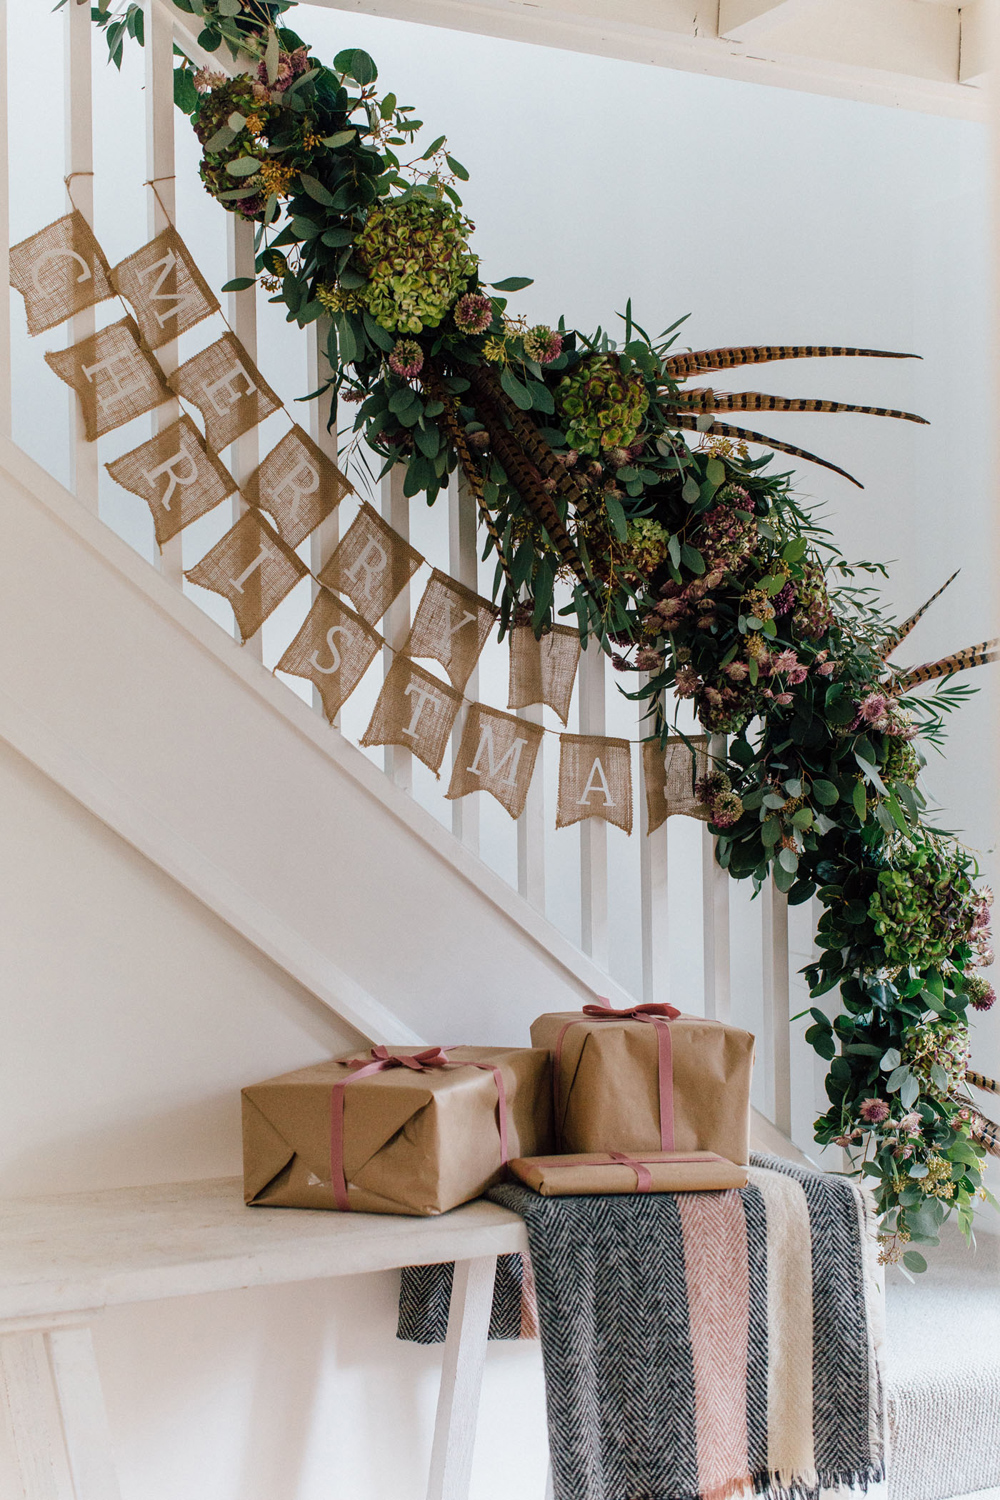
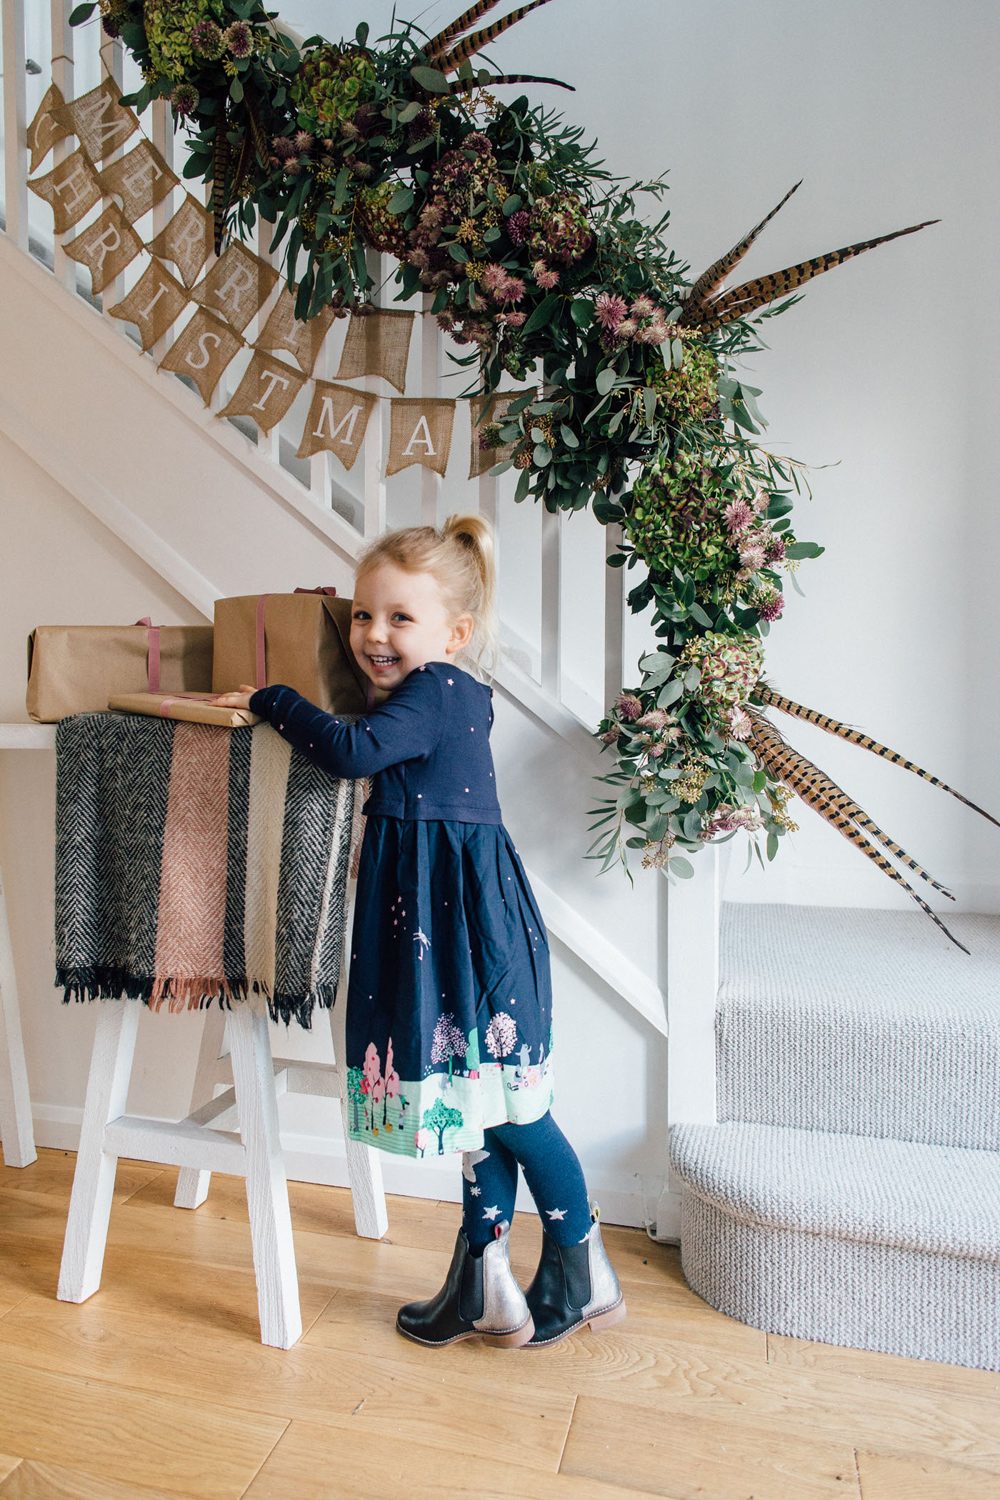
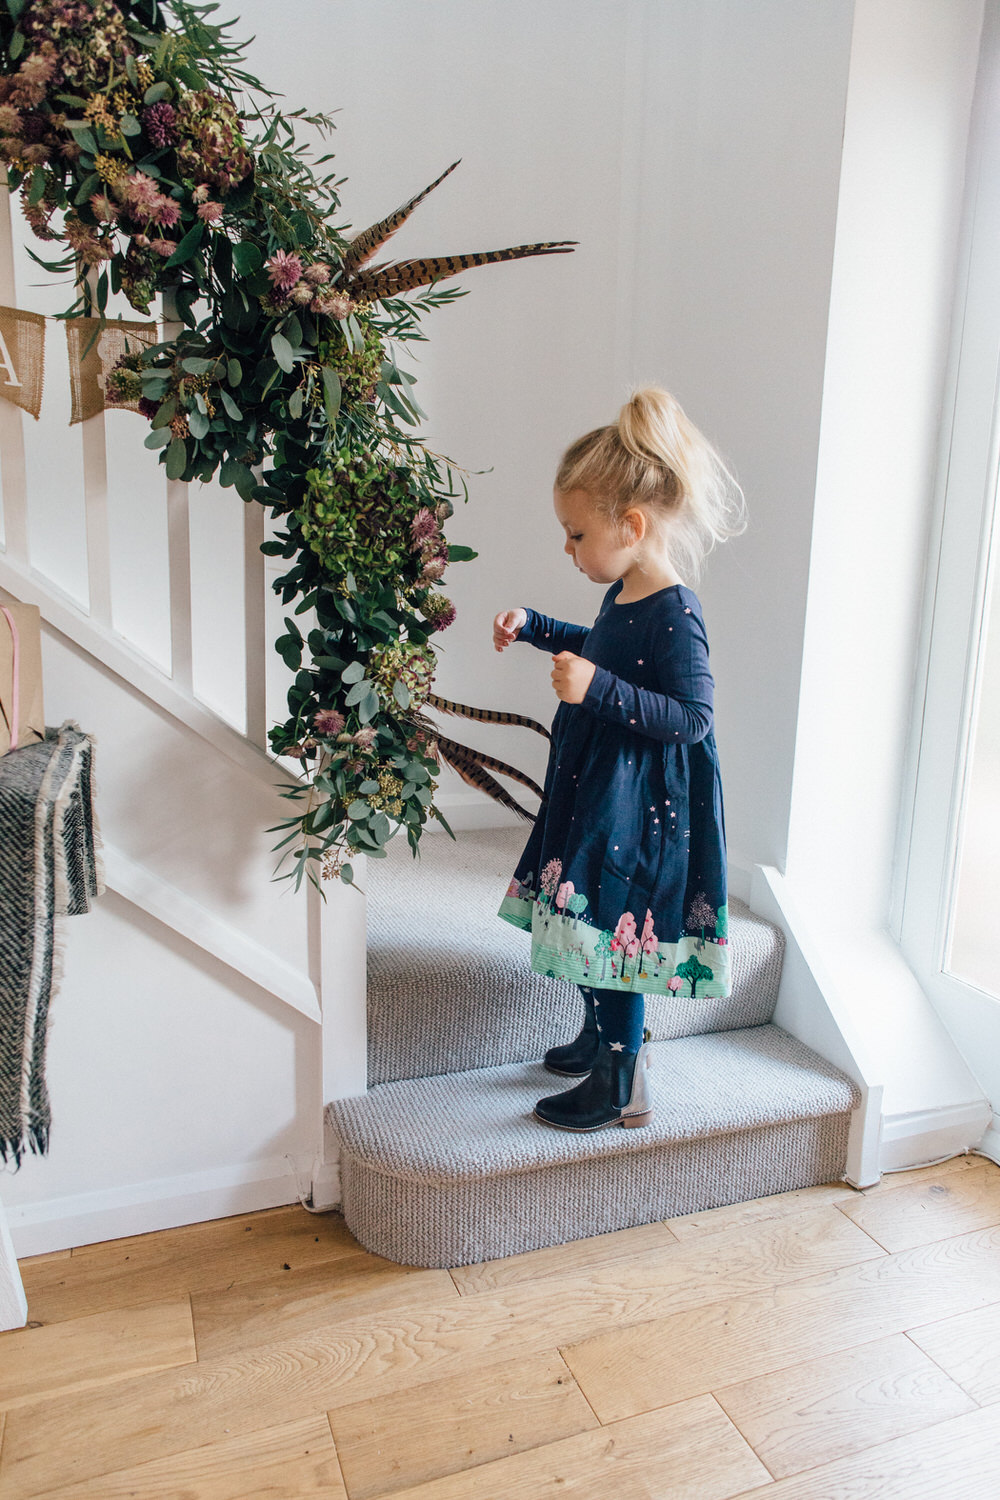
This year I decided to have a bash at a full on garland for my stairs complete with lots of hydrangea, foliage and of course even more feathers. Florist Karen from Passion For Flowers assured me it was a fairly straight forward process and as we were looking for a combined editorial project with Joules, this seemed like the perfect how-to feature to share with our readers. Of course you don’t have to use the garland for your stairs at all – it would look equally as epic down the centre of your dining room or kitchen table, they make such a statement absolutely no other decor would be required for the 25th.
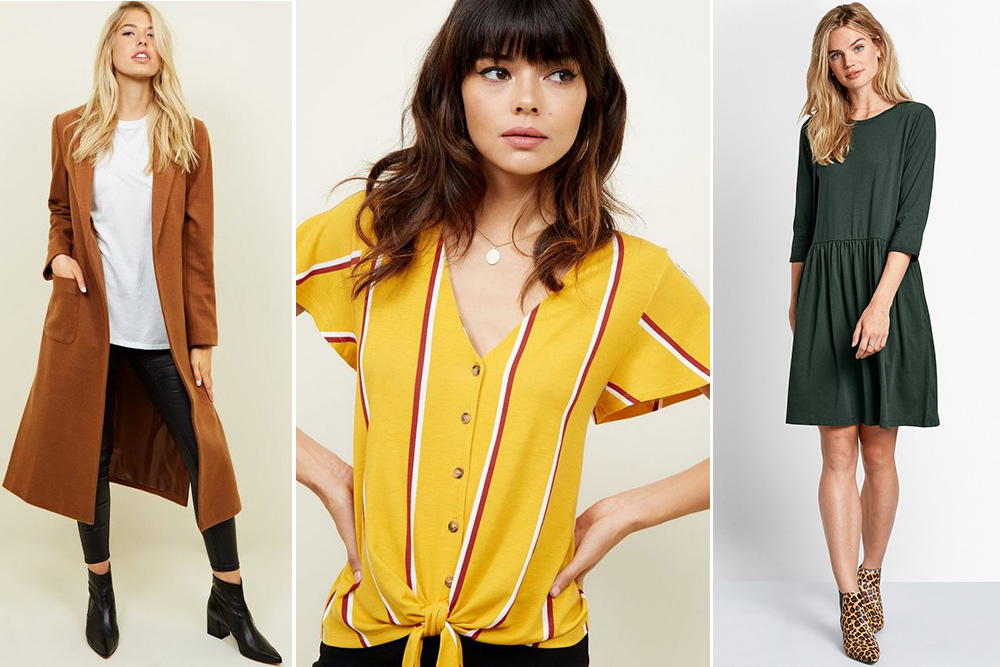
Those of you that have been following my posts will know that I’m almost 6 months pregnant, and that in general, I still think the current specific maternity fashion offering is poor. Aside from existing wardrobe items and a new pair of jeans, I’ve made a conscious effort to only purchase a few transitional pieces that make me feel confident and that I can also wear post arrival of Mabel’s new little sister.
Behind The Scenes With All The Lovely Clothes
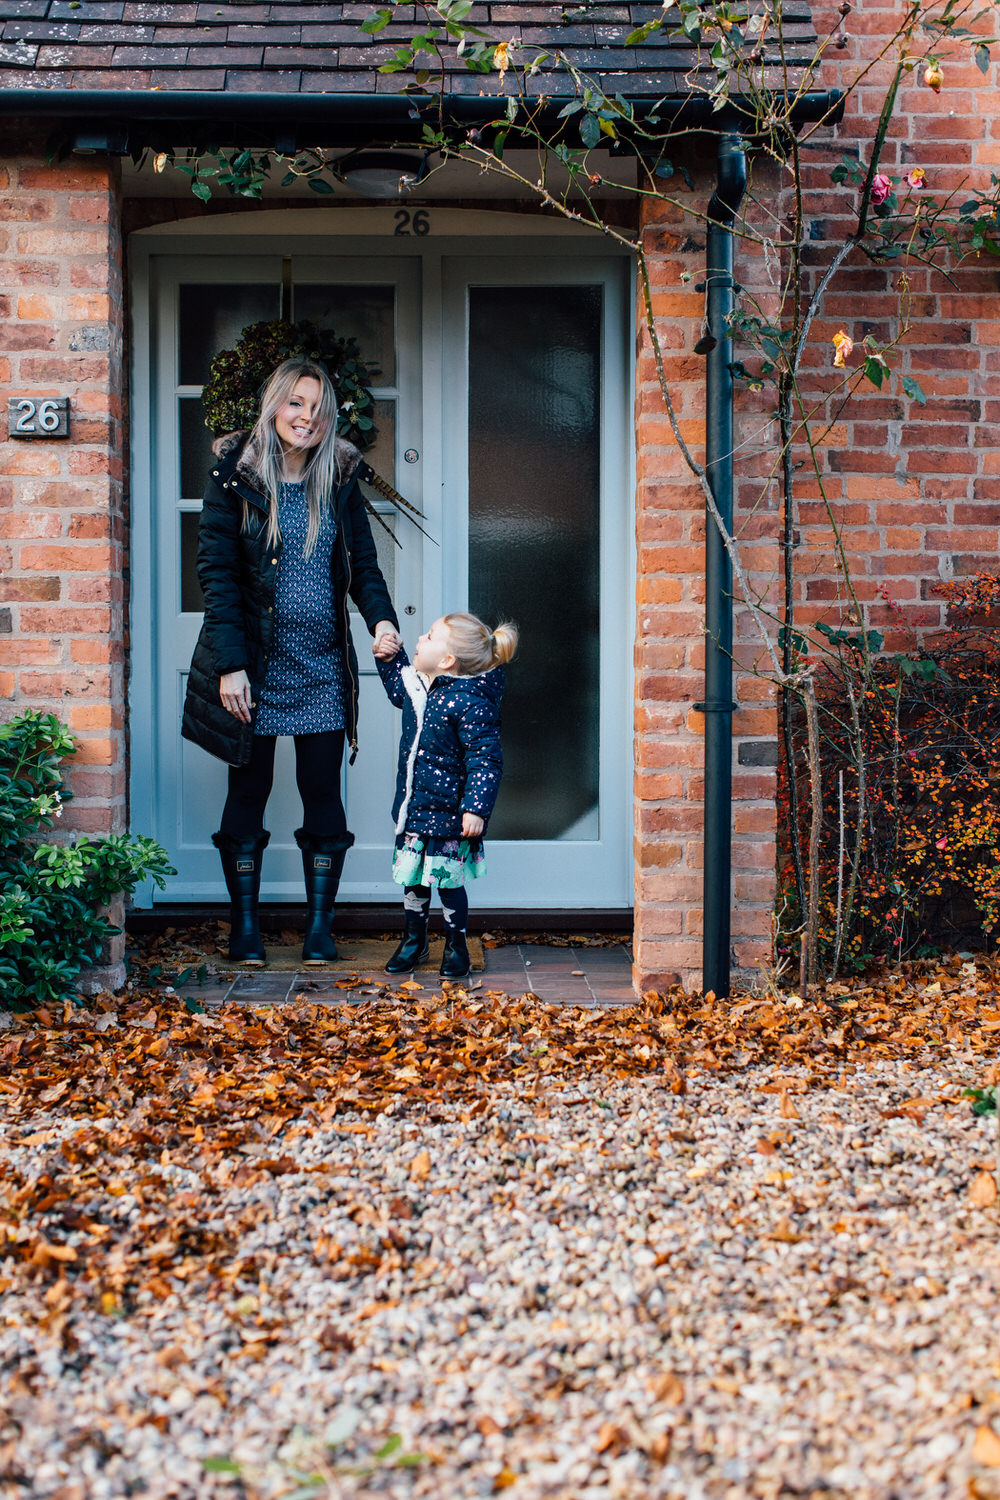
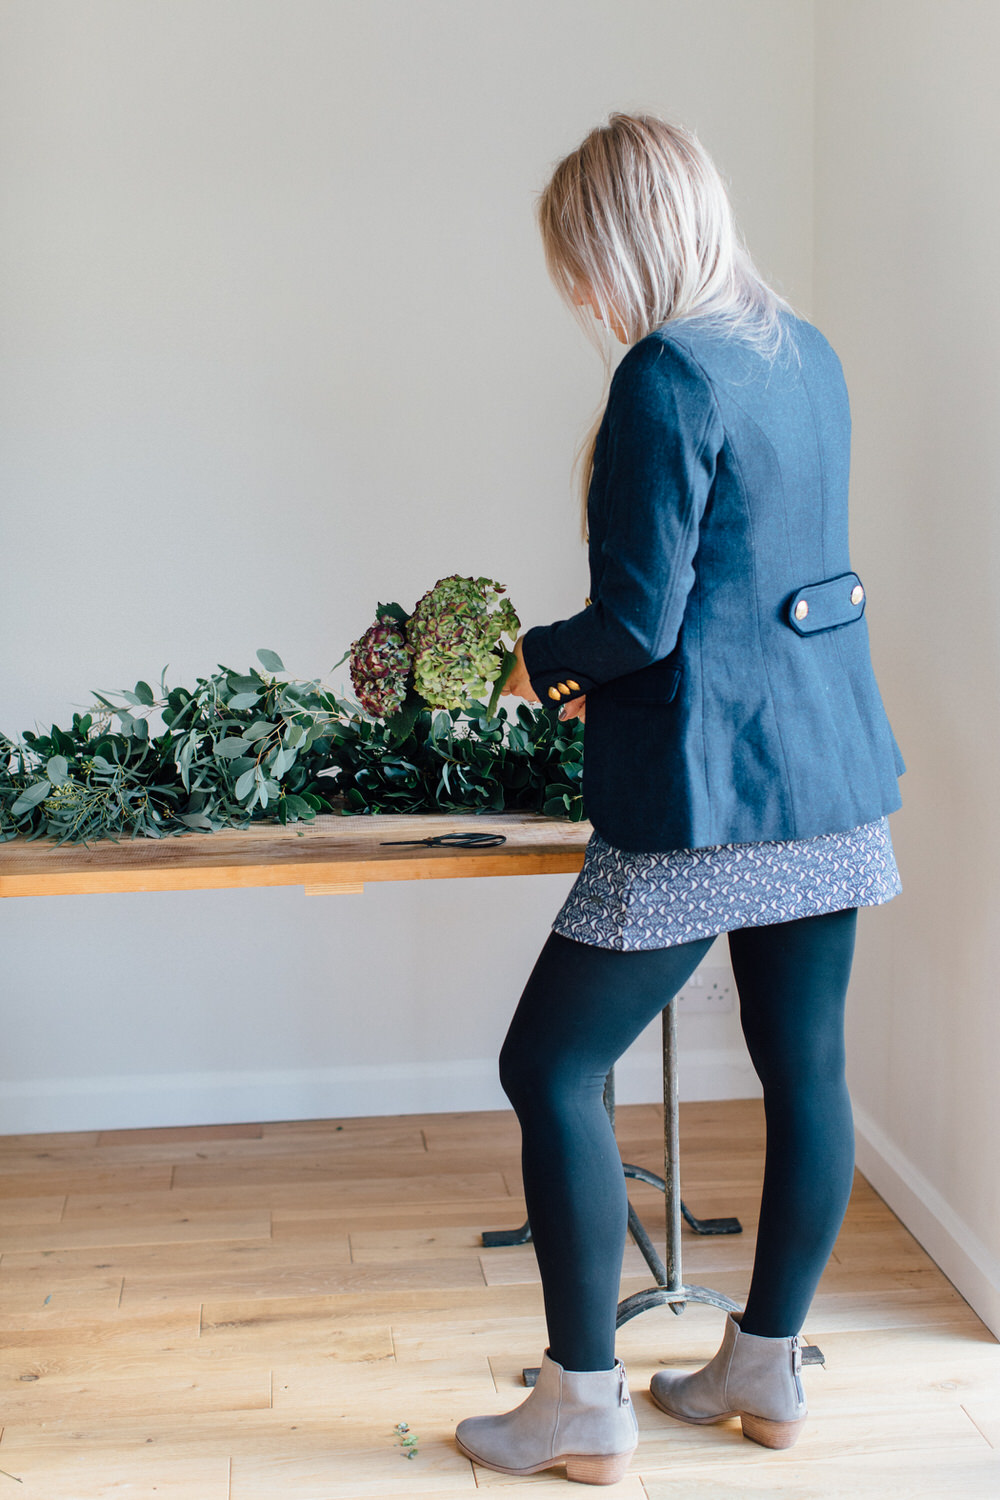


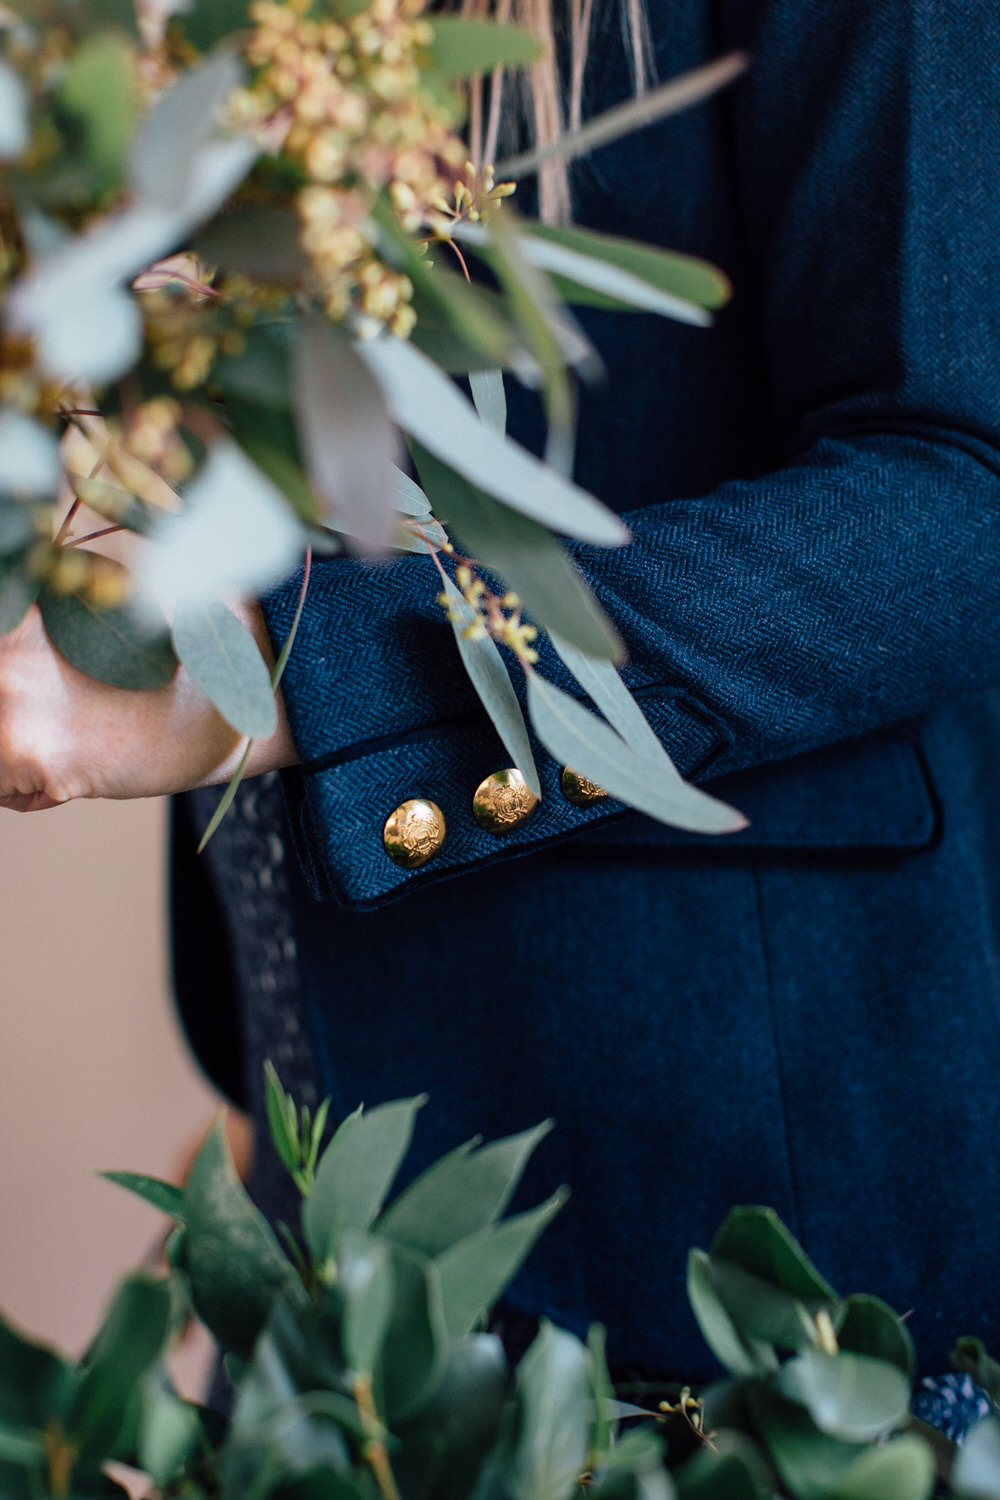

I’ve had my eye on the Langham Ankle Boots in grey forever, and the fact they are not too high means I can wear them all day in comfort (do excuse the cankles, by lunchtime my lower leg water retention is quite spectacular). I have become very much a regular blazer wearer since 20 weeks, they make for a neat and sleek silhouette and I feel as though I have made an effort. I pair the Peyton Navy Tweed Long-Line Blazer with the aforementioned jeans or a stretchy dress/tunic with opaque tights or leggings. The Peyton is currently £139 reduced from £199 by the way – well worth the investment and I like the fact the longer length means it covers my ever expanding lower back and soon to be expanding backside (based on the the fact it’s nearly December, which means all the Terry’s Chocolate orange, which I am NOT sharing).
I chose the Isabella Knitted Jacquard Tunic because I liked the thick printed fabric and pockets. I went for a size larger than I would normally take and it accommodates my bump really well… Oh I’m sorry, am I still taking about clothes? I better tell you about how to actually make the garland hadn’t I.
How To Make A DIY Festive Christmas Garland
1. Purchase An Oasis Netted Garland
You can buy these in 2.6 metre lengths from Amazon or a florist. Alternatively you could make this yourself too – it is essentially chunks of oasis and netting put together much like a string of sausages, but seriously, can you be bothered? I couldn’t. I would prefer to spend that time demolishing the aforementioned chocolate orange.
Soak the garland briefly in water before using.
Also invest in some plastic cable ties as these are what you will use to tie your garland to your stairs.
2. Choose Your Flowers And Foliage.
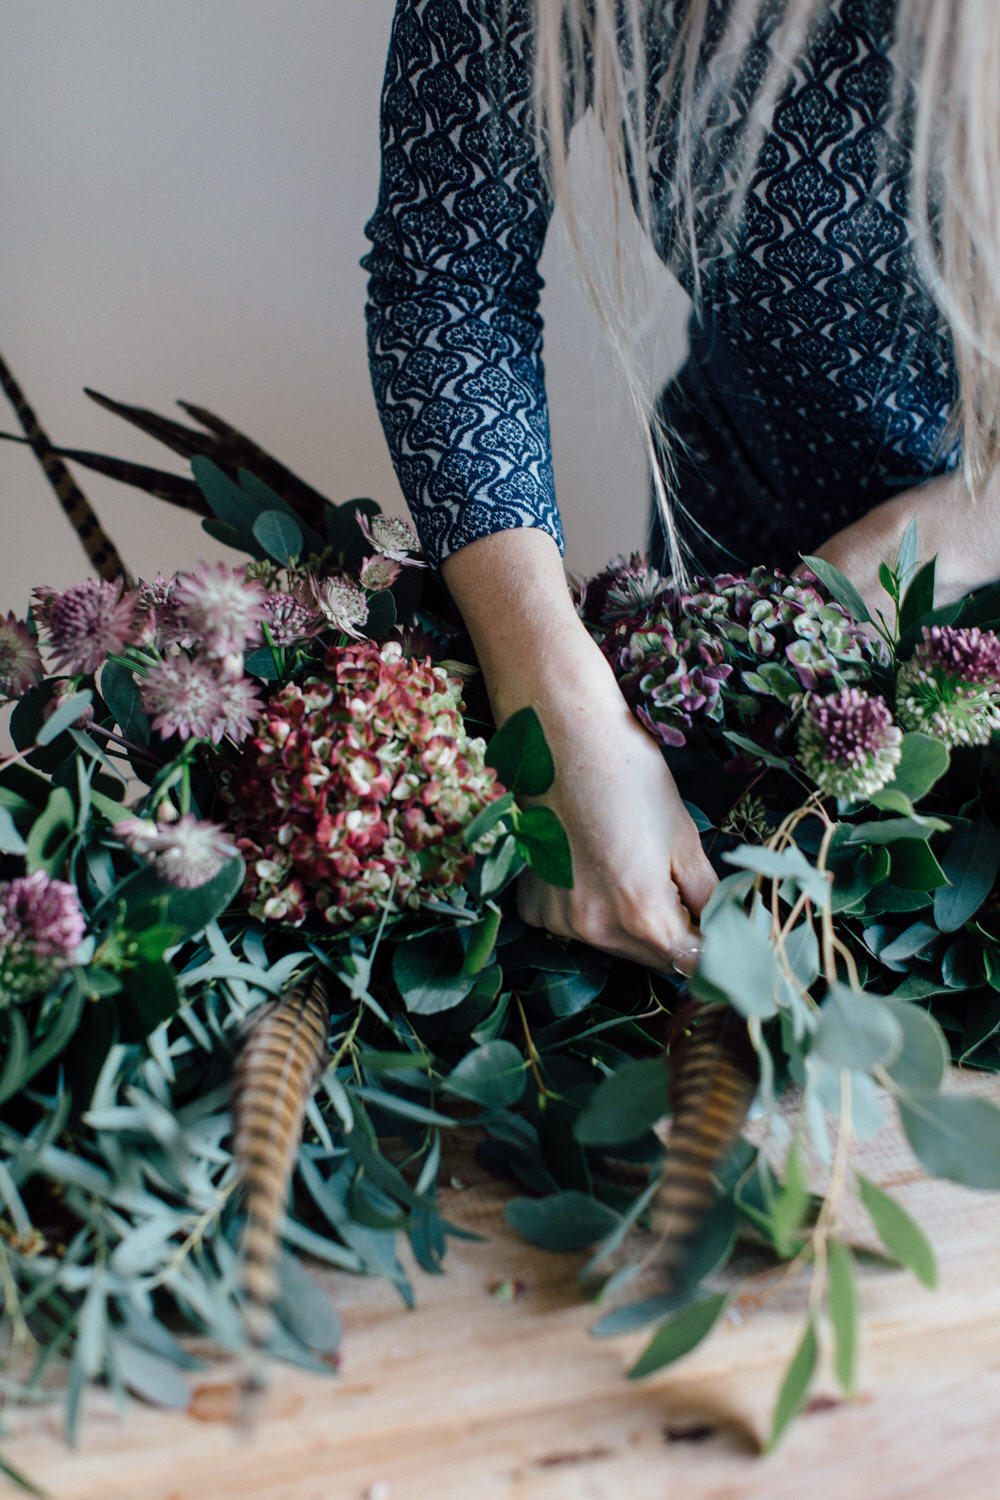
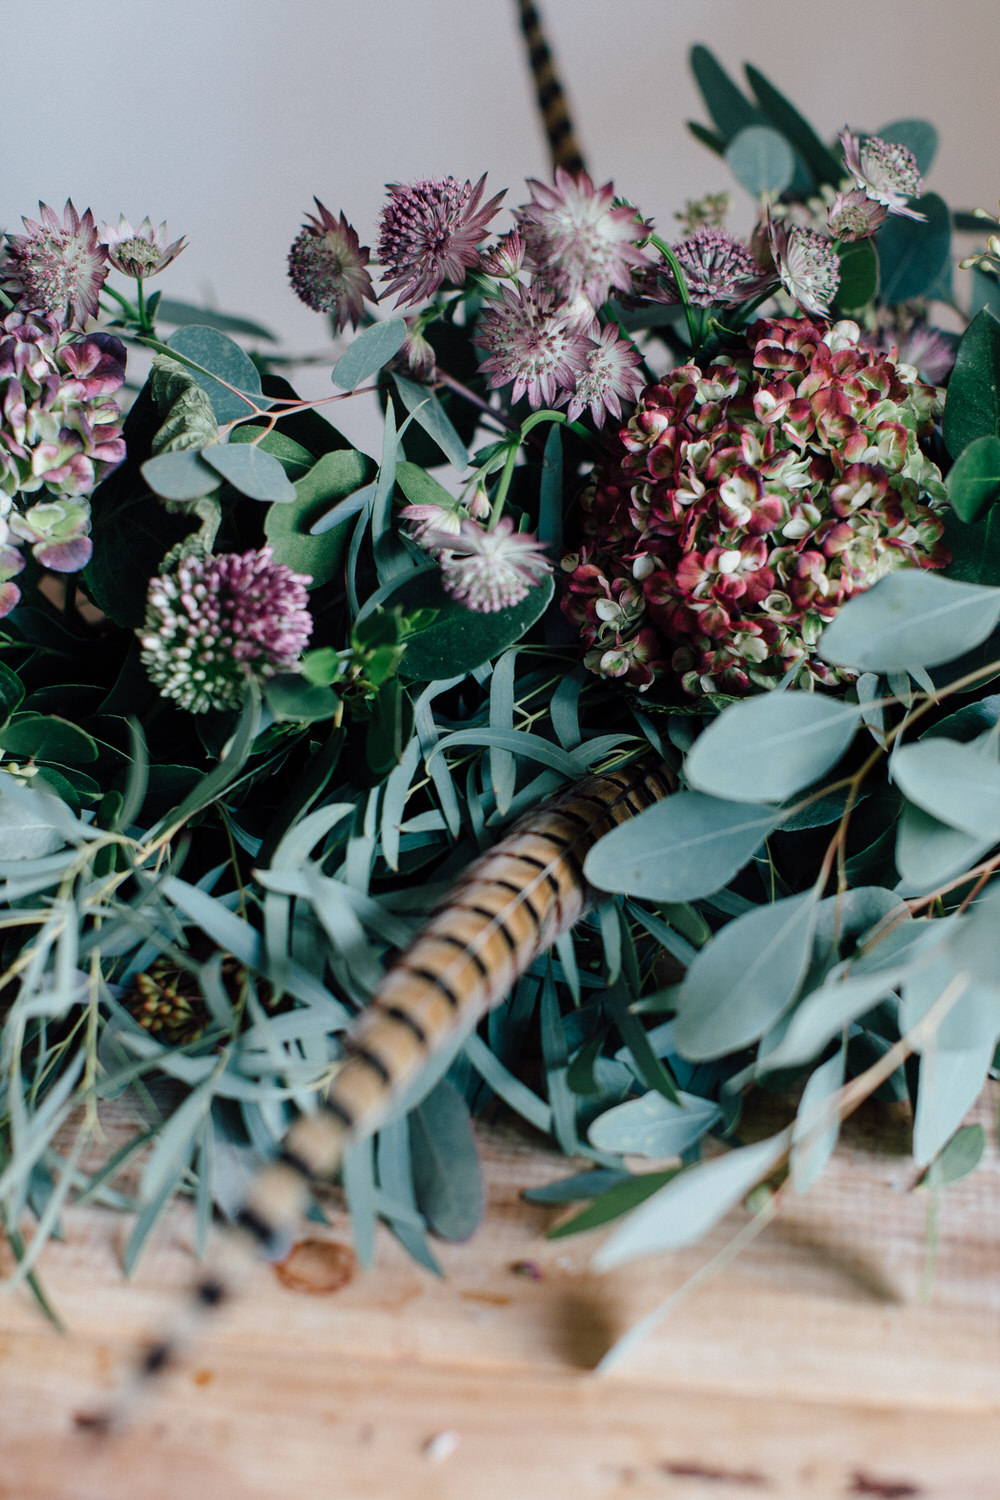
Completely your call in terms of colours and textures but some have greater longevity than others, ask your florist for advice or look online before you commit to buy. I chose hydrangea and alliums which are fairly hardy – I also dotted in some Astrantia but on a large stalk with lots of heads as otherwise they can be a bit flimsy.
3. Begin!
Start by sticking in your foliage to each oasis block, I find haphazardly works best for a more organic/undone vibe. I love eucalyptus for it’s pale green hue and wintery scent, I used eucalyptus parvii, berried eucalyptus and eucalyptus glaucus. Fir or ivy helps to bulk out the majority of the base and is budget friendly.
4. Add In Florals
Add in your flowers to each block amongst the greenery, I started with the larger hydrangea head per block and added in the smaller florals to fill in any gaps.
5. Prepare Your Stairs
To protect carpet from any potential drips I used old towels which I then removed once the garland was safely in place and the Oasis was damp rather than leaking down my bannister.
6. Tie On Your Garland
I started from the top of the banister down, applying the cable ties as I went, in-between every other oasis sausage and underneath foliage to hide the plastic.
7. Add Extra To Finish!
Once your garland is in place you can fill in any sparse areas with extra foliage or blooms. I also added my feathers once the garland was in place so I could create a certain look. You can maintain your garland’s freshness by spraying daily with water.
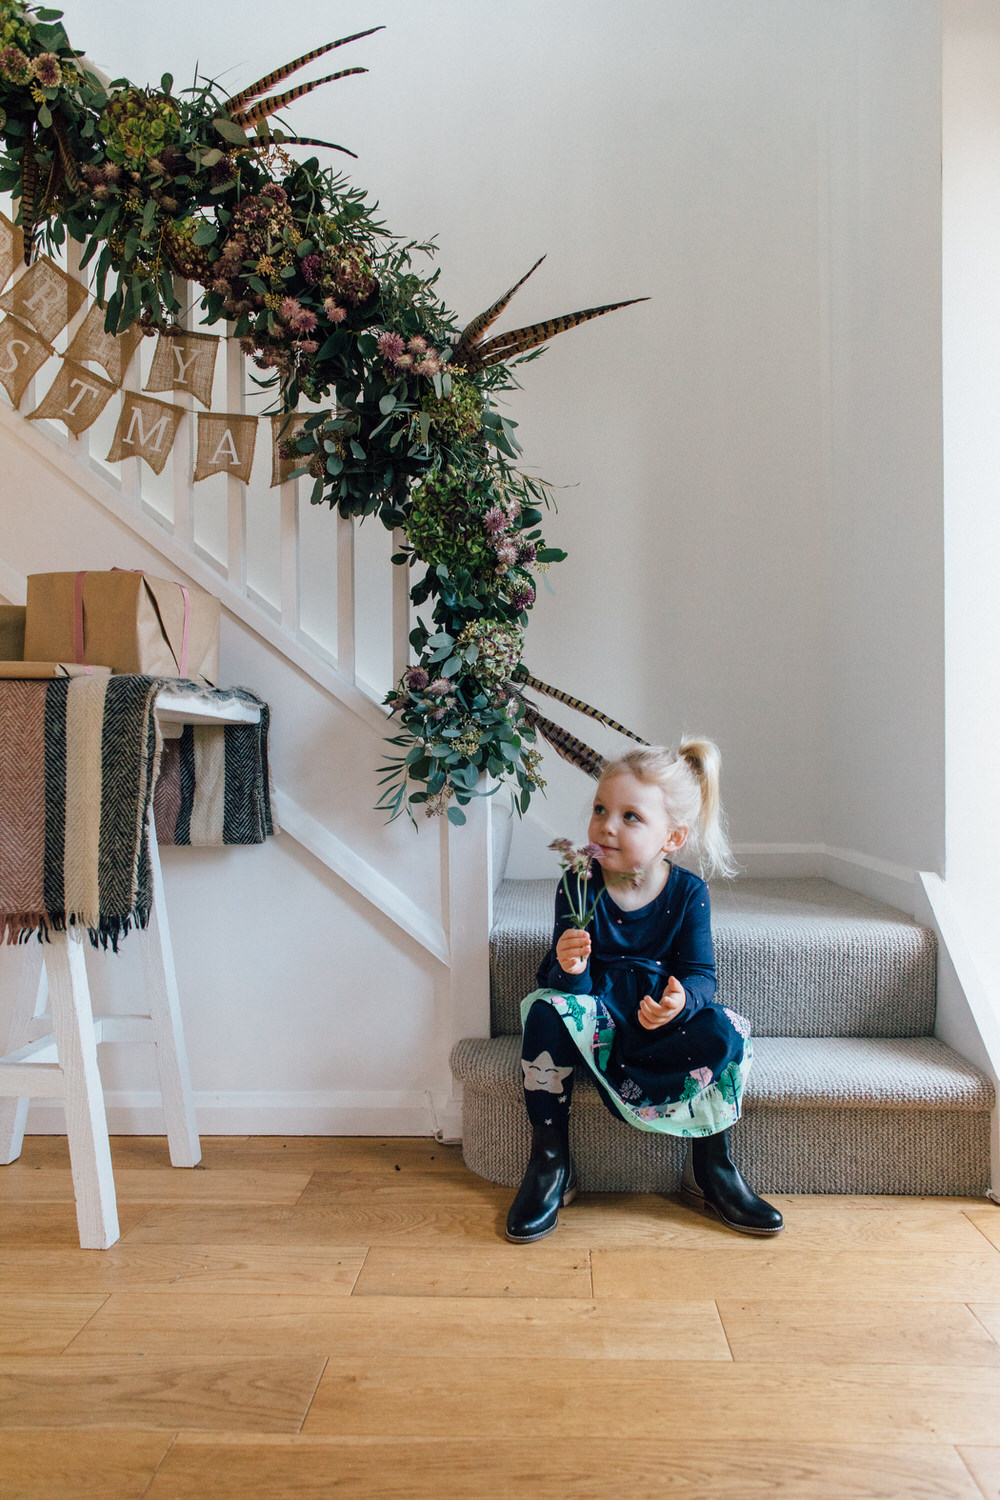
The final finishing flourish was of course my Mabel, who was determined to open the decorative “presents” and laughed her head off on queue when we called photographer Adam silly names. Oh, and we also bribed her with chocolate coins (can you detect a theme here? like mother like daughter…)
Mabel wore the Joules Merrie Woven and Mix Dress, Joules Festive Anikin Tights and Joules Chelsea Leather Boots (which due to the glittery heel, she flatly refused to take off).
In some of the behind the scenes images Mabel is also wearing the Nell Star Fleece which has to be one of the most beautiful fur-lined children’s coats I have ever seen. I am wearing the Caldecott Padded Coat which is wonderfully warm and because I live in the country now, the Downton Premium Wellies. These wellies cover up chunky pregnancy calves like nothing else. Seriously, I’m tempted to wear them ALL the time.
Are you planning on making a door wreath or a garland this year? Do let me know if you have any questions on the how-to in the comments box below.
P.S EDIT: There is currently a 3 for 2 offer on children’s clothes at Joules
This feature has been sponsored by Joules, we only choose to collaborate with brands we love and want to recommend to our readers. All opinions are my own.


Ooh I love Joules stuff! Actually have had my eye on the wellies for ages but wasn’t sure how they would look but they look great (nice quality) so will be adding those to the basket.
By the way Mabel’s outfit is amazing! Not sure my 3 year old boy would appreciate me buying it but if I had a little girl I would buy it all 🙂
Hi Nicola! Oh the wellies are lovely! So luxe and comfortable. The children’s clothes in Joules are beautiful, I treat Mabel to an outfit every so often, I find they wash really well too x
Do they have those boots in adult size? Love the silver heel!
Yes they do! someone on my instagram mentioned they had a pair yesterday 🙂
https://www.joules.com/Women/Shoes-Boots/Westbourne/Leather-Chelsea-Boots/Silver?id=V_WESTBOURNE|SILVER
Oh Charlotte look at your neat little bump. Gorgeous! 🙂
I’m looking for something exactly like that padded coat but they’re sold out on Joules. I saw you had a similar one from Ralph Lauren on your insta – were there any other you came across in your search? (Sorry to hijack this post with coat questions, nice garland-making but it’s not for me. I’m so clumsy I’d probably lose an eye.)
Hope your pregnancy is progressing well, Mabel also looking gorgeous by the way xx
Nancy this made me laugh out loud!!!!! They still have this coat in the navy on Joules?
https://www.joules.com/Women/New-In/Caldecott/Padded-Coat/Marine-Navy?id=X_CALDECOTT|MARNAVY
Also they had this one which is also lush:
https://www.joules.com/Women/Jackets-Coats/Snowdon/Padded-Jacket/Woodland-Green?id=Y_SNOWDON|WOODGRE
Gorgeous post, the clothes and garland alike! I love those wellies and I’d be very much tempted to wear them all the time too as I’m also in the oh so attractive pregnancy calves camp!
I went to a wreath making workshop last week and LOVED it – here’s my handiwork https://instagram.com/p/Bb6lIhxhYM1/ It was led by Becky from Picking Posies who did the fabulous flowers for the Coppermines shoot over on Rock My Wedding recently – she’s amazing! I’ve been desperate to find some pheasant feathers to finish it off though as I think they give such a lovely soft touch – can I ask where you sourced yours? I may be getting ahead of myself after one wreath attempt but I’d love to try a garland now too!
Try your local butchers.
Mine come from the pheasant themselves. I was never a fan of Dad plucking a brace on the patio until recently #propercountrylife
Have not tried a garland but I do usually do a table centre piece. I prefer the long trays pushed together as they hold the water and you can put in blocks of oasis but it depends on your table size I suppose.
These https://www.ebay.co.uk/itm/Double-Brick-Trays-Plastic-Funeral-Container-Smithers-Oasis-Floristry-Dish-/370905579110
Thanks Rebecca, good idea! There are lots of shoots near us so I was tempted to just go for a forage in the fields but that’s a much easier option!! Thank you 🙂 x
Hi Kirstie! What a lovely wreath, you can buy pheasant feathers from Amazon or I’ve seen them in sets of 10 from Etsy for a fiver.
Pregnancy calves are a joy aren’t they? I have some flared jeans which disguise them pretty well too x
Thanks Charlotte! Great tip with the flared jeans too 👍🏼 x
Love this post – I saw a gorgeous wreath made by a florist but when I saw the cost (£120) I thought I’d have to try it myself since everything on it was already in my garden and then I could spend the money on something else…like those half glittered boots! Thanks for the link for the adult versions!
Abby if you have everything in your garden then DO IT, and then you should definitely buy the boots 🙂 x
Where is the Merry Christmas brown bunting from? I love it x
It’s by Ginger Ray at Not On The Highstreet:
http://rstyle.me/n/cu8qdxbabtx
Charlotte, I will never again believe you when you claim to be rubbish at crafts. That is all 😉
Babes I can shove flowers and foliage into an Oasis block and admit to a fairly good eye for colour and texture but that’s about it……I can’t sew and I can’t even cut in a straight line. The “fake” presents you see in the header image took me longer to make than the bloody garland 😉 x
Oh that garland is so gorgeous! Beautiful pictures. We’re currently mid house move (will we, wont we complete before Christmas?!) and I hate the limbo. I keep telling myself next year will be our year, we’ll have stairs made for a garland like that, and a wreath ready front door! For now I’m saving those pics as inspiration and living through everyone else’s insta!! x
Oh Sian next year will definitely be your year, how exciting! x
Wow Charlotte and Mabel a perfect festive post. You both look adorable and I was glad to inspire you to create your own festive garland. I think the colour combination looks so stylish and of course the pheasant feathers the icing on the cake! You are certainly fitting into country life.
Merry Christmas xx
Ah thanks lovely Karen! x
Loving Mabel’s coat!! And the garland of course. We always used to have banisters covered in ivy and berries when I was little, I can’t say my creativity has reached that level yet, but I do make my wreath every year! Also, loving the neat bump. I’m about two weeks behind you and I’m about twice the size – could possibly be to do with the fact I discovered limited edition orange Aeros recently?!
You discovered what now? A limited edition orange aero you say? That expanding backside I was talking about is definitely happening (!) x
Larger WHSmiths stores seem to be stocking them, only in 100g bars which I seem to be able to inhale 🙂 You’re welcome/sorry!
Hi Charlotte
Were hosting Christmas this year so making something like this would be amazing as our table centrepiece! Can I ask where you would suggest getting the flowers and foliage at a reasonable rate? I’m not sure if you used a wholesaler or a local florist and what would be the best way to get hold of them.
xx
Looks amazing! We’re up to our eyeballs in building dust this year, but already dreaming about next Christmas and ALLLLL the decorations we’ll be having to make up for their absence this time! On a totally separate note…where is your beautiful stairs carpet from?!! :):):)