
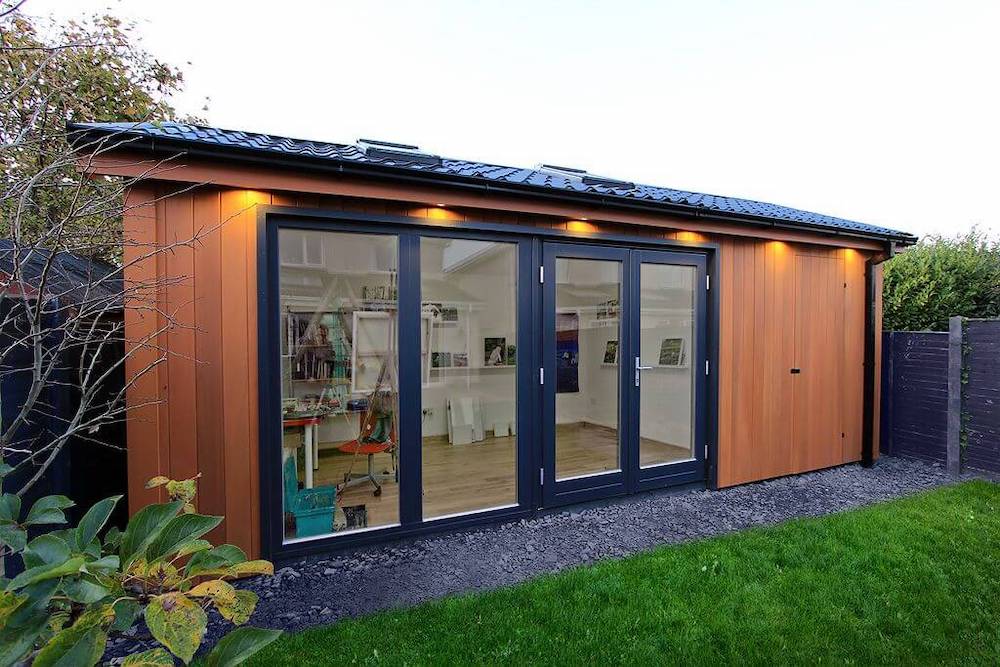
Naomi Here! Although Sophie completed her garden transformation last year (and is currently able to enjoy the fruits of that labour during lockdown), I figured that with B&Q stores and other hardware / home renovation stores opening up around the country again this week that it would be nice to share some inspiration with you. I’m quite happy to have my garden office project to potter away on. So kick back, have a look at the beautiful outdoor space that Sophie’s created, and let me know in the comments of any outdoor projects you’ve got on the go at the moment. I’ll now hand you over to Sophie who has kindly shared the nitty-gritty details as well as the cost of her project.
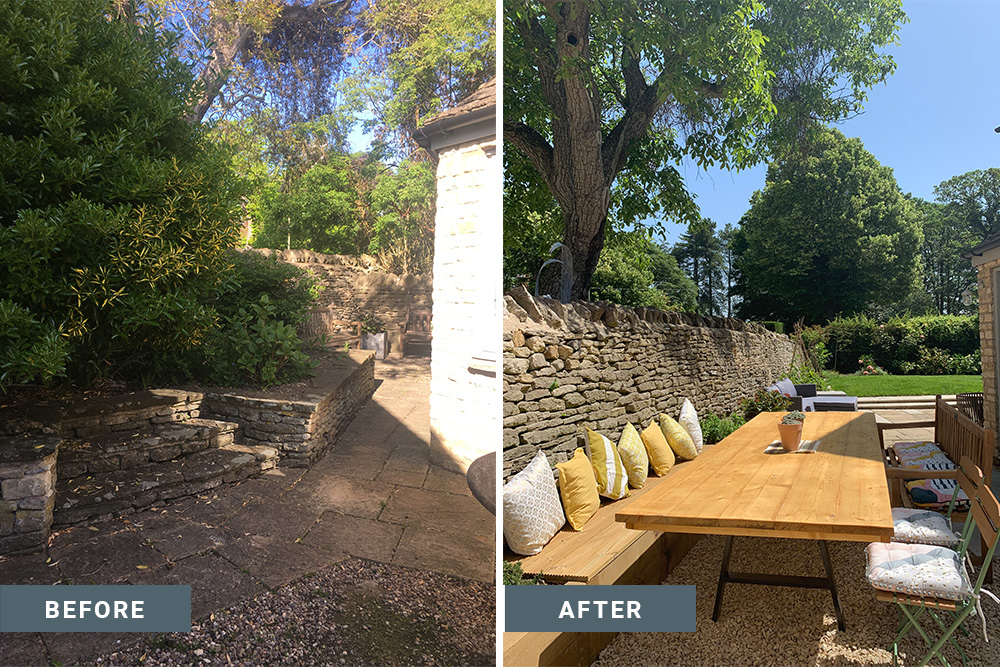
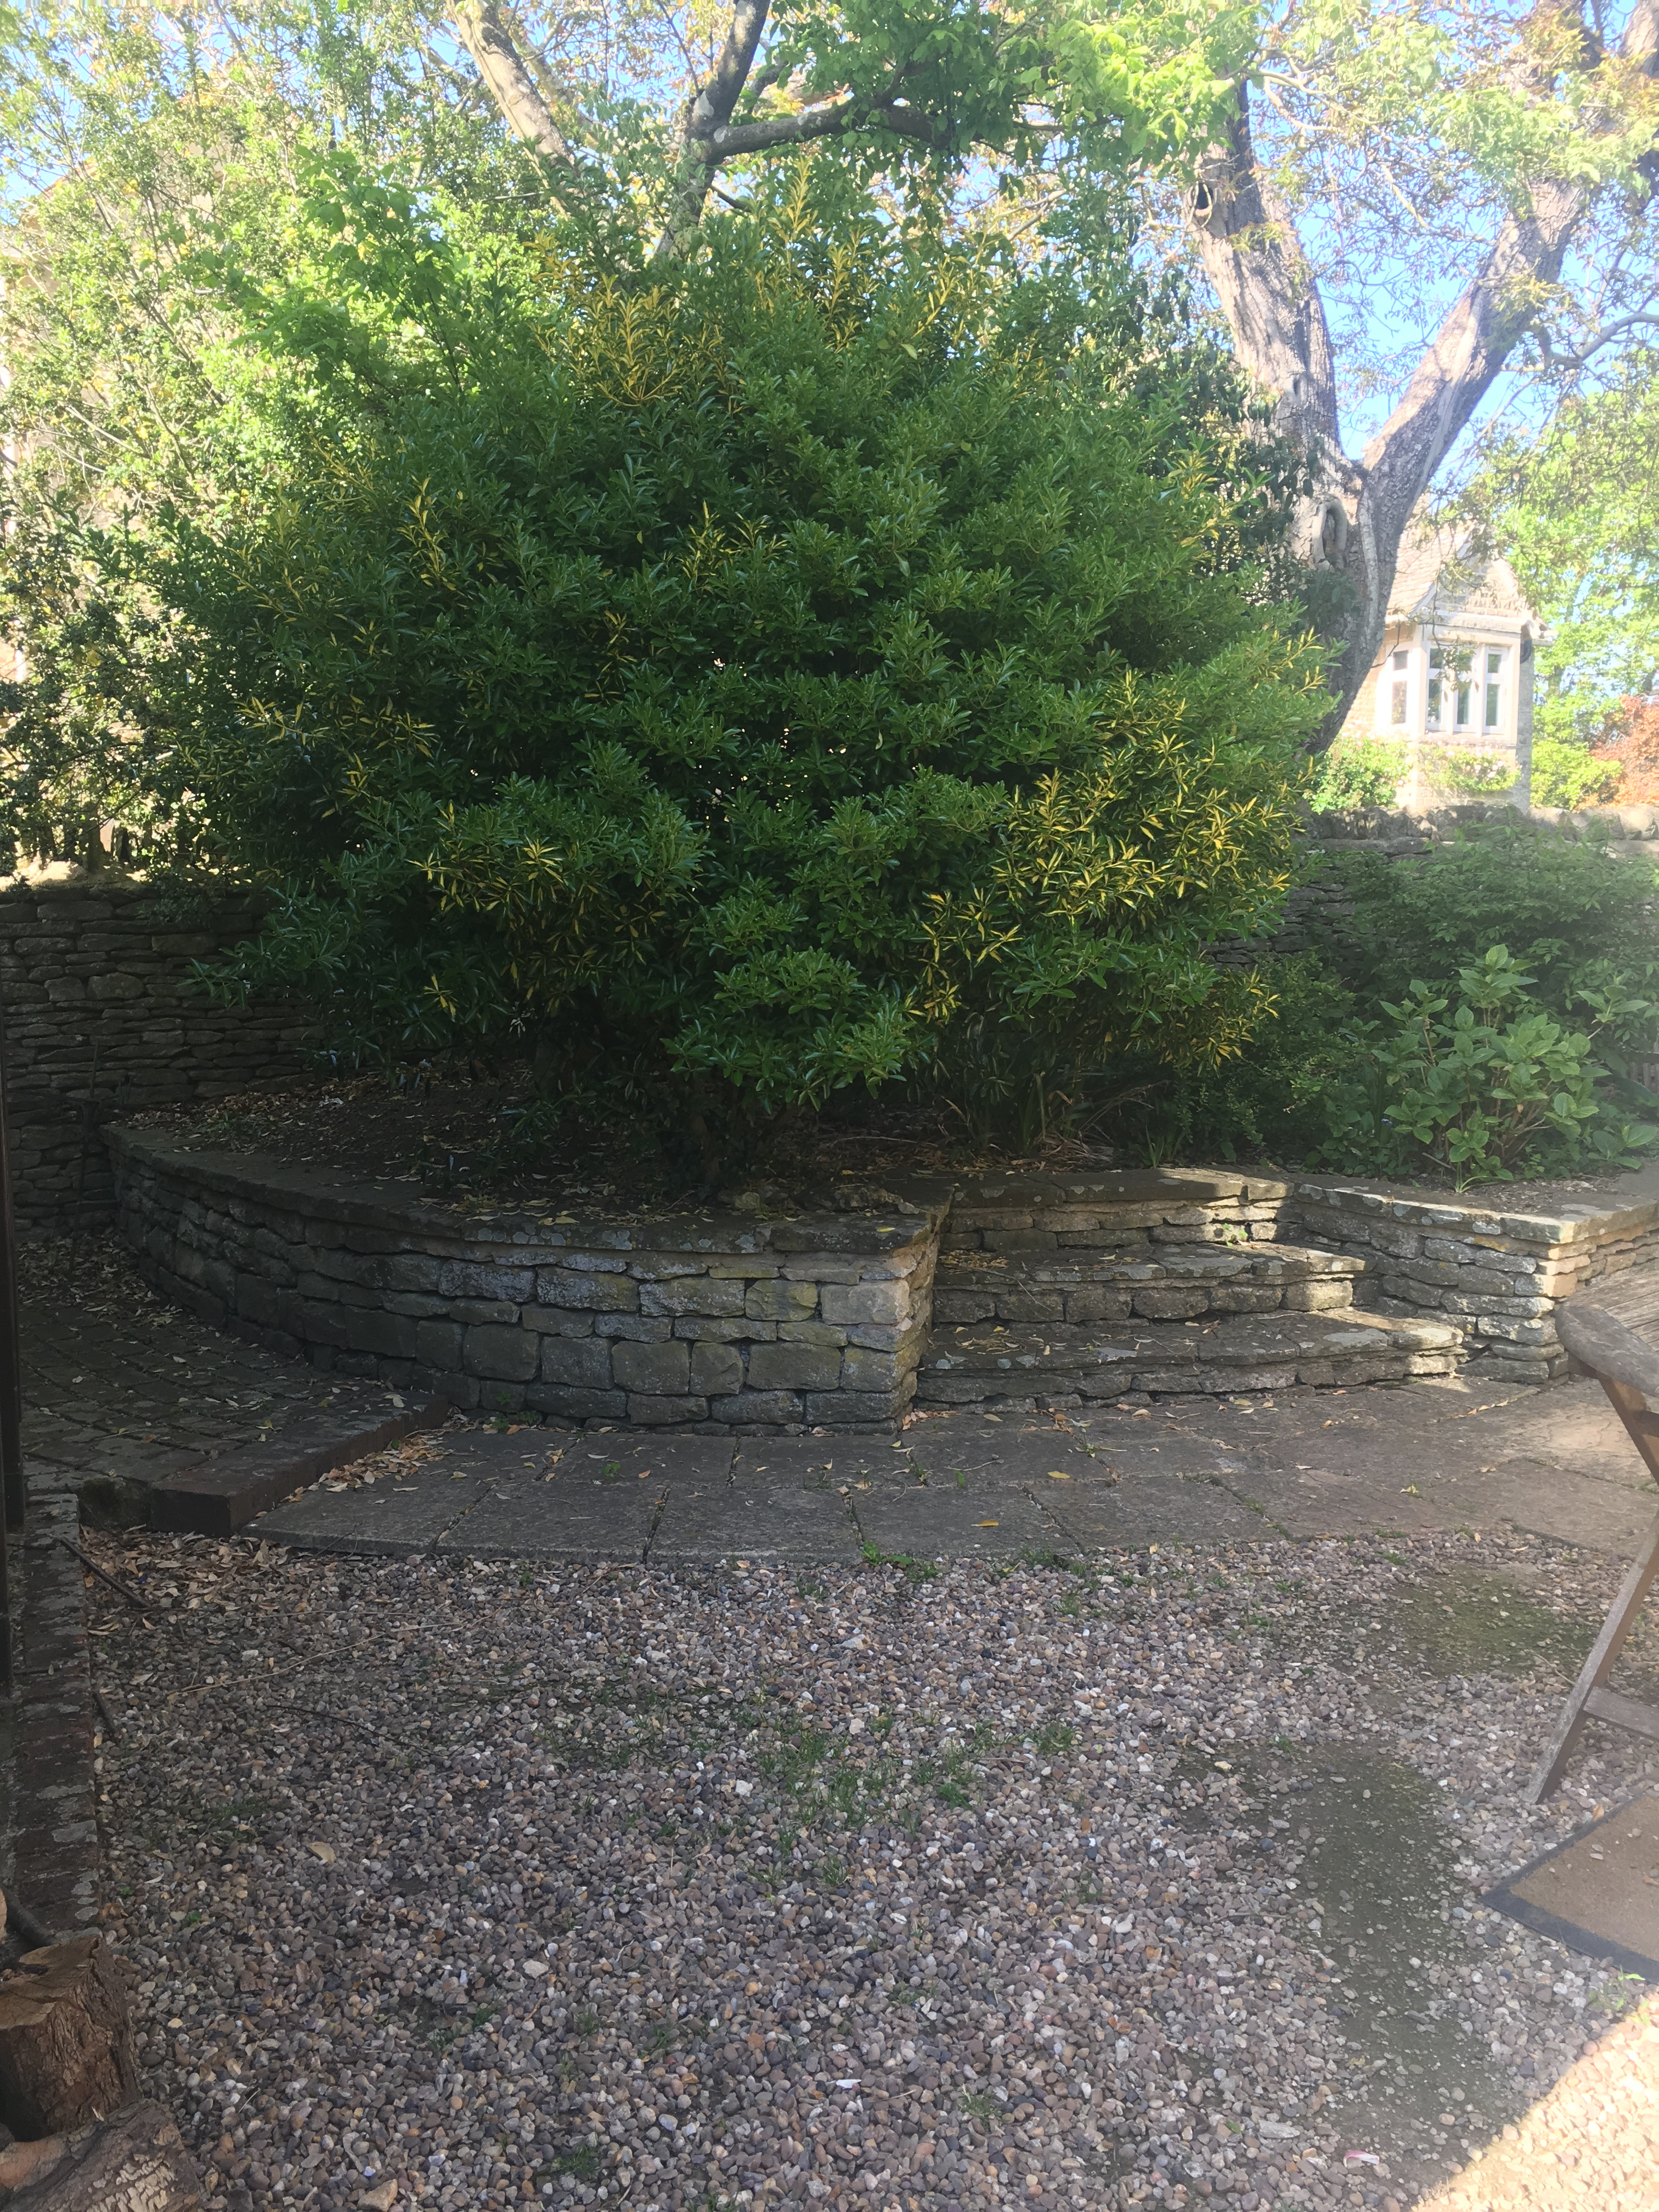
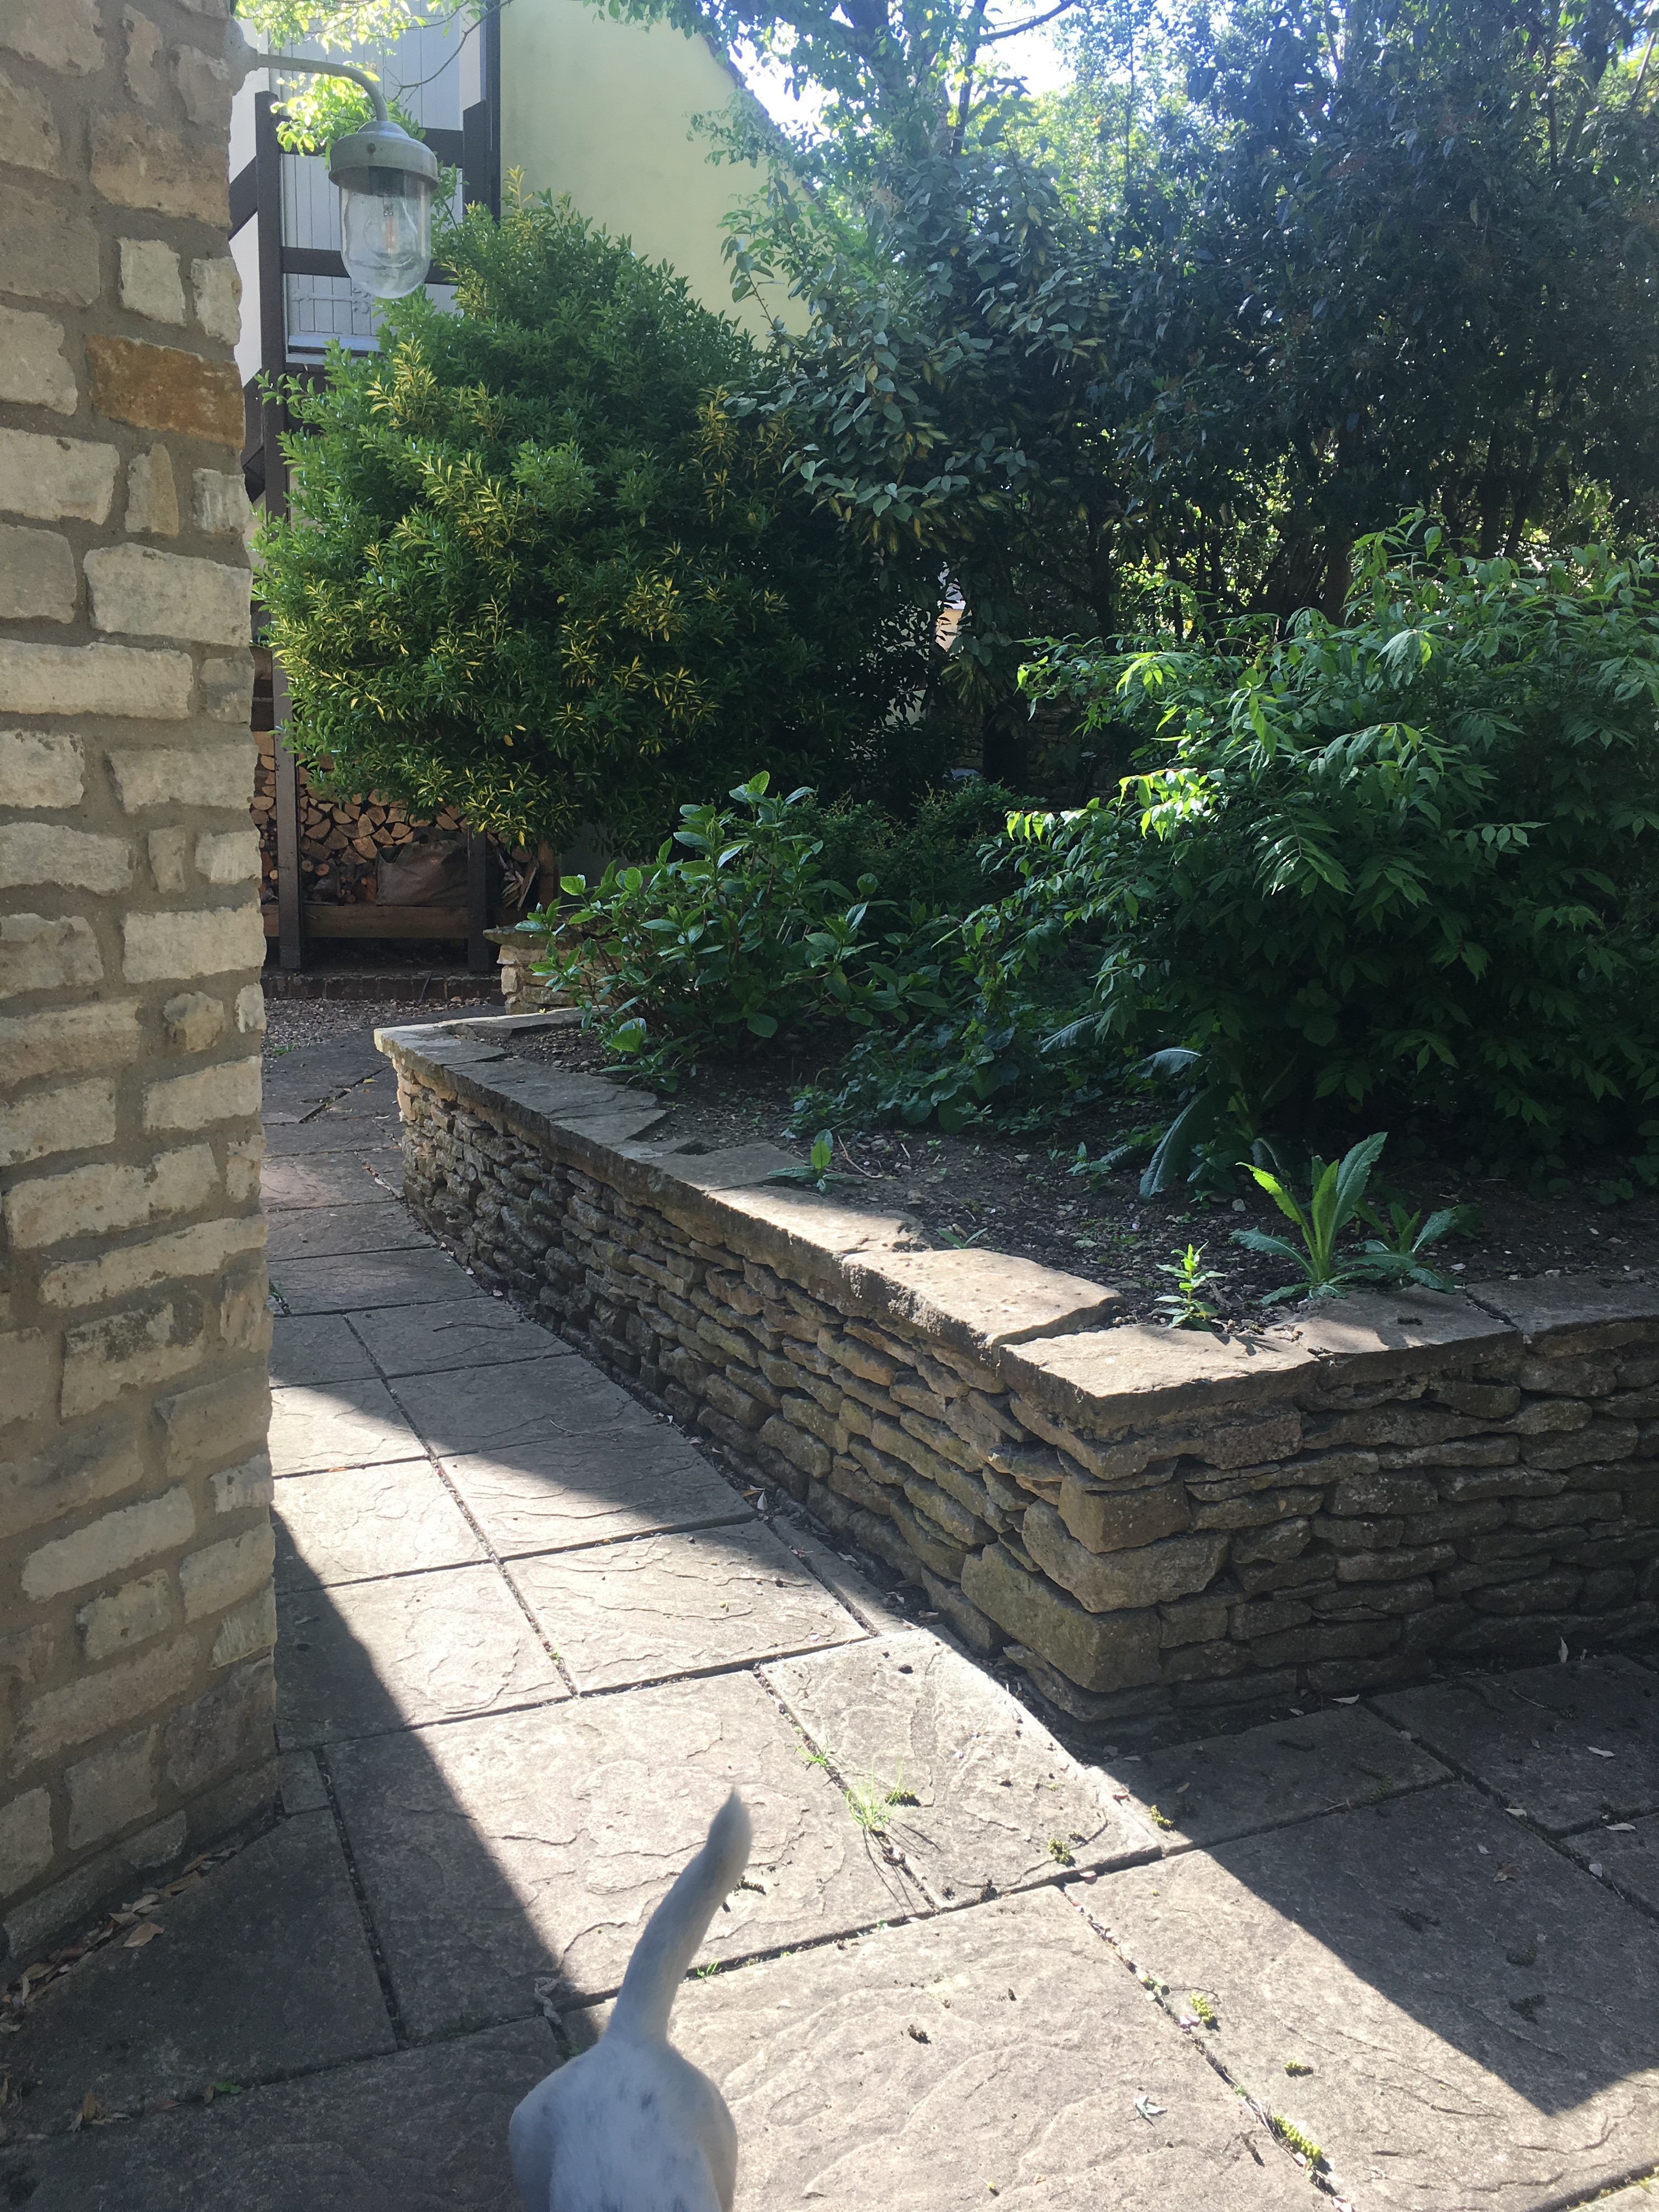
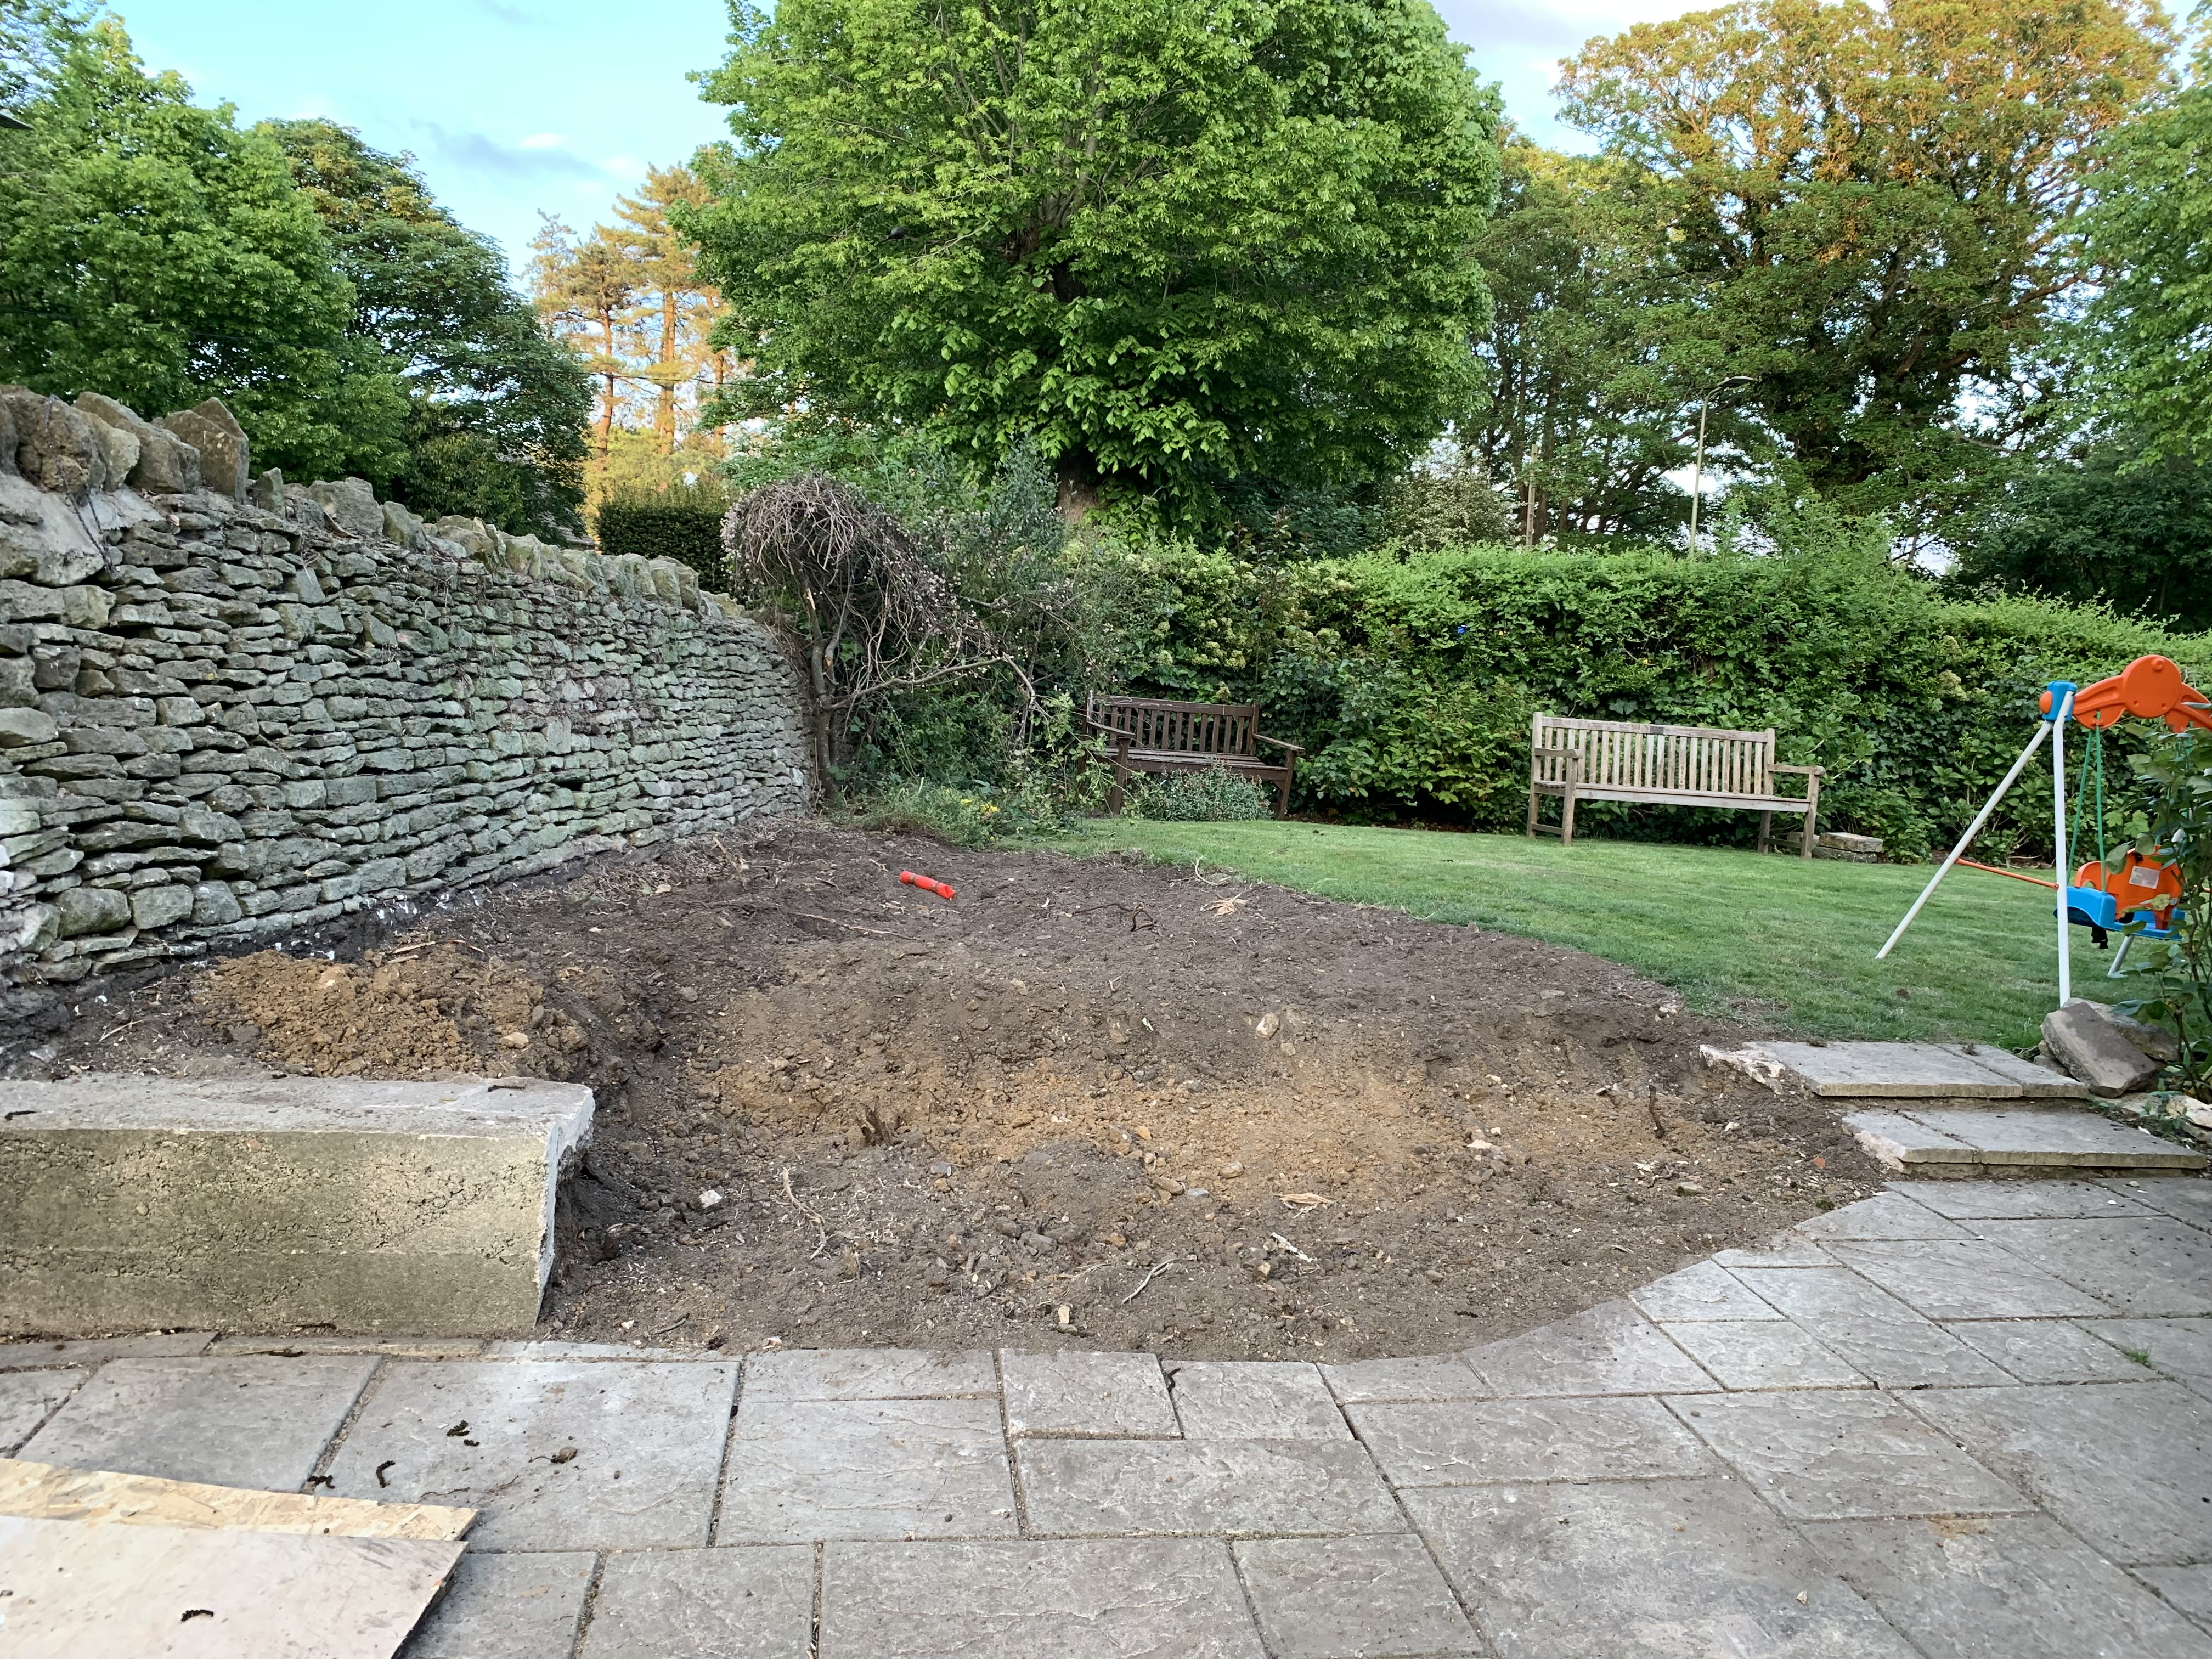
We were lucky to inherit an established garden full of hydrangeas and roses when we bought our house. But to one side of the property there were two huge flowerbeds that were too large to be useful. The first was a raised flowerbed on the patio area (3m long and about 2.5m deep in a curve) which took up all of what could be a good patio/dining space and also came very close to the doors leading out of the dining room This rendered them fairly hopeless as you came out and walked straight into a wall. It was full of trees and shrubs which made that side of the house very dark. Then there was a large corner flowerbed on the lawn with a large tree and some pretty shrubs but mainly just lots of weeds. It left us with a small patio which didn’t get much sun.

We wanted to overhaul this part of the garden since we moved in but had prioritised all the internal renovations first. Last Easter we had such beautiful weather that it galvanised me into prioritising the garden renovation and we did it in May 2019. We wanted to do it as affordably as possible and luckily, we have a great handyman who is very creative and can do a bit of anything and everything. So he and I sat down and went through our wish list for the space which was:
- A veg patch
- A large table for us to have lots of friends and kids over for BBQs
- A ‘lounge’ seating area
- A built-in BBQ
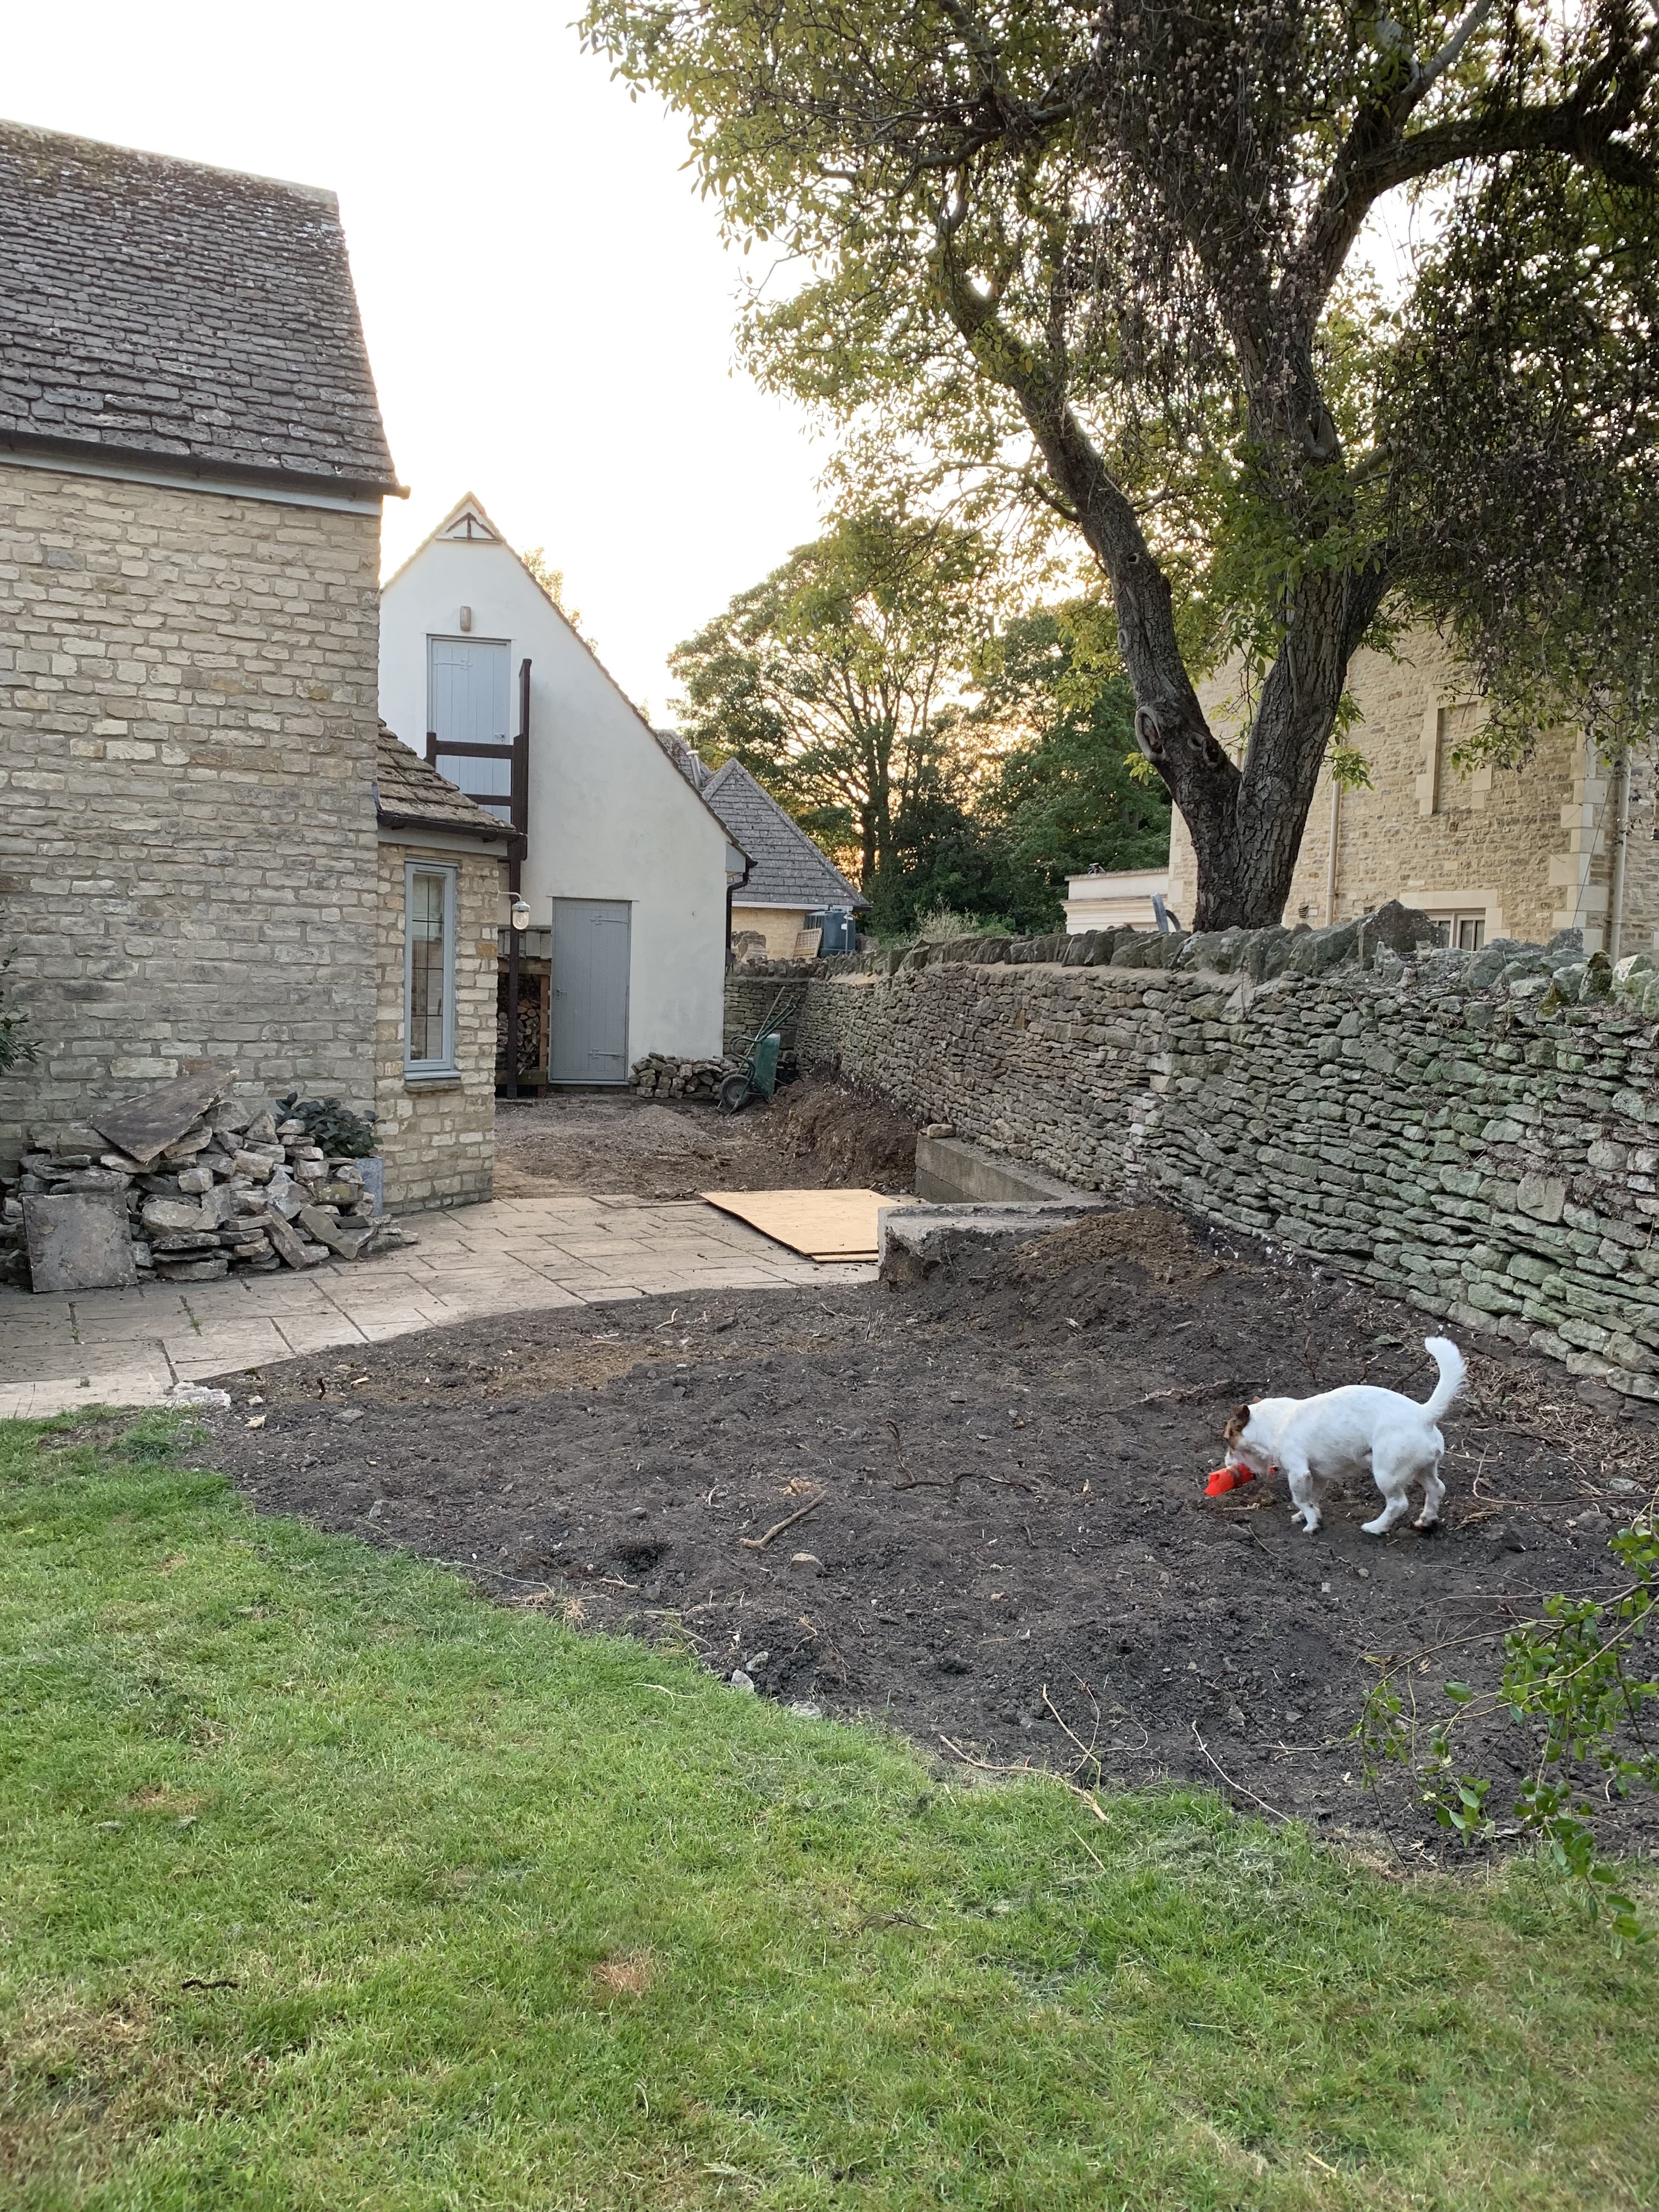
The first job was to remove the two flowerbeds and the stone wall separating the patio and lawn. There were a couple of logistical challenges – the end of our driveway is on an awkward angle so we couldn’t get a skip onto the drive and the access to the garden from the driveway is via two small garden gates and a couple of steps. We hired a mini-digger and a track barrow so the digger could dump into the barrow on the drive and then the barrow could be driven to the dumping spot on the driveway – although the hire was an expense (approx. £60/day each), it meant fewer days labour. Turns out the huge raised flowerbed was full of rubble, probably from when they built the house. In the end we got rid of 30 tonnes of soil and rubble! To get around the skip access issue we put all the waste on the driveway and our very kind neighbours let us use their parallel driveway for a grab lorry that picked everything up over the wall. The grab lorry was actually cheaper than skips (£150 a load) but made a lot more mess! Anyone going for the grab lorry approach, I would recommend putting down sheeting of some sort before you load on all the waste – we did not, and we regret it.
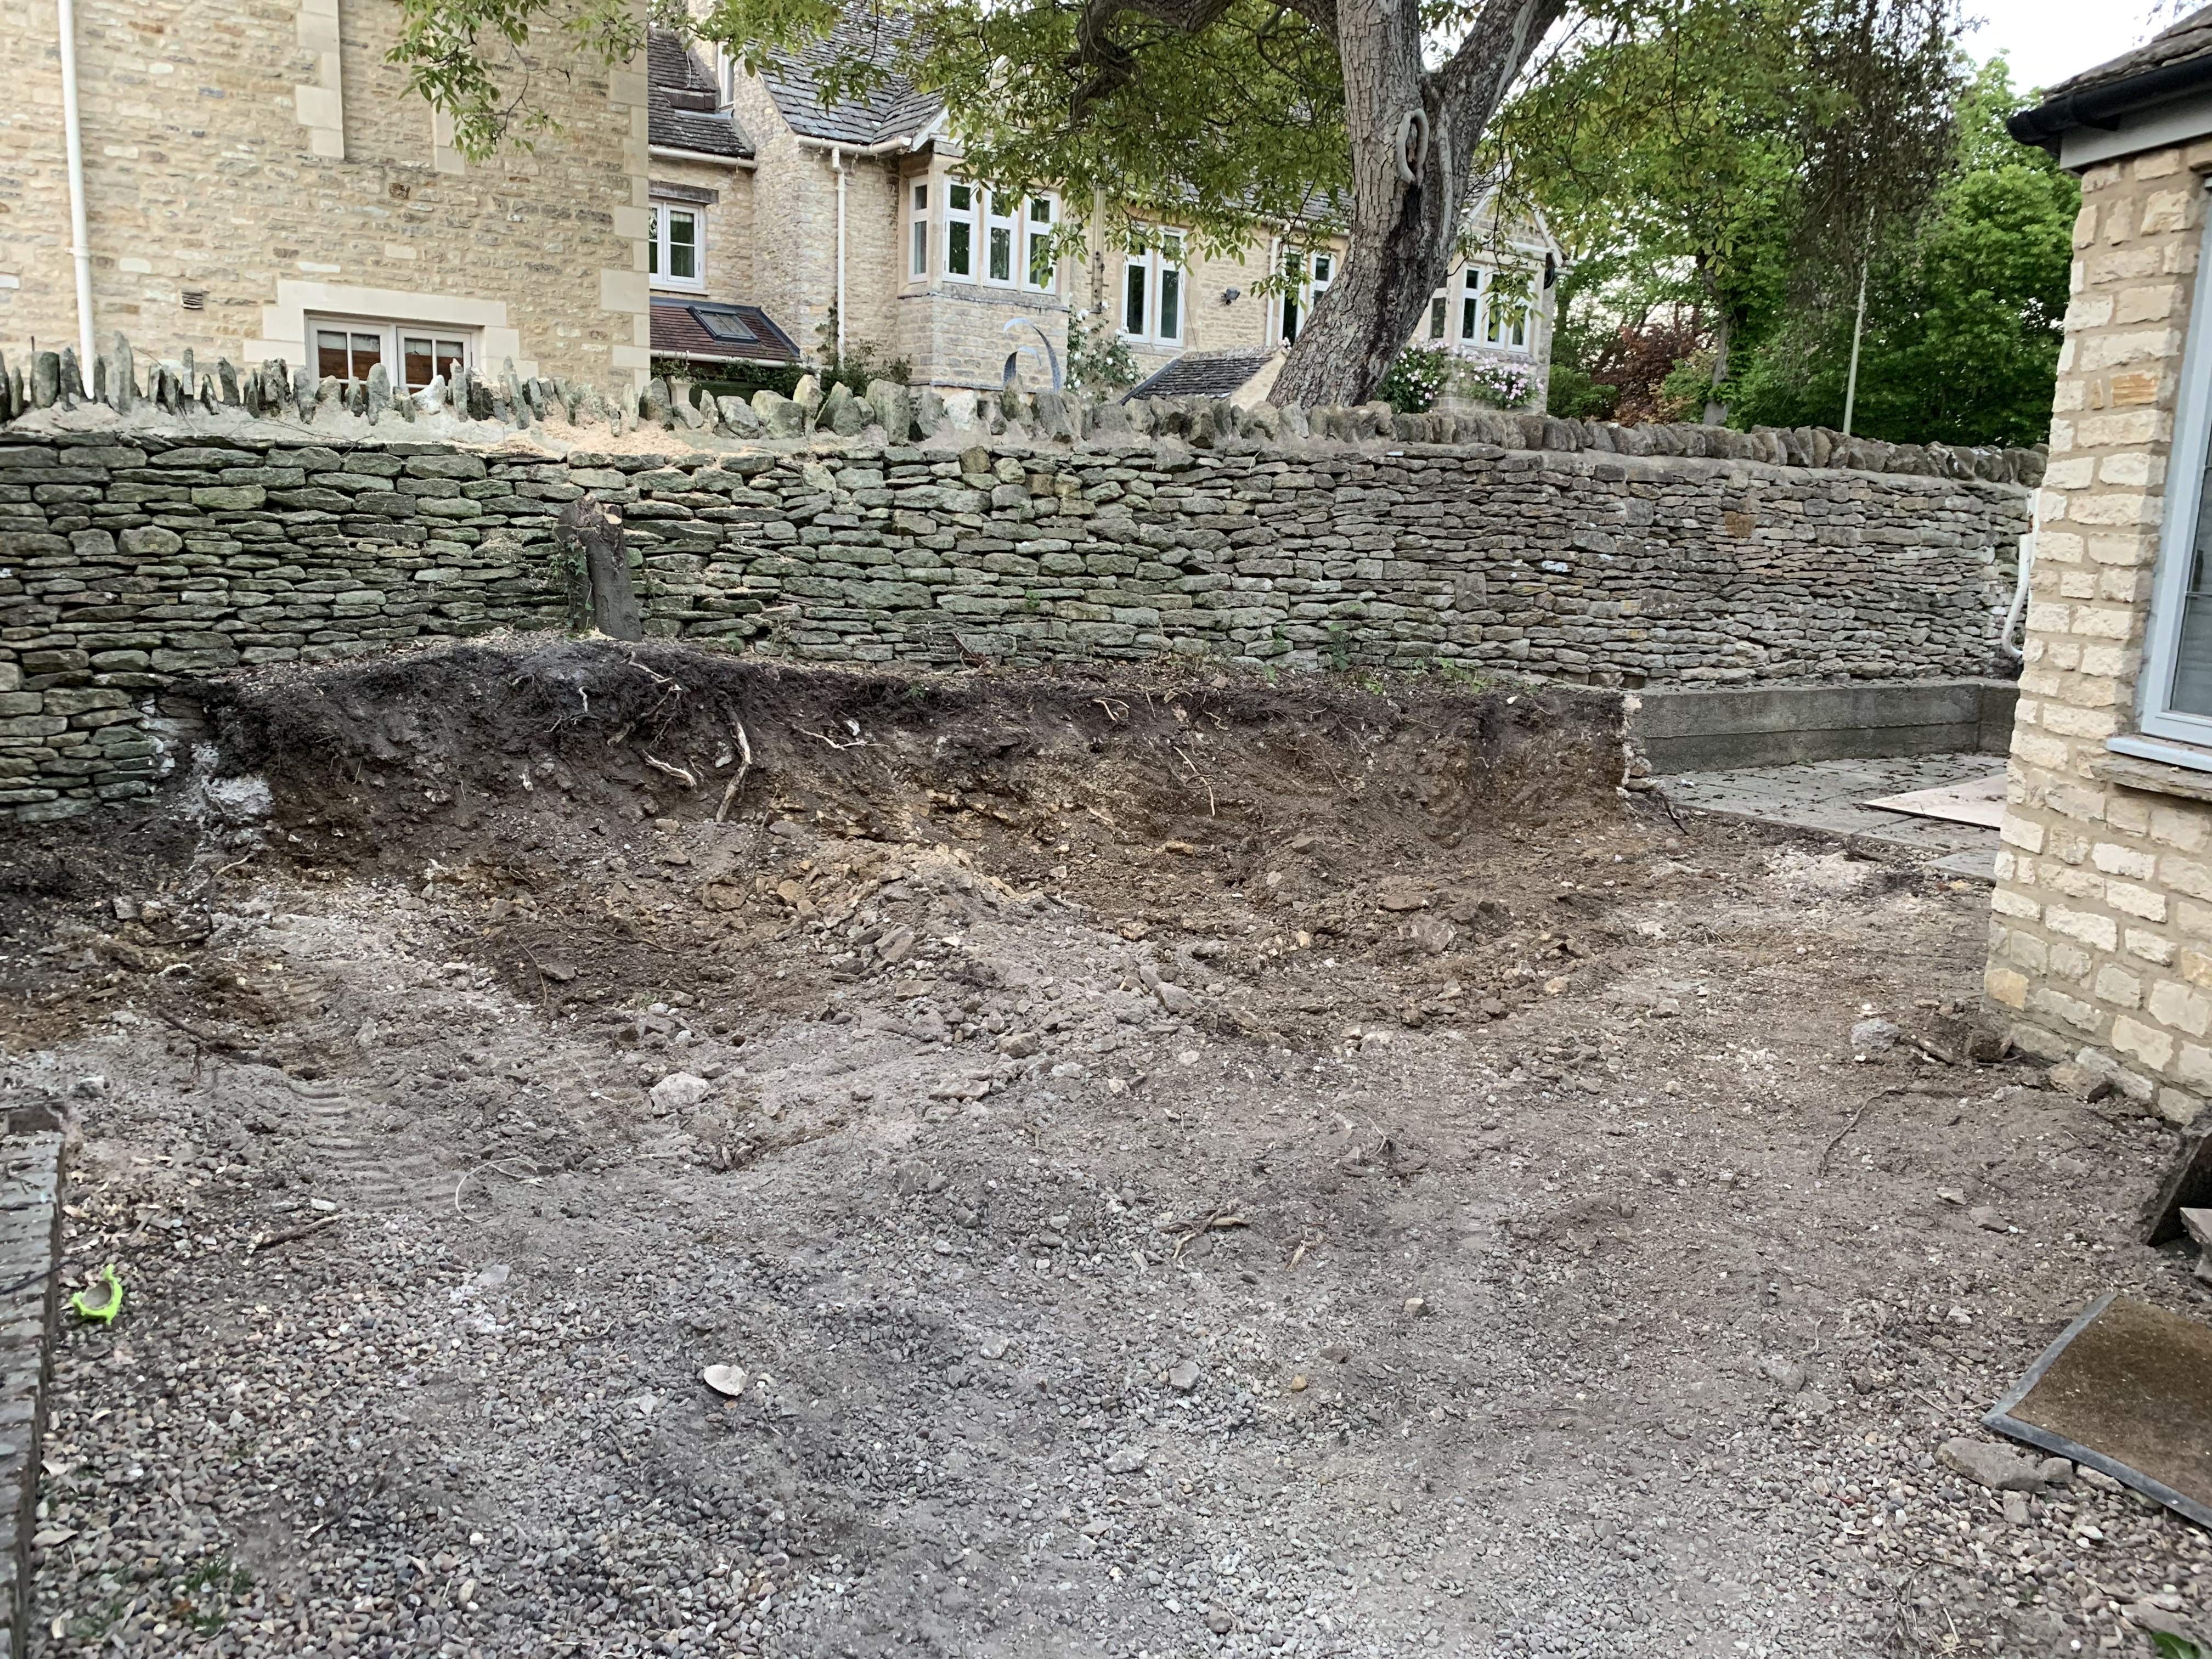
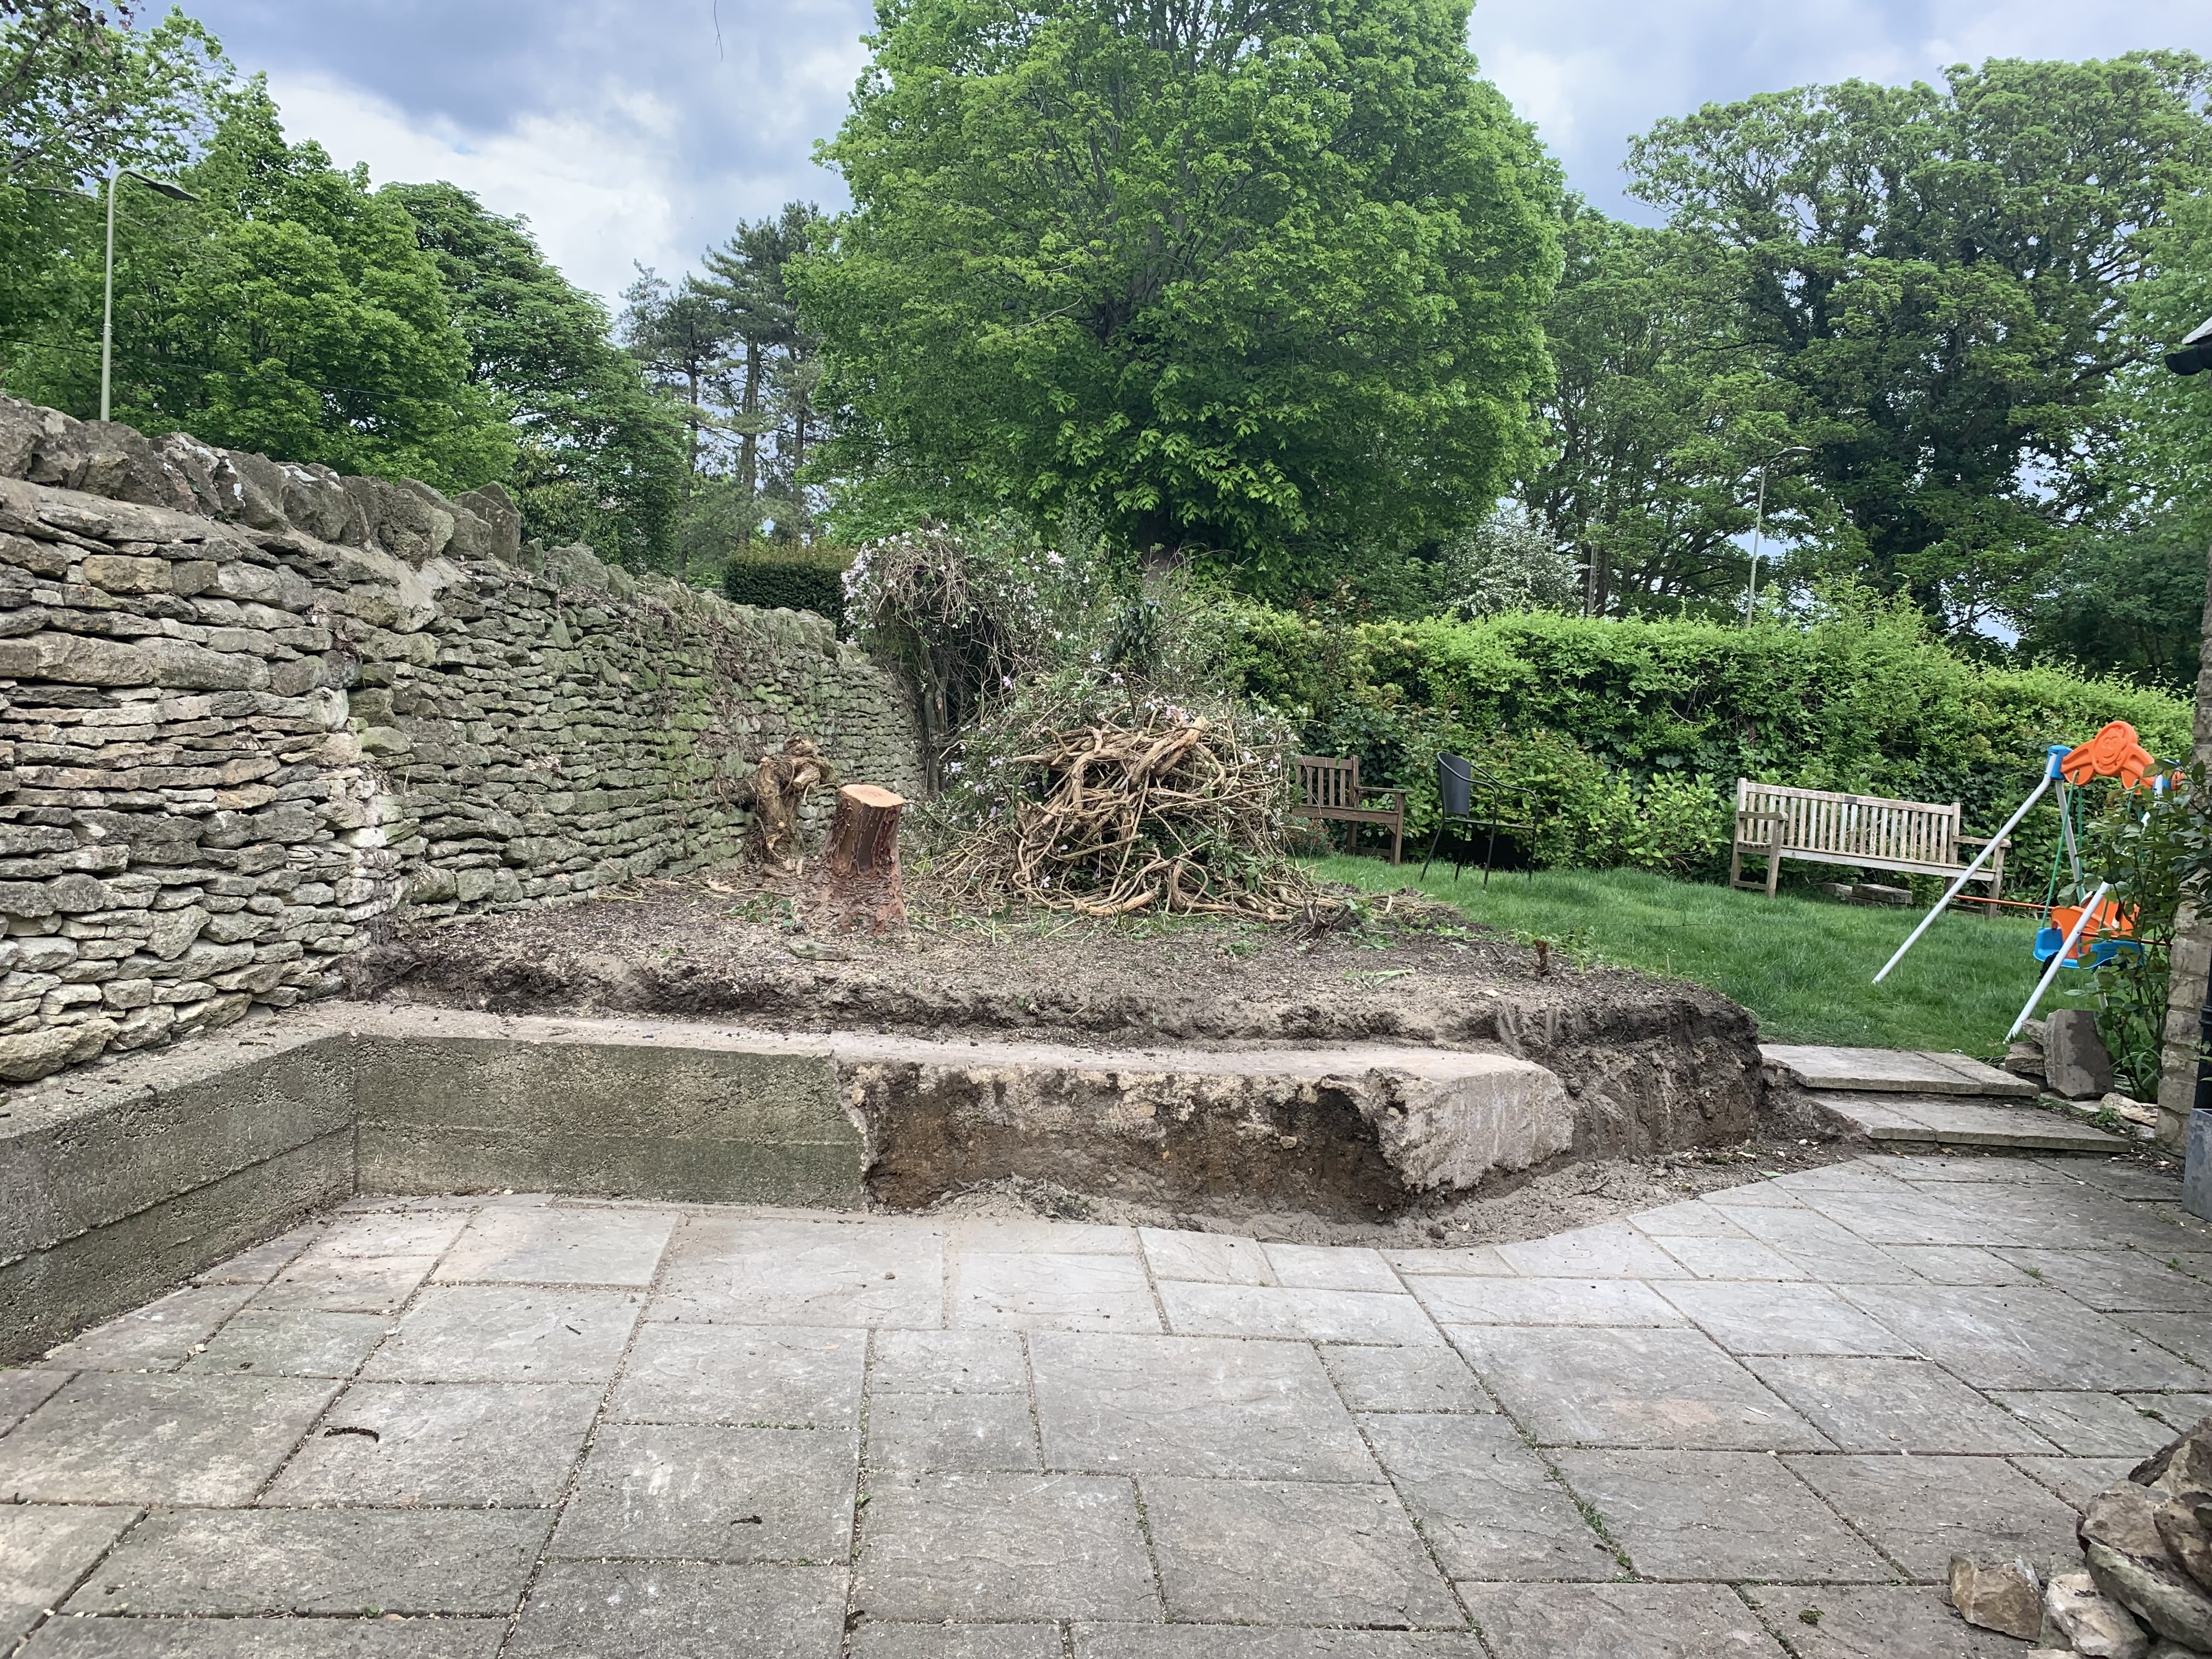
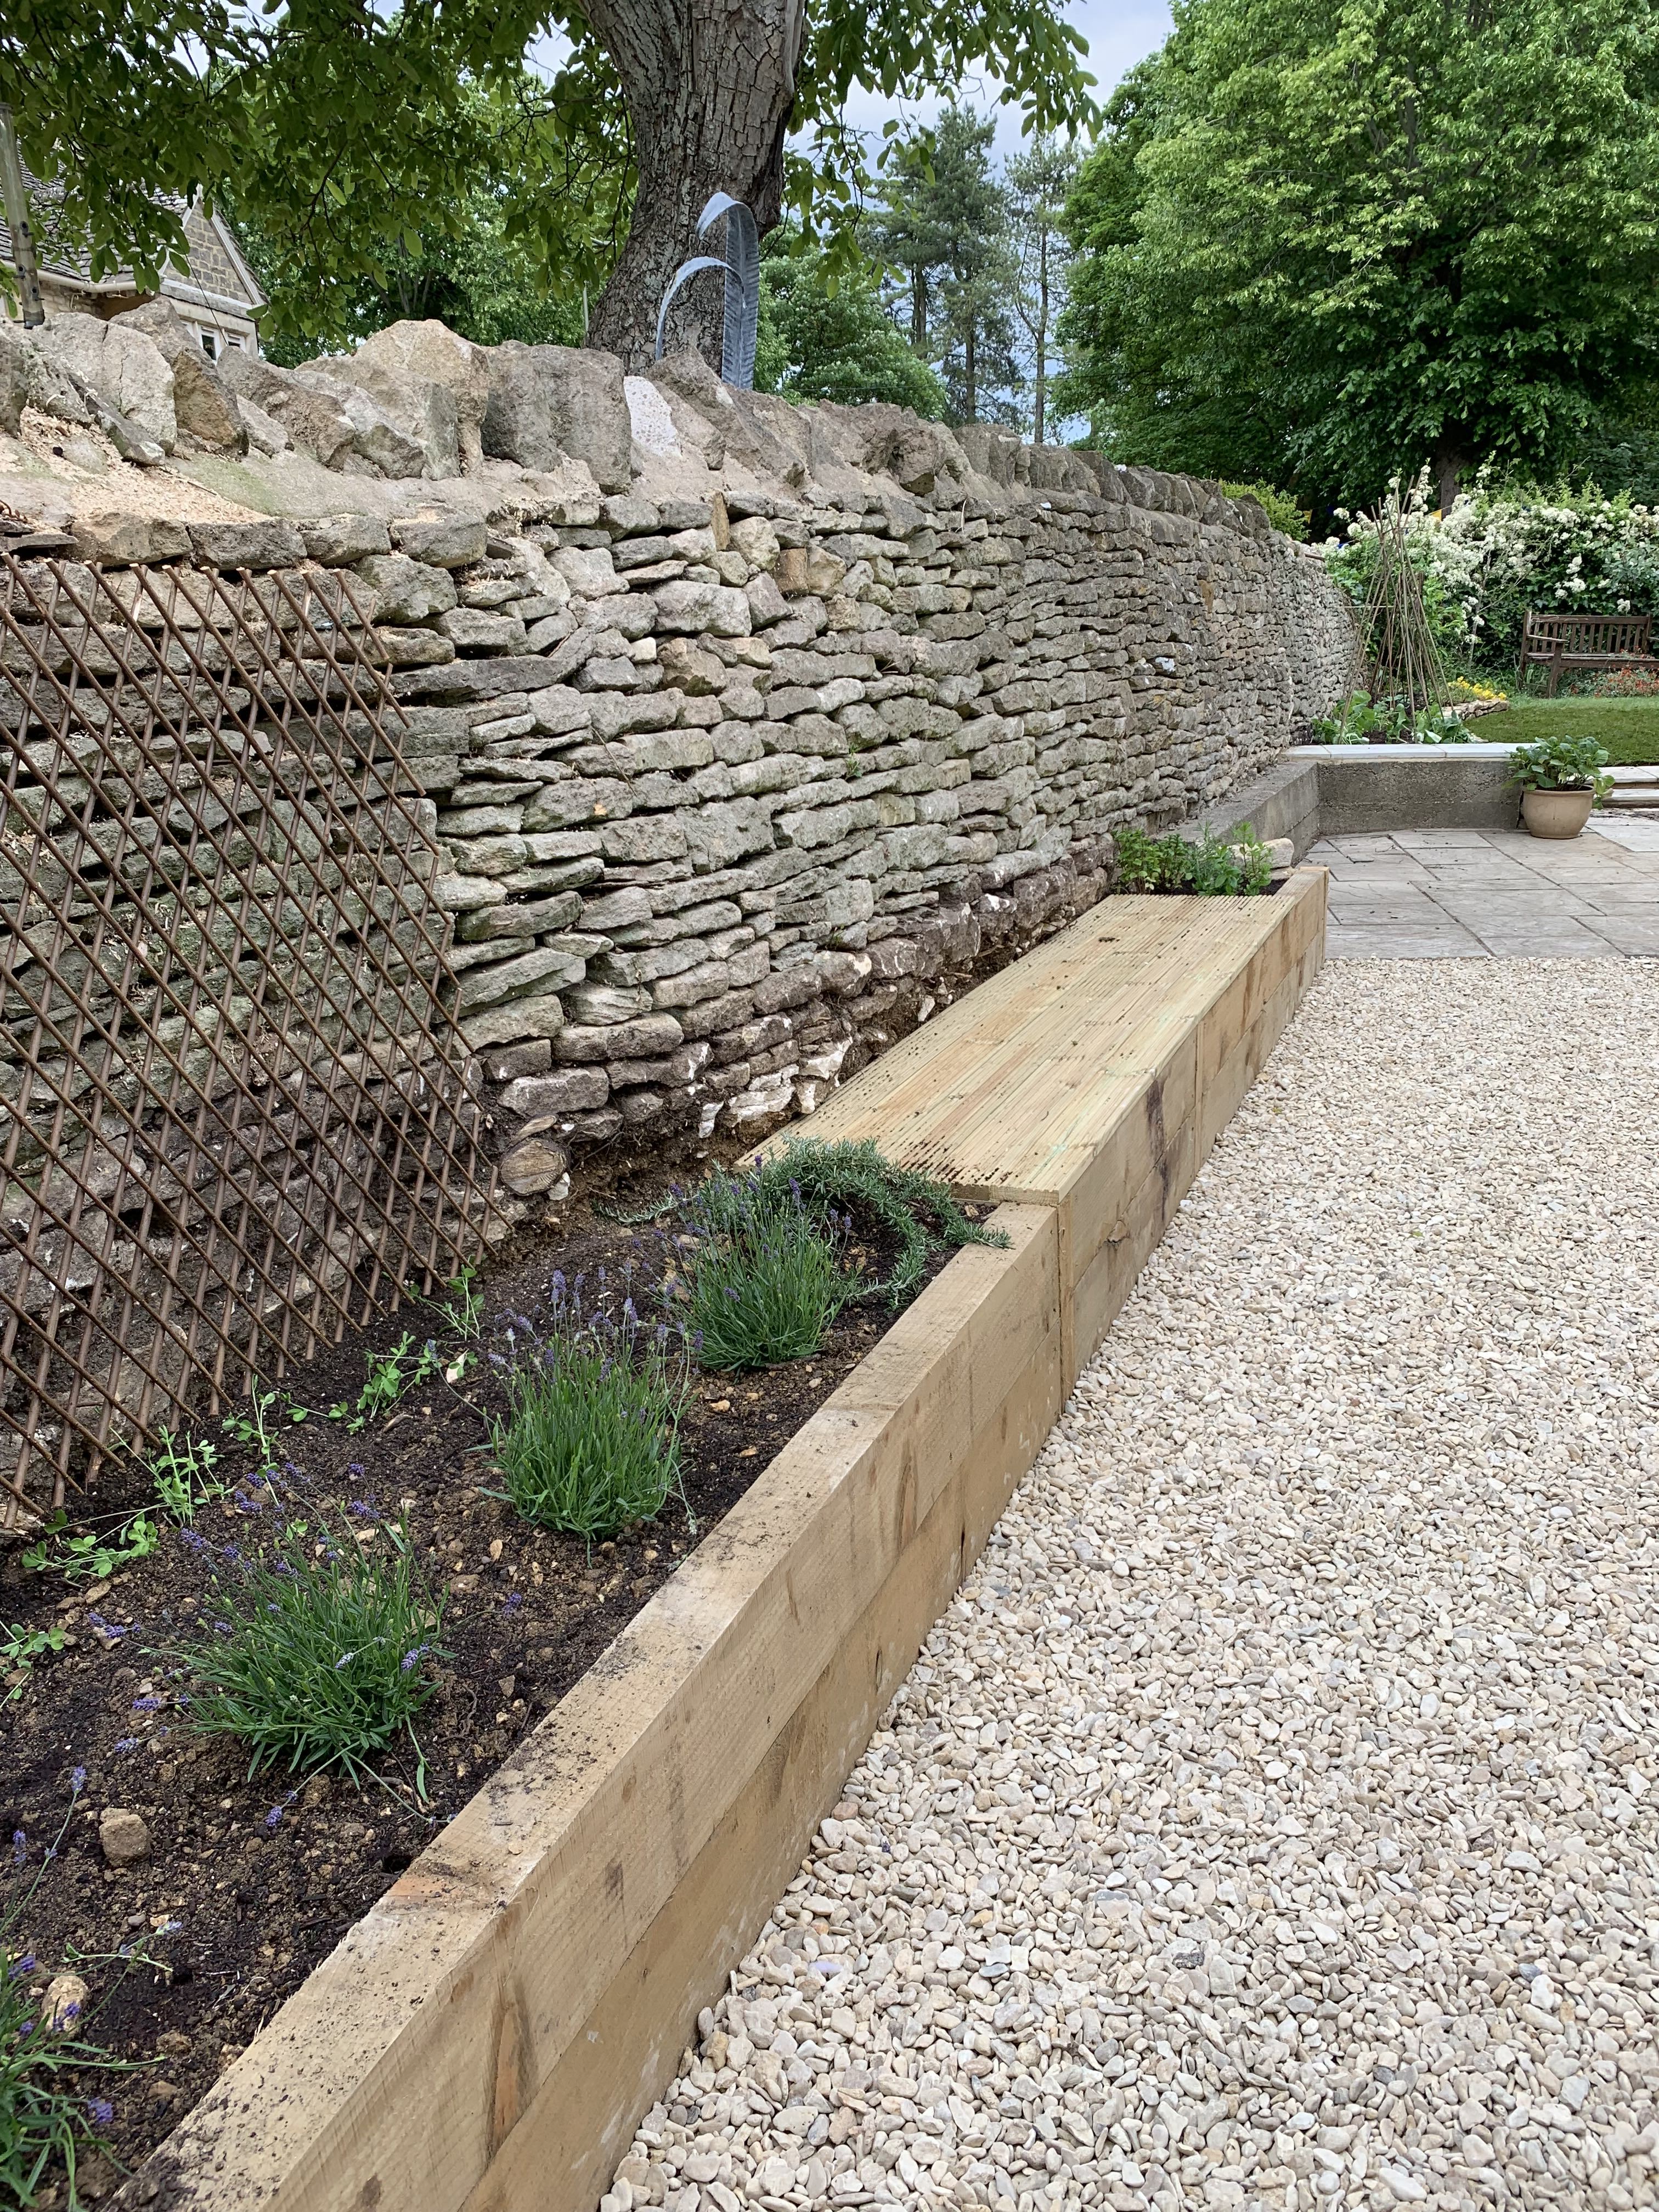
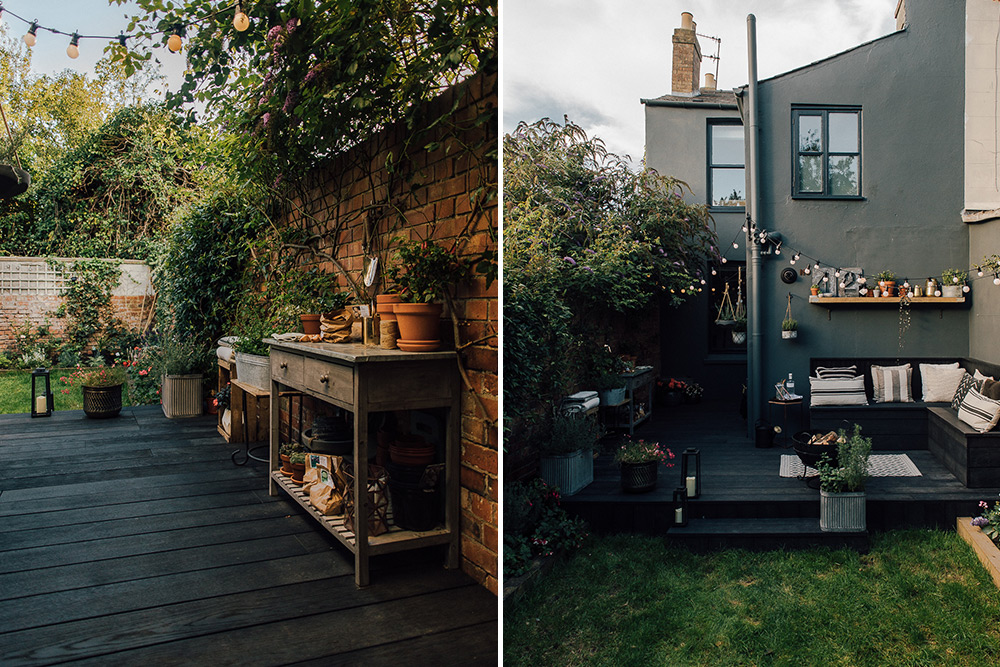
The original plan was to take the raised bed out all the way up to the boundary wall but as we got closer to it, we realised the very condensed rubble/soil combo was quite integral to the wall and we may risk it coming down if we dug any further (the budget definitely wouldn’t stretch to rebuilding a 6ft dry stone wall!). I’m actually really glad this happened because we ended up using sleepers and decking planks to box off the last section of soil/rubble and make a 3m bench which dictated where we would put our outdoor table.
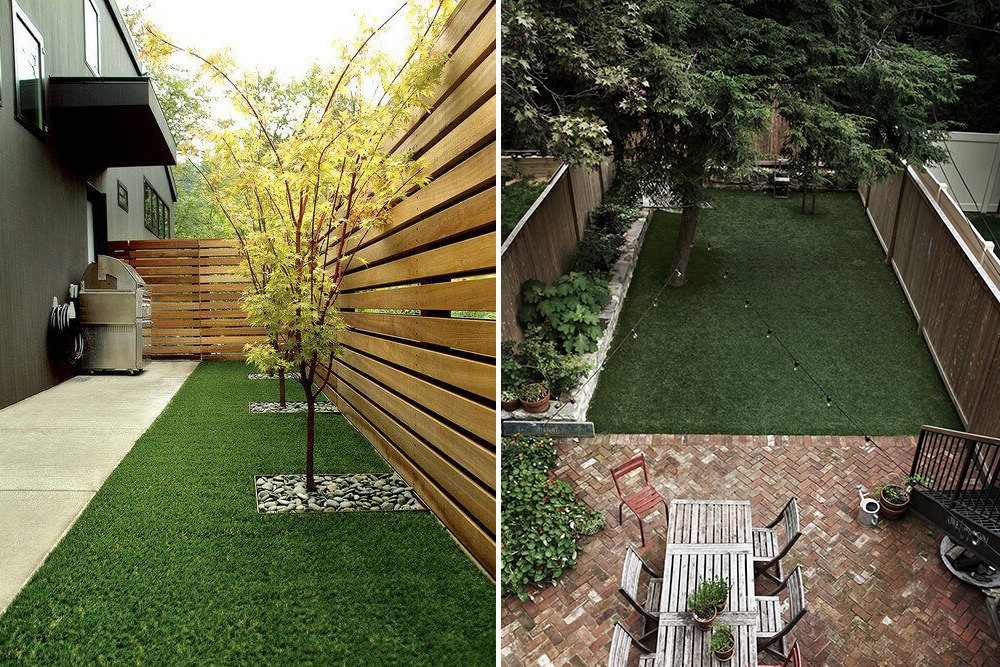
The corner flowerbed was dug out and we just kept a strip alongside the wall to join up the existing boundary flowerbed. This strip became the vegetable patch and we used stones from the wall we had removed to border it. We built two shallow steps to go from the patio onto the lawn and laid new turf to cover the remainder of the original flowerbed. We bought rolls of turf and watered it religiously and luckily it took really quickly. Apparently keeping weight off it and watering for the first 3 weeks is key.
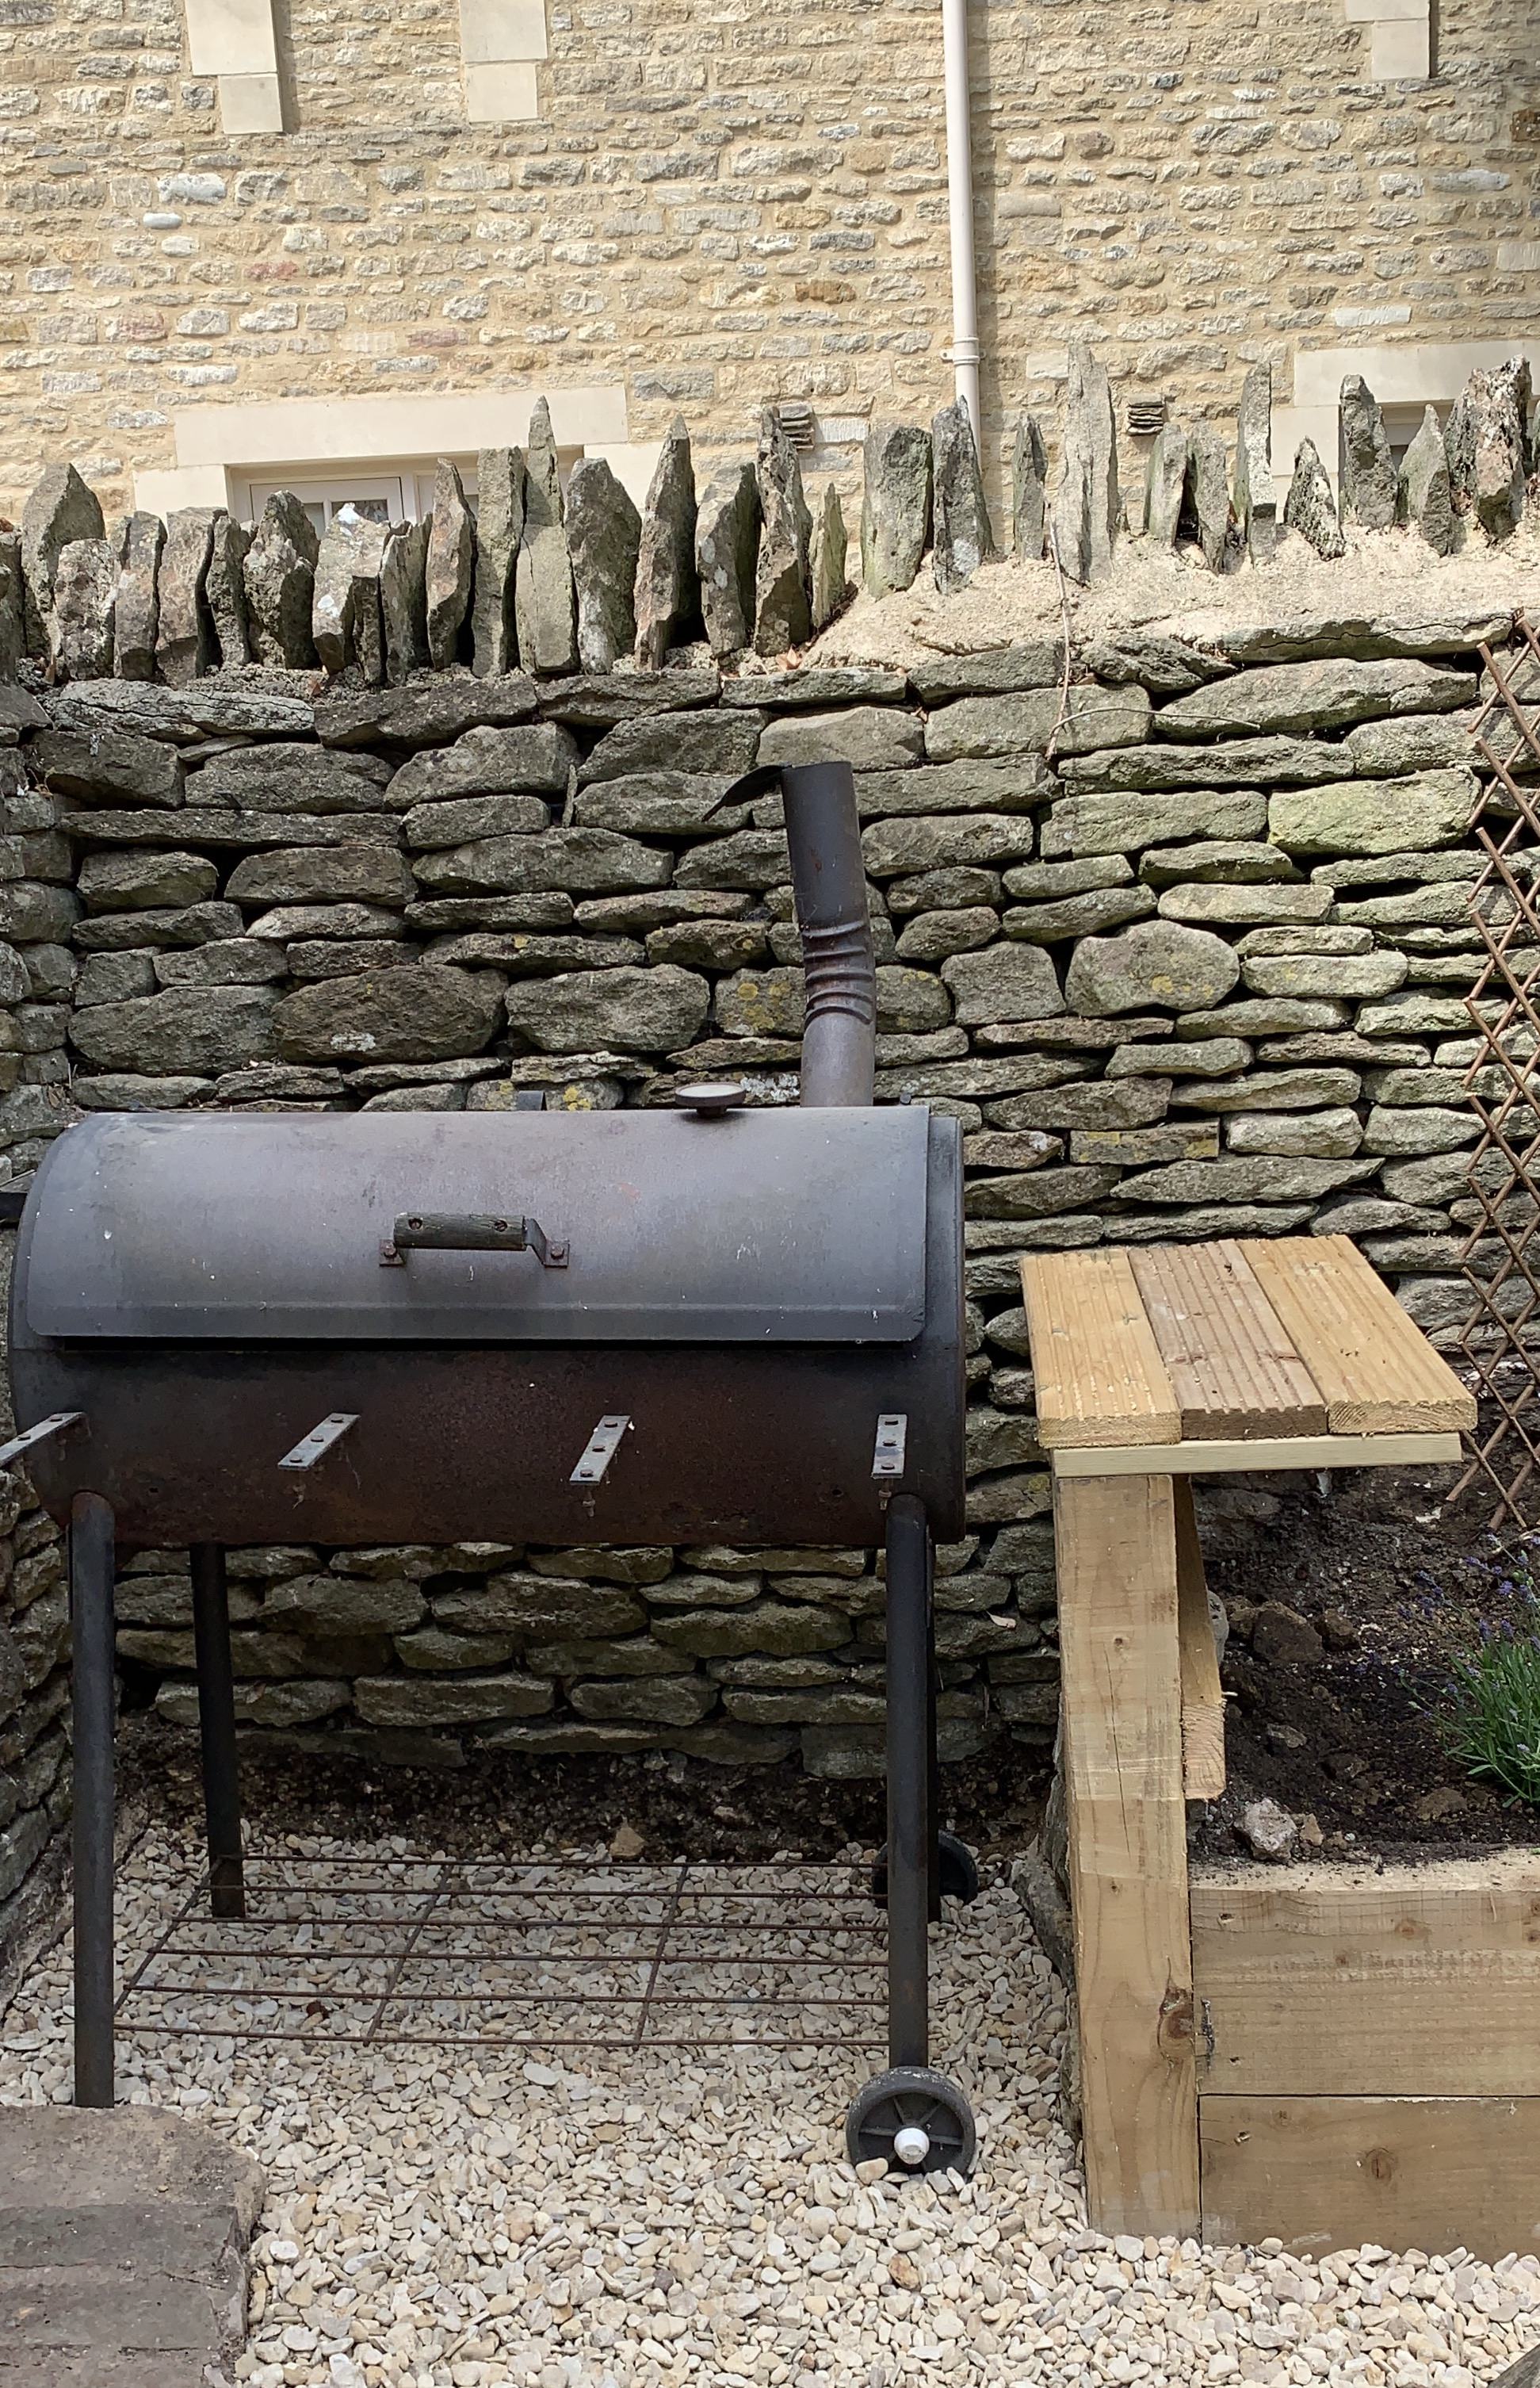
Because there had been so much more soil/rubble to get rid of than we anticipated, the extra grab lorry loads had used up the built-in BBQ budget. I definitely thought this would be a cheap and easy thing to do, but when we looked at the materials and labour needed, it was going to cost several hundred pounds. So, we decided to stick with our current BBQ and made a little ledge (from leftover decking planks) for BBQ tools/trays etc.
Next on the list was a huge outdoor table. I just couldn’t find one the right size (3m long) and the closest to it that I found was thousands of pounds. Luckily my father in law is very good at DIY and we persuaded him to make one for us. I bought 5 new scaffold planks from a local builders merchants (I think they were about £16 each) and these table legs which were £70 for a pair. He put it all together, then we sanded and oiled it. We had the built-in bench for seating down one side, then a bench and garden chairs we already owned down the other. I have added to the chairs with finds from Homesense sale too.
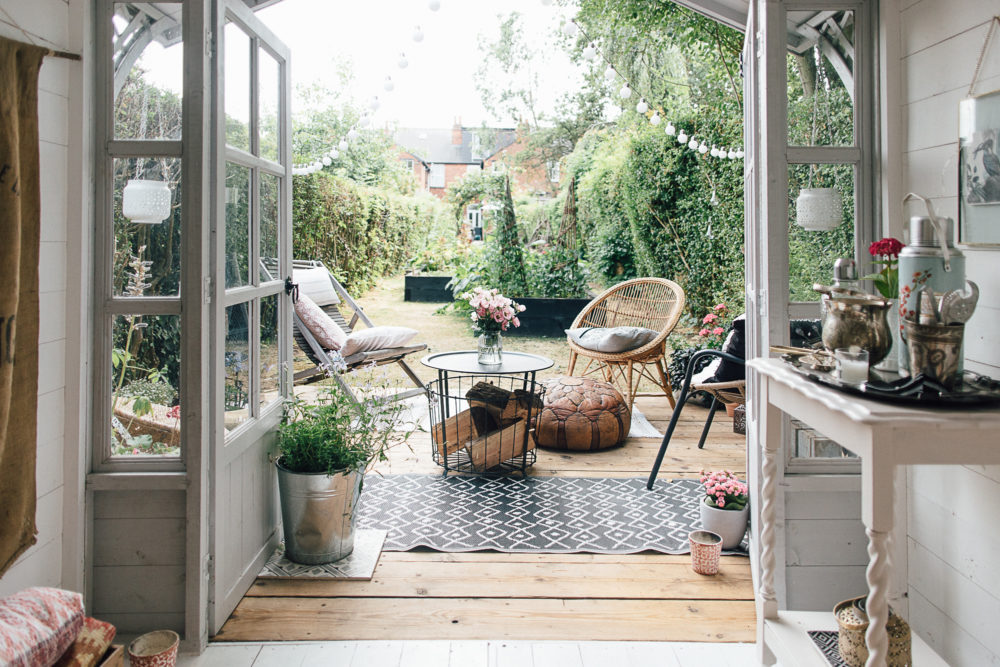
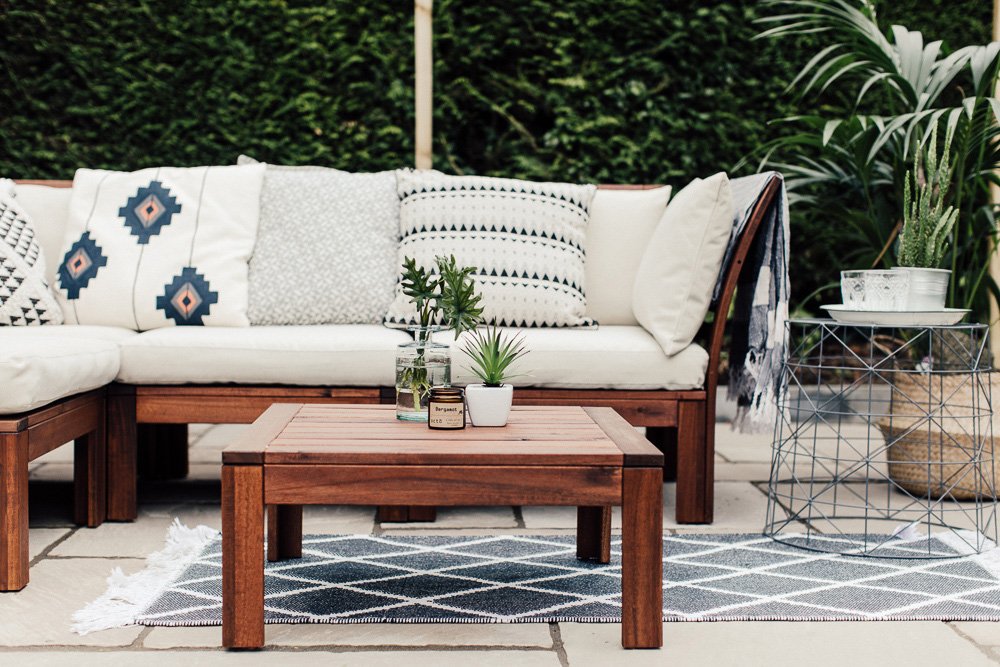
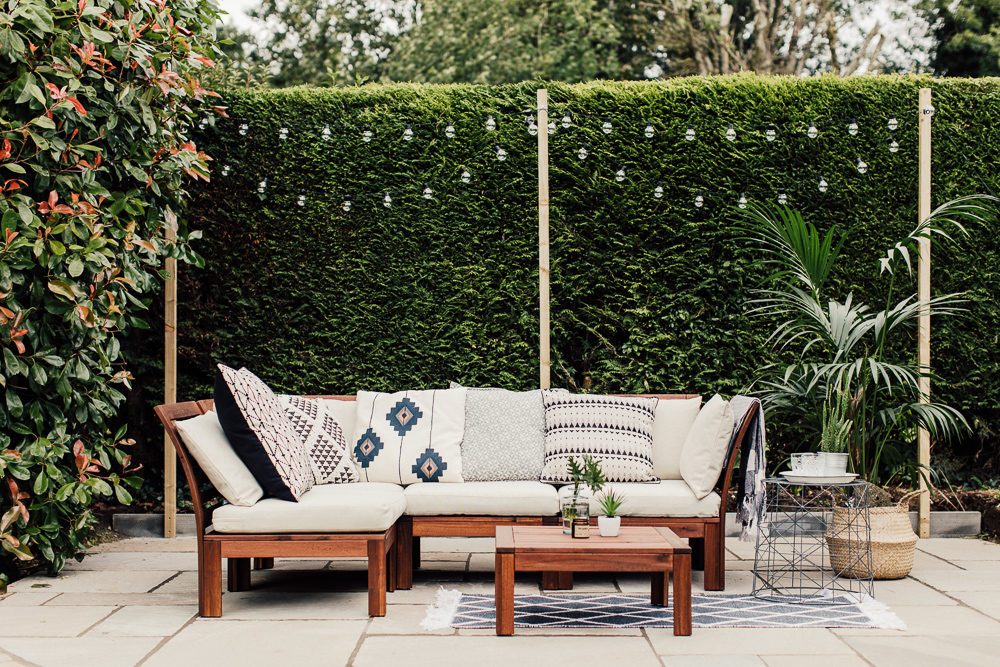
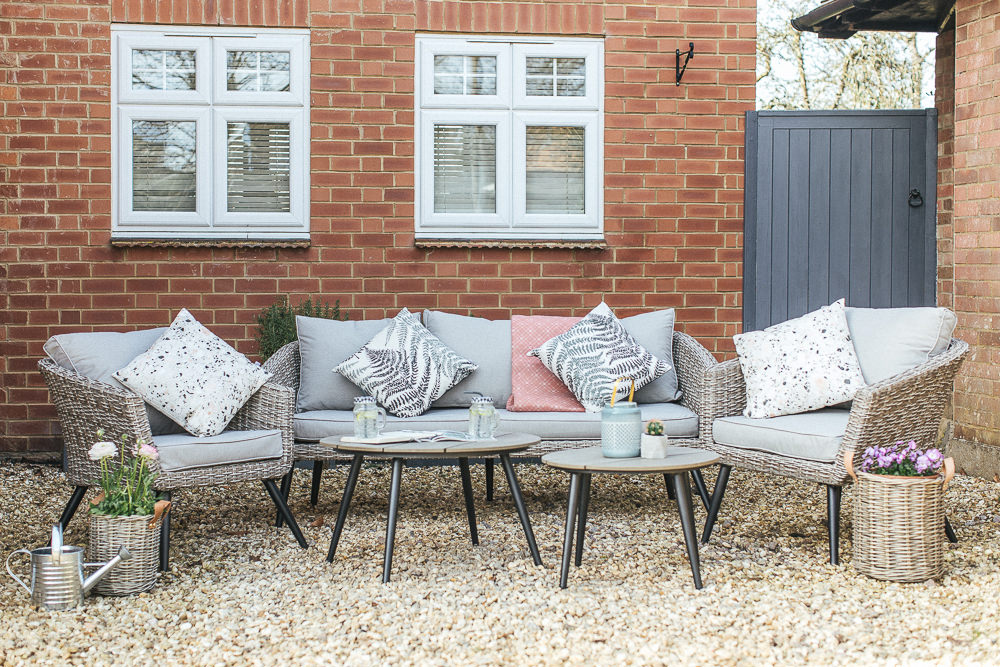
Finally, the lounge area. There are so many beautiful outdoor sofas out there but with not much budget left we went for a rattan effect corner sofa from Argos which was £216 in the sale and importantly (for us) had dark cushions. It fits perfectly in the space and we spent a lot of time on it during sunny days but also with the fire pit on during the evening.
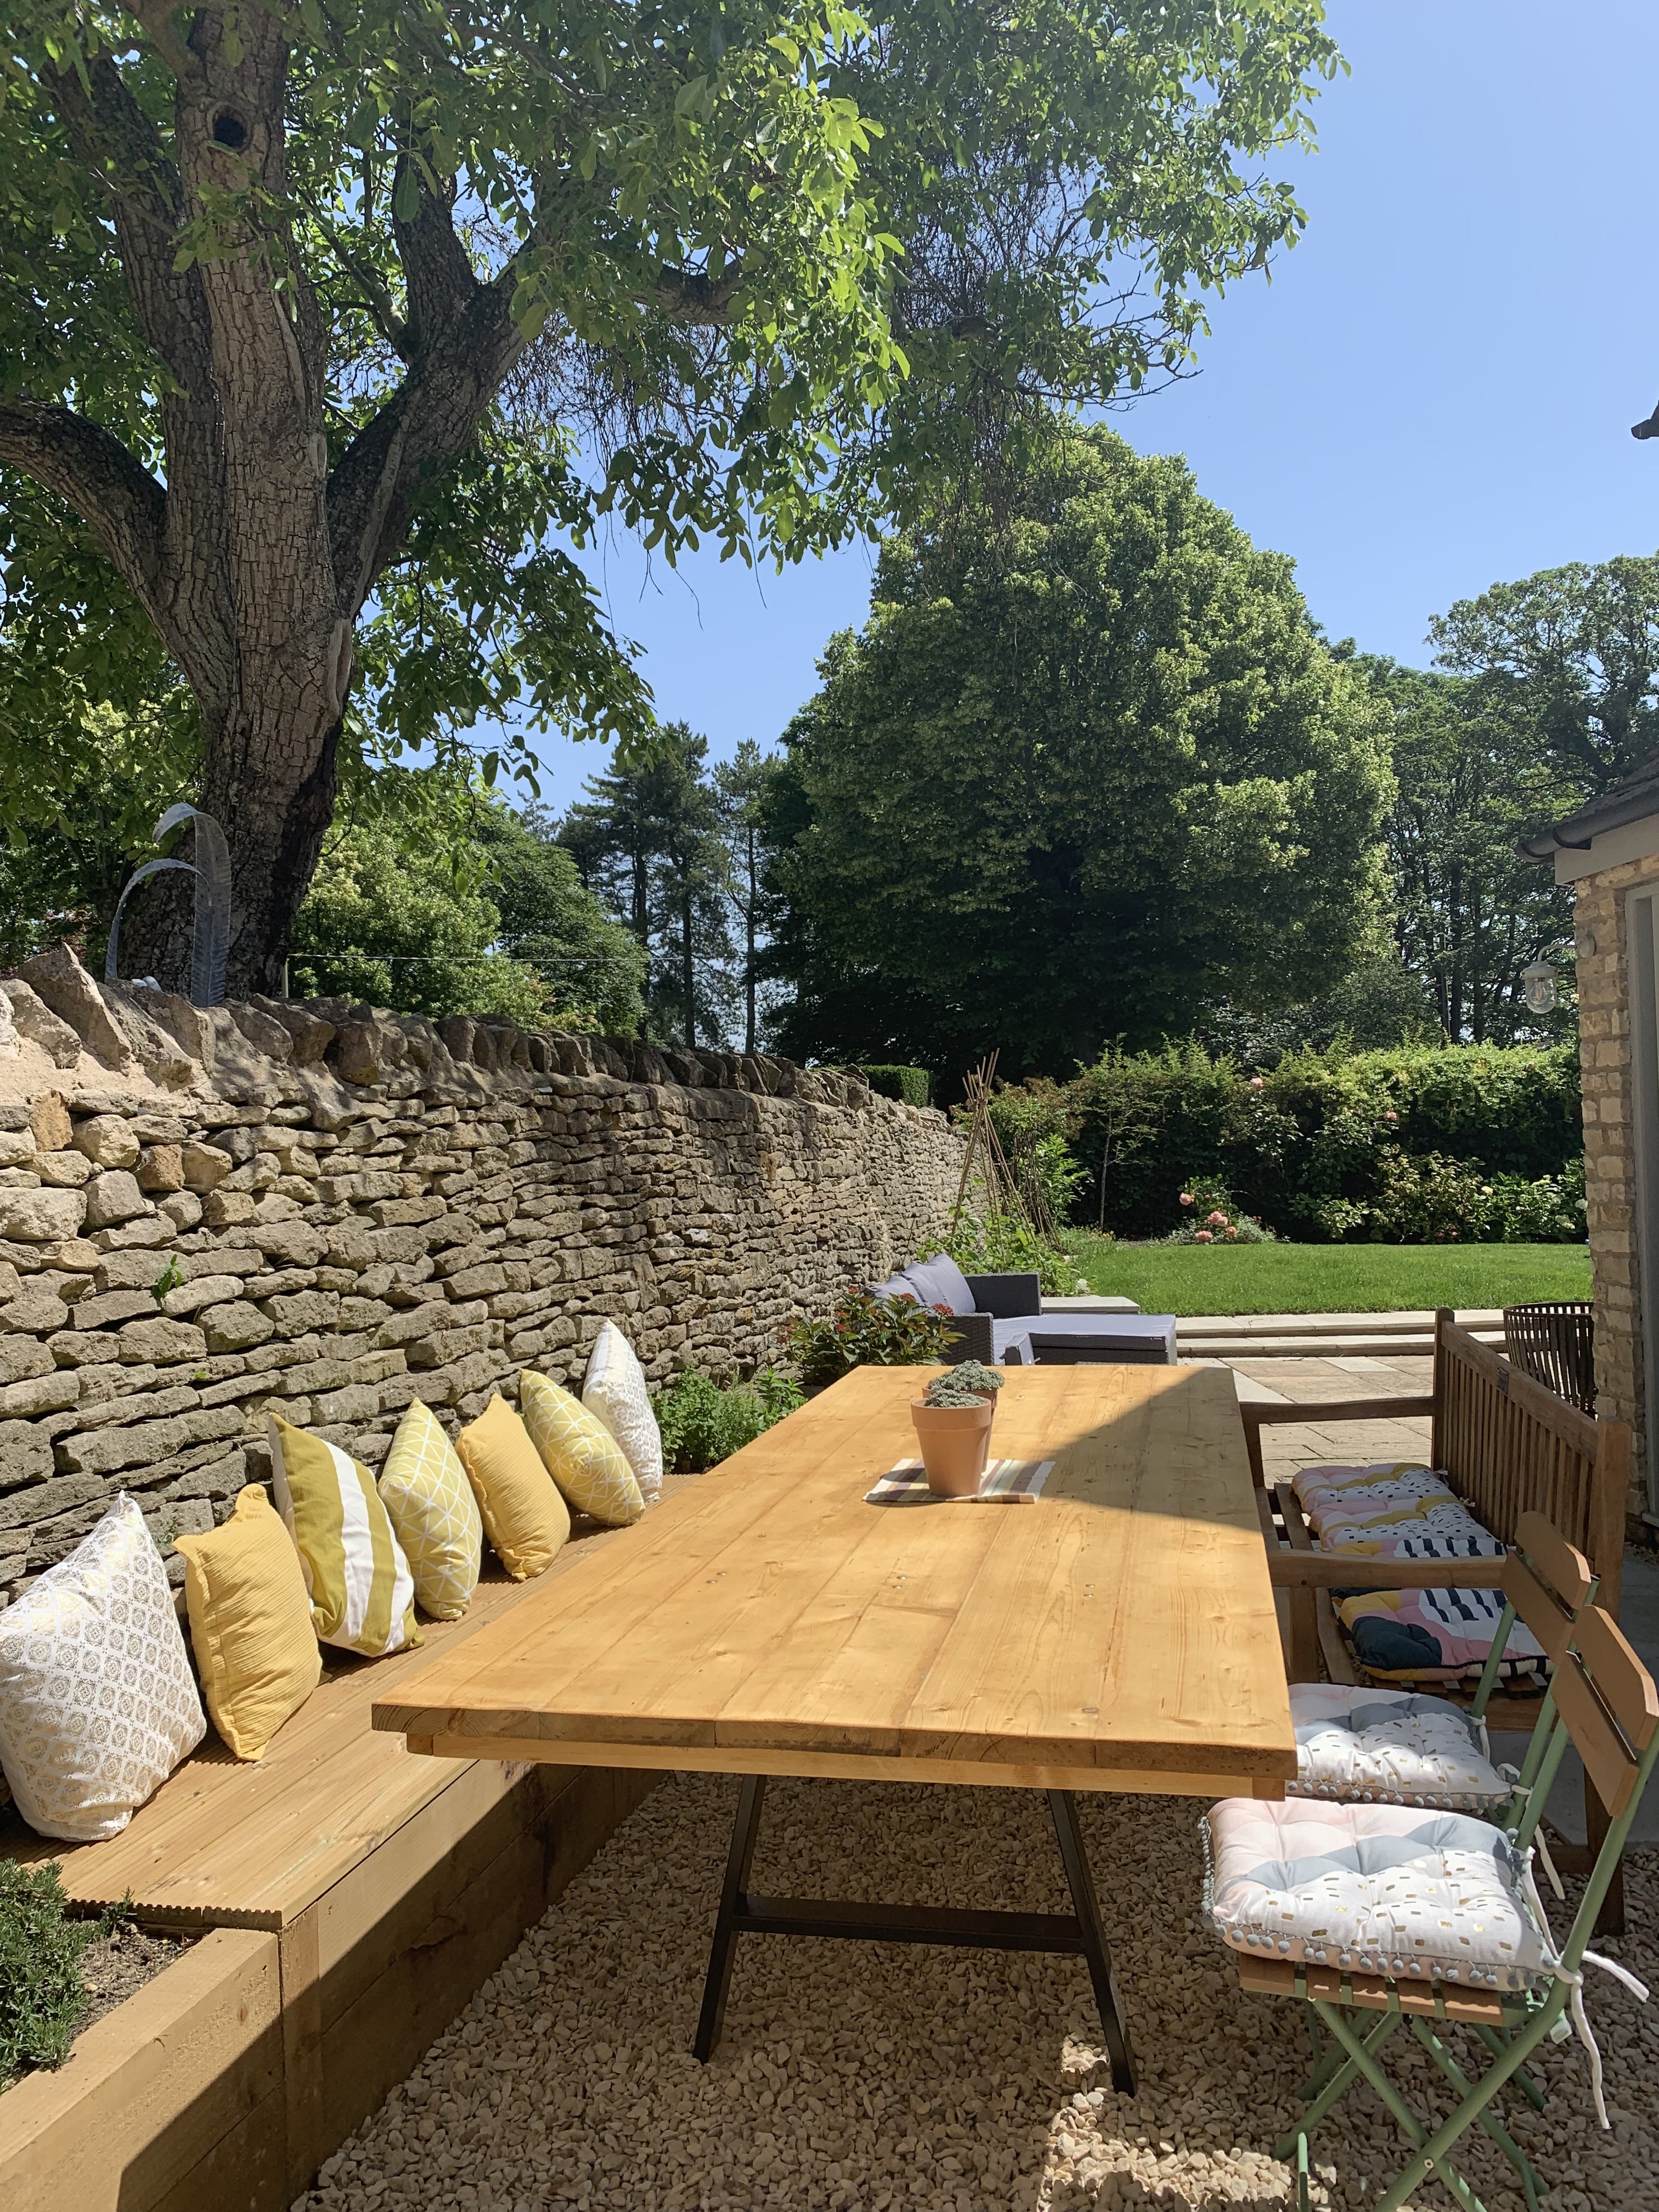


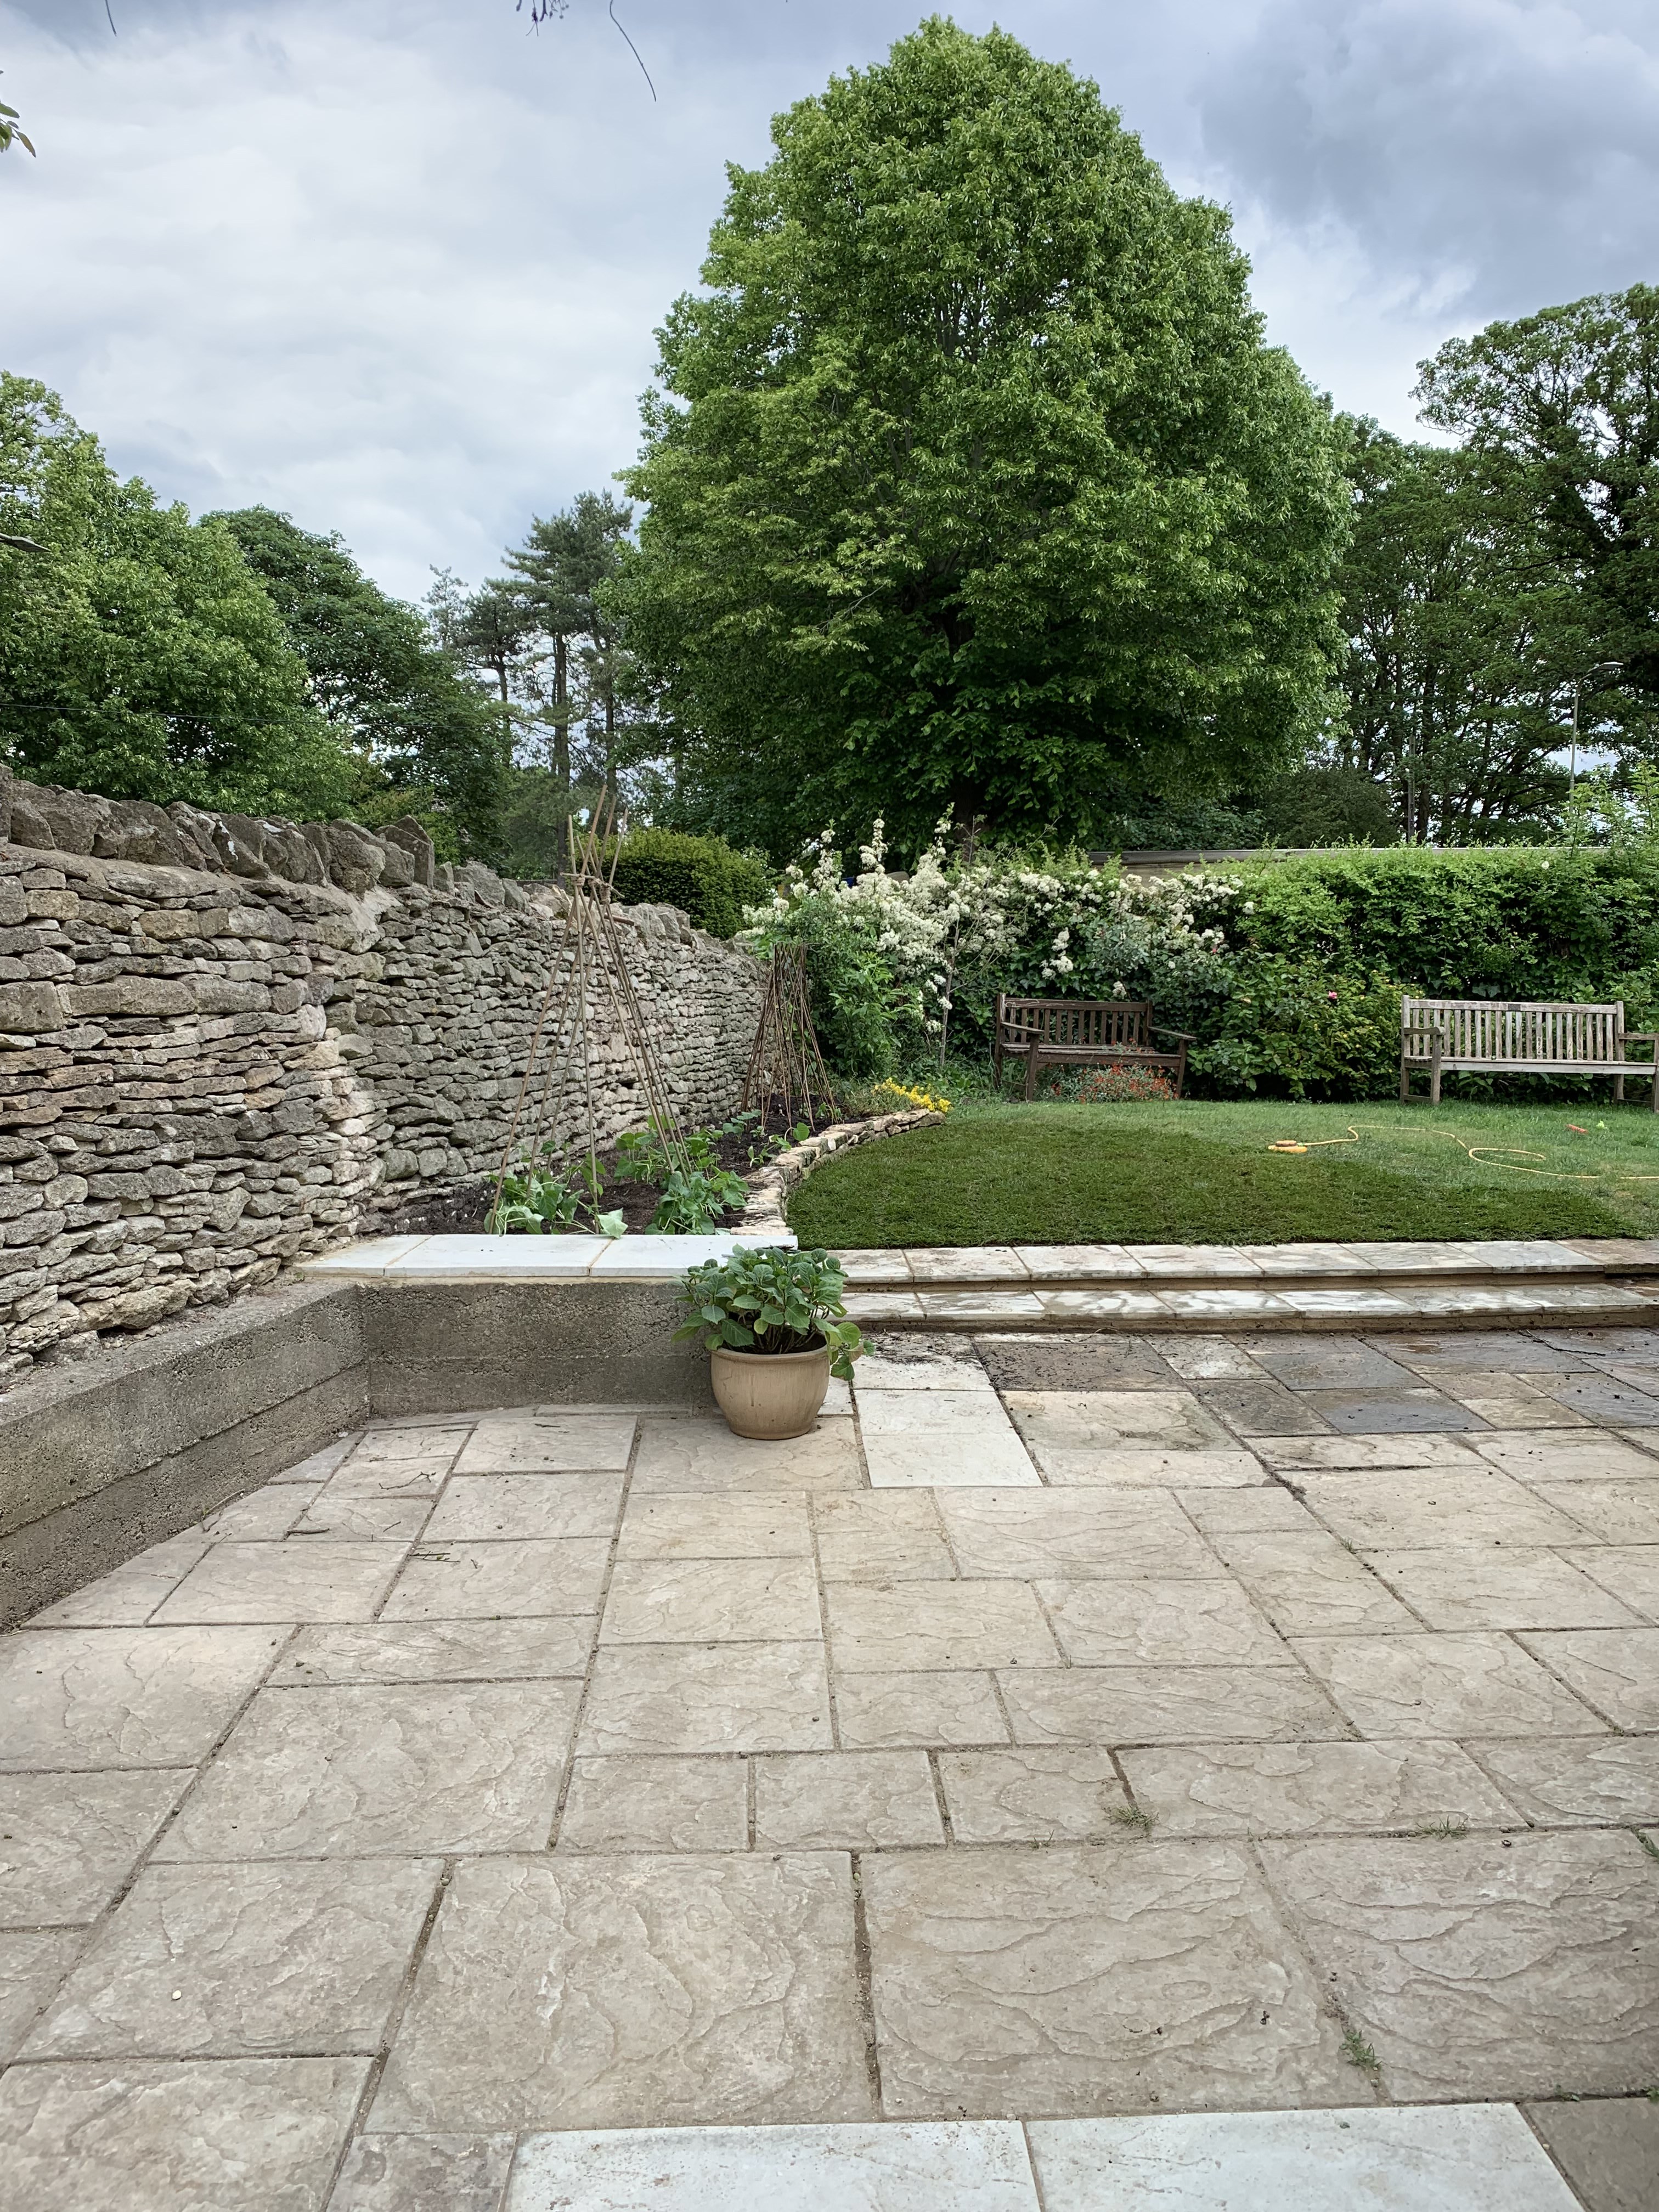
The whole project cost £3000. We came within budget but with concessions e.g. no built-in BBQ. Our biggest spends were labour (10 days in total) and grab lorry loads – I think we had five in total at £150 each when we originally thought we would have two, max three. The materials (patio slabs, gravel, liner under gravel, turf etc) were all from a local builders merchant. It is definitely worth going to see the materials in person because the price varied massively between the different types of slabs and gravel. We saved money by leaving down the existing patio and patching up around it with new slabs – we found a similar pattern slab but the new ones were significantly lighter as you can see in the pictures; I’m pleased to say that a year on they look much more weathered. We also saved by putting gravel down rather than full patio – I actually like the change in texture. My biggest lesson learned was to revisit the plan at each stage. I had envisioned keeping at least half of the wall that separated the original patio and lawn but it just didn’t work. The long low steps in its place open the space up so much and are more toddler friendly. All of the changes we made along the way were definitely for the better.
It wasn’t the cheapest project to do but it has transformed how we use the garden as a family so has been worth every penny. It has given us so much more space and the veg patch gave us a lot of produce! We grew green beans, courgettes, pumpkin, cucumber, peppers and tomatoes and I can’t wait to get it all going again this year.

This is beautiful. I love the gravel, it works really well and looks stylish. This is excellent inspiration! My husband’s lockdown DIY project is to put decking down at the bottom of our garden (it only gets early morning sunlight so the grass is a bit crap). If anyone has any dos and don’ts for laying decking let me know!
Thank you Kate! I have no advice for decking other than I think it looks great! X
Beautiful garden, I love the vegetable bed you created. You’re so lucky to have that dry stone wall too!
Thank you Jenni! I know, we are so lucky to have all the dry stone walling. I just planted up the veg bed for this year and can’t wait to see it all grow again x
Love this. Currently have 6 scaffolding boards in the garage for the same reason. How did you sand and oil it? And how do you protect in winter?
Hi Rebecca,
We put the table top together first and then sanded it with an electric sander to make it smooth, then applied a clear oil for outdoor woodwork that I got from B&Q – did 2 coats of oil. They had different shades, so could make a different colour but I wanted it as natural as possible. Once it was sanded we put the legs on (as the bolts for the legs show on the top of the table, in a nice way (!) but easier to sand without them there). I couldn’t find a table cover big enough so bought a caravan roof cover and tied that together underneath for the winter. It protected it really well! x
This is lovely to see. And Naomi, it would be great to get an update on your garden office project! I was showing my partner the post the other day, as we are considering one.
Didn’t Sophie do such a great job! Kat our garden office progress has been slow (given the lockdown obvs). But we’ve been able to get some supplies and are just finishing off the inside before I can move in. I really love it. Will take some ‘during’ pics this week and hopefully get an update to you in a few weeks time 🤞🏼
This is so inspiring! I’ve been talking to garden designers who have completely different scale budgets to what we can reasonably afford.. yours looks fantastic on a much more achievable budget.
This is amazing!