So here’s my downstairs bathroom, all 2 metre squared of it. Given its teeny tiny footprint it’s somewhat surprising it took well over a year to get it to it’s current finished state.
[ezcol_2third id=”” class=”” style=””]
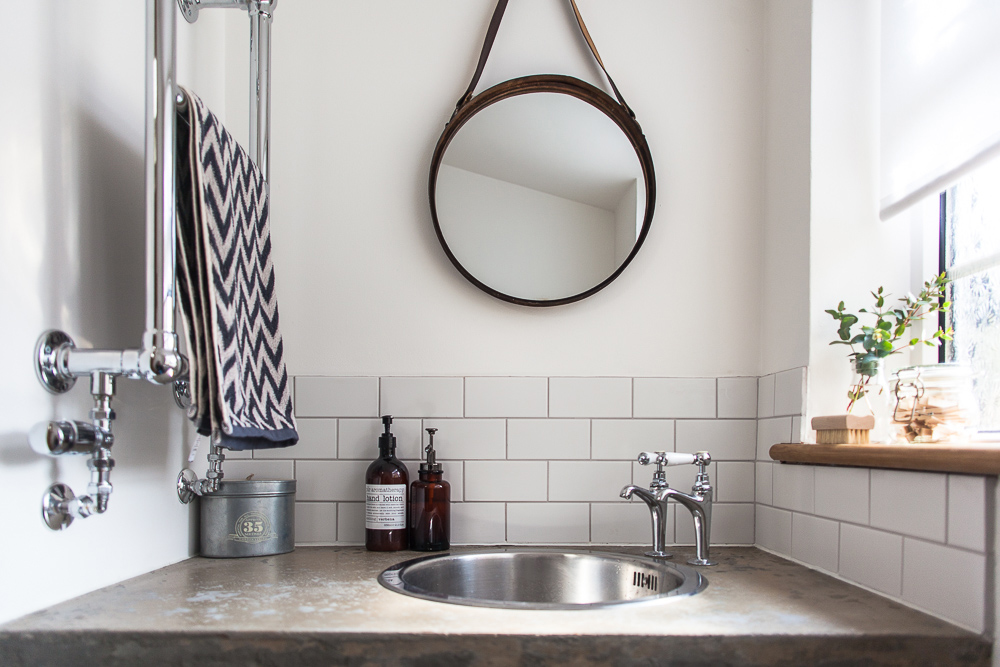
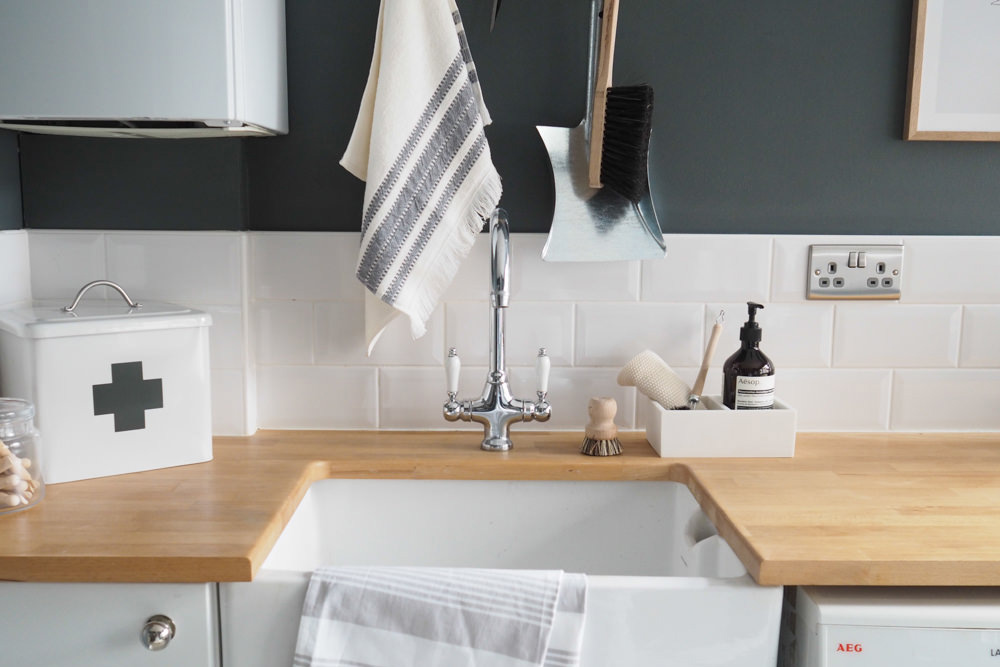
We chose to keep the toilet cistern, quarry tile floor and stainless steel sink but everything else had a refresh. The sink in question isn’t particularly ‘bathroomy’ but as this room is next to the cupboard housing the washing machine there’s more of a utility room function going on in here. We will at some point change the ‘squiffy’ taps but for the moment they do the job, water comes out of them after all.
Let’s start with the concrete workshop shall we? Originally we were going to use a solid wood counter top in here but James decided to give himself a big challenge and make his own custom top. As concrete is becoming a really popular surface it’s surprising we really struggled to get hold of the materials to make our own. Some of my favourite blogs featured tutorials to screed original worktops with a layer of concrete which looks smashing but we wanted to go the whole hog. I’ve asked James to put together a little tutorial in the grey box if anyone’s interested in the steps we took. To be honest, it’s a little dull so do keep scrolling past if it doesn’t float your boat!
We decided not to polish the concrete and instead left in its rough state. To be honest it doesn’t look like the smooth and luxurious surfaces you’d find on Pinterest but for our little room it’s fine. I wouldn’t be happy to have this surface in my kitchen but I kind of like how raw and organic it looks and a little more rustic which is far more in keeping with our cottage.
In the past we’ve used bevelled, gloss subway style tiles but this time we went for smooth, matt metro tiles from Walls and Tiles grouting with light grey grout.
The Captain’s Mirror came from my local Homesense last year and if my memory serves me correctly it was less than 30 quid.
I had some fab feedback on my original inspiration post about haunts for handles where Annie suggested I check out Superfront. I was massively inspired by their loop leather handles thinking they would tie in with the leather strap on the mirror. I found an Etsy seller, Love That Leather selling genuine leather door pulls. These walnut creations were handmade and shipped over from the US in a little over a week. I have to mention the packaging too; a hand punched initial tag adored a very sweet leopard print box. I was very impressed!
On the accessory front I bought an amber glass bottle from John Lewis last year, teaming it with a hand lotion from TK Maxx. I would have loved a collection of Aesop toiletries but the budget wouldn’t stretch! As I mentioned in my recent home purchase post the towel and bath mat were purchased from Betty Jackson’s Debenham’s range.
In the mirror reflection you can see the little trinket tray I mentioned in the same post. The faux succulent is from John Lewis.
We don’t have too much storage space in our kitchen so all our cleaning products are housed in the cupboard. As mentioned earlier this room has a bit of a utility room function hence the wooden pegs and ostrich duster (bought from Utility in Brighton).
I would still love to find some art to adorn the walls but for now I’m just glad to have the downstairs loo back in action. What’s the longest period you’ve ever taken to decorate a room? Can you beat my twelve months?
[/ezcol_2third]
[ezcol_1third_end id=”” class=”” style=””]
James’ Concrete How-To
There are plenty of guides out there on how to create your own worktop, apparently books by Fu-Tung-Cheng give excellent instructions, he even has a range of ready mixed concrete mixes but only available in the US. As we were making such a small worktop it made sense to make our own mix. In the end we settled on a mix of Lafarge ready to use multi purpose concrete and Lafarge cement in an 80:20 ratio. The small stones in the concrete give strength and the cement gives some smoothness and colour to the mix. The final ingredient, and an essential one to prevent the worktop from shrinking as it dries, is Plasticiser, available from places like Wickes. The approach we took was to make a mould in which to pour the concrete. After measuring up we used melamine wood from our local DIY, with a big sheet as the base and inch high side walls to keep the shape. Barrocca tubes were used to keep space for the tap pipes, and wood cut into circles and stacked for the sink. The process is pretty simple, mix the concrete, pour in, and push in a wire mesh; top tips, mix the entire concrete in one go, tape over any screws in the mould (so you can easily peel off after any concrete has dried), and shake and tap to get all of the air bubbles out of the concrete. Once dried (best to leave it a few days), take the mould apart and carefully flip the worktop over to admire what is hopefully a perfectly smooth finish, with the final step to apply some Ronseal Concrete Seal. The rough and inconsistent looking finish we ended up with wasn’t entirely deliberate, we didn’t tap and shake enough to remove the air bubble so had to fill the gaps with cement, but luckily the finish was fine for a utility bathroom.
[/ezcol_1third_end]
[ezcol_divider]



Polished concrete kitchen worktops curved to the floor = my dream!
Love your room 🙂
Curved would be amazing Victoria!
Wow, the concrete worktop looks fantastic! I’m very impressed with your husband’s DIY skills! X
Thanks Emma. It took a while but was worth it in the end! x
How good does this look! Love it, and good job on the DIY worktop, looks smashing. I was going to buy one of those fake succulents from John Lewis too for our bathroom. My Ikea orchid that had been going strong just suddenly and spectacularly died in the space of about 2 days! Great inspiration as always from your interiors posts!
We’re still decorating our bedroom! To be fair we only started recently having originally planned to before Xmas! We’ve got to sand back our Polyfilla and then start on repainting ceiling and tops of the walls above to picture rails. We’ll be getting a new carpet, and hopefully some shutters for the windows instead of the venetian blinds that are currently in there.
x
Oh Kitty, I adore shutters. You lucky lady. x
This is so lovely! I’m currently decorating my main bathroom and can’t believe what a mammoth task it is. Out of interest, what lighting/light fixtures have you put in your bathroom? It’s something I’m really struggling to decide on! xx
Hi Hollie, it’s such a tiny room and south facing too so I’ve just got one halogen spot in here that’s suitable for a bathroom.
Hope it goes well with your bathroom x
I have been quietly watching and loving your interiors posts! This is my fave so far, stealing ideas left right and centre for our downstairs loo!
Aww thanks Aimee x
Everything sounds amazing, but the pictures seem to be broken! Can I find them anywhere else?