
As a self-professed Monty Don fan, I’ve always harboured ambitions to have my own vegetable patch filled to the brim with organic produce. The reality is that life, or rather my own excuses have previously prevented such a project coming to fruition. ‘There’s not enough space‘, or ‘I’ll set it up once we move into the new house‘ and the most recent ‘I’ve got a baby now so how on earth will I possibly have the time‘ were all too familiar gripes. Once I’d stopped procrastinating though and told myself to get a grip, (after all if my ninety year old granddad can do it then I have no excuse) plans for Project Patch were put into play.
Location
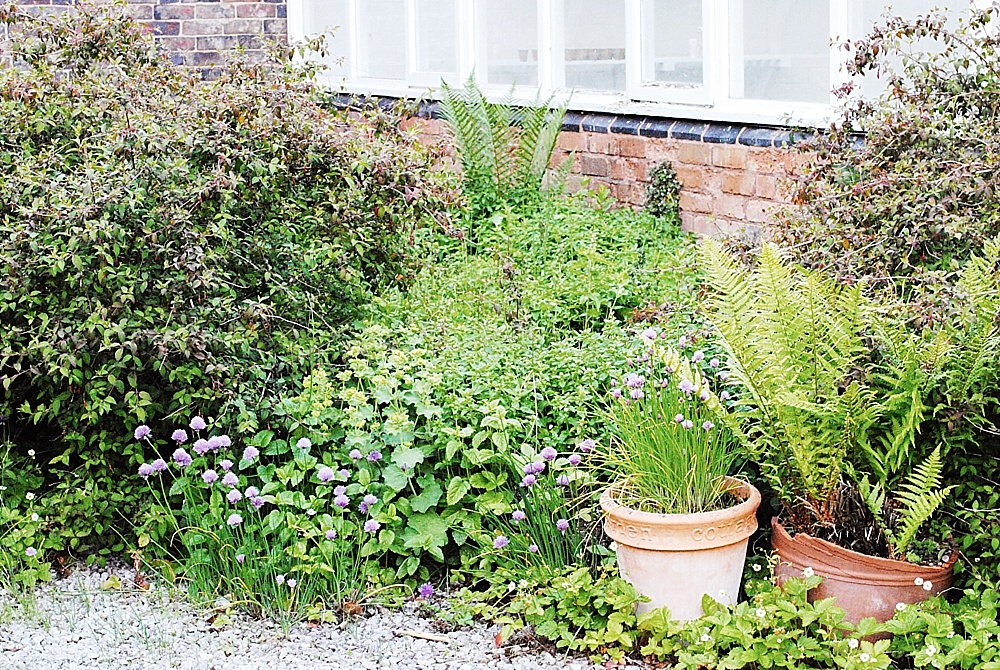
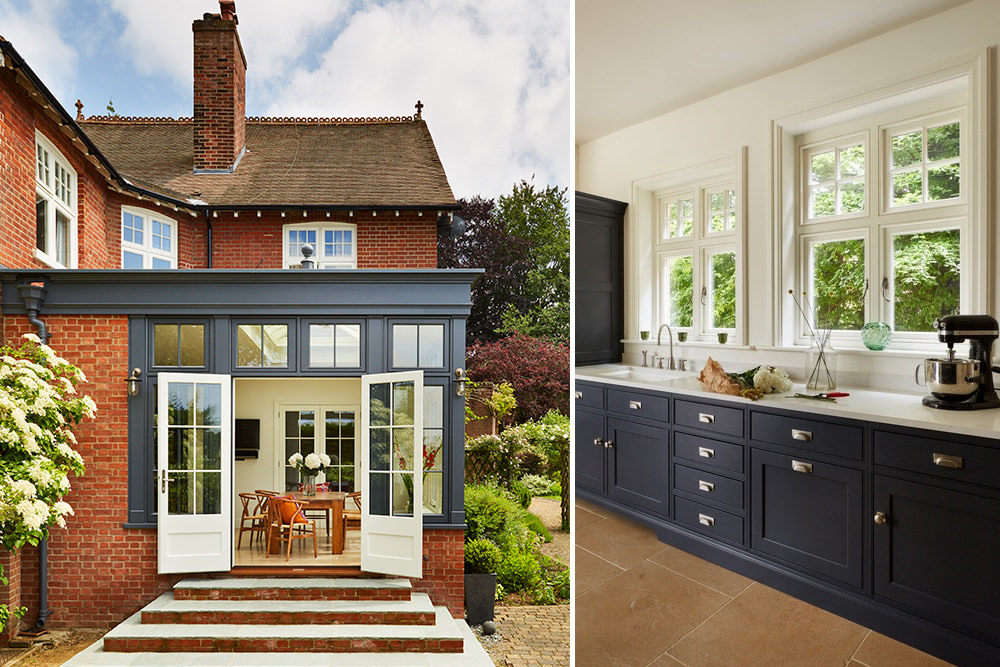
Our house refurb is still taking place (I threw a couple of spanners into the works with a few redesigns) so it looks like we’ll be staying Chez Mama’s for a while yet. Luckily her garden is huge and south facing and whilst the majority of the grounds are teeming with plant life (think rambling roses, laburnum and lilac trees, manicured lawns and terracotta pots for as far as the eye can see) there is a small area next to the orangery that has been neglected for a few years. I say ‘neglected’ but perhaps a better word would be unkempt because there are plenty of living, breathing, wonderful plants occupying the plot. Lady’s mantle, lemon balm, peppermint, spearmint, a unwieldy fuchsia, ferns and chives to name but a few.
It’s clear that this area must have been used as a kitchen garden at some point in its history (for the history buffs amongst you, the house was built in 1851 and you can see some images of the back of the house on my Instagram feed if you fancy a peek) because there was a clear rectangular bed so to speak underneath the masses of foliage (more on that in a moment) and because of the type of plants that are still growing in the space today (mainly herbs). It seemed silly then not to restore the area back to its former function.
Clearing The Plot
Once we’d landed on the location, the next step was to clear the existing plants from the area. I was initially keen to keep some of the mint varieties in situ as I’ve heard that they can be a good deterrent for some types of vegetable pests but I was advised against it from a maintenance point of view since mint can run rampant.
The Fuchsia was hacked back considerably despite not actually being a part of the bed itself for easier access and lots of Lady’s Mantle went on the compost heap accompanied by several piles of herbs to boot. The remaining soil was aerated and raked over to ensure that no weeds remained.
Improving The Raised Bed
After googling how deep a raised bed should be to be able to grow carrots we made an executive decision to add new sleepers on top of the existing walls of the plot for that extra bit of necessary depth. I’d like to say that I did this myself, I didn’t; instead I watched my husband do all the hard work instead. The additional depth was topped up by more soil and a healthy dose of homemade compost mulch that was raked in.
Rather than buying bamboo canes, I chose to chop down a few stalks from an existing plant in the garden to create supportive tripods to grow sweet peas along. Yes, it sounds a little destructive in hindsight but my mum hates the plant so she was happy to see a part of it disappear. I allowed them to dry out and then drove them into the soil at the very back of the bed before tying the canes into threes for the sweet peas to grow up against. With the basic structure in place we were good to go.
Planting
Before choosing which plants to grow I watched videos on the Gardener’s World website religiously. I’d grown sweet peas before and I’m a dab hand at keeping Viburnums, Hydrangeas, Lavender and Wisteria alive but I’ve never grown vegetables before. Like ever. So I was a bit anxious about the potential pitfalls in place. If I’m honest, I still am but I’m holding onto the notion that this is all a learning curve and mistakes are bound to be made.
I also remembered what another Rock My Style reader and commenter had said on one of Lauren’s posts about the importance of planning before planting. I knew I had to keep the tallest plants positioned at the back because of the brick wall on that side of the bed so by default the sweet peas would be situated here (yes I know that sweet peas aren’t veg but they remind me of my Granddad and I love their enticing scent so they found their way into the bed!).
I started my sweet peas off prior to them being planted out in the bed in rootrainers purchased from Sarah Raven. I always plant sweet peas in pairs and the rootrainers ensure that they develop a healthy and strong root system. A mixture of Amethyst Sweet Pea mix with Muse and Vintage Silk were all planted and once they had grown at least three pairs of leaves I pinched them out for bushier growth.
A friend of mine (thanks Nath!) gave me three courgette plants from his own stock which I knew from watching the tutorials on the Gardener’s World website needed plenty of space so I decided to plant these at the front of the bed. I’ve not grown courgettes before but I was assured by lots of green fingered friends that they were easy to grow.
I also invested in carrots – namely Purple Sun – and Salad Leaves from Thompson & Morgan. I also purchased some Rocket seeds but they haven’t arrived as yet.; all were planted in drills between the courgettes and the sweet peas (I’ll add the rocket later when it lands on my doormat.)
As to whether this plan will work remains to be seen, granted I’m not growing a huge amount at the moment but I figured I had my hands full with these plants for the time being; I’m sure that something will flourish and other plants won’t even germinate but if I can grow just one small carrot by the end of the summer I’ll consider the whole thing a success.
Do any of you seasoned growers have any tips for me? Have I made any serious errors so far (please say I haven’t)? Are any of you like me and growing your own for the first time? If so what have you chosen to eat?
Granted it looks a bit bare at the moment but I’ll be sharing more stories about my patch later in the year along with the lessons I’ve learnt, what grew (hopefully everything!), what failed (inevitably something) and any tips and tricks I might pick up along the way. Please feel free to leave me any advice in the comments below particularly of the keeping pests away in the most humane way variety. If you’re really keen to keep up with my green adventures then I’ll be posting my progress on my personal Instagram account as well. I really really hope I’ve got something to write home about….

So excited to see how this all comes together Lolly. Growing veg really isn’t my strong point so very envious of project patch. x
It remains to be seen whether growing veg is one of my strong points…I’m keeping my fingers crossed anyway. You’re more than welcome to come and visit project patch any time you want xx
Hooray for the veggie patch! Good choice on the first few to try. I’m not good at looking after any plants unfortunately but luckily hubby has inherited his Dad and Grandad’s love of plants so our veggie patch is rather large. This year we are having a year off as Edd is away so much with work and I don’t think he trusts me!! We have a few things still growing so will have lots of nice berries, peas and tomatoes. Plus his famous chilli plants (by the way those would be fab to grow in pots in the orangery). One thing Edd always does is plant Borage in amongst the veg as apparently they act as a deterrent to a lot of bugs, encourages pollenation and you can use the leaves in loads of things from salads to drinks. Plus he always put a few things like primroses or violets nearby for the same reasons. They are amazing for decorating your food too. Can’t wait to see the results xx
I think I was a bit late to the table with tomatoes this year which I’m gutted about but I’m proud that I managed to get this far with the patch at all. We have lots of wild strawberries growing around the garden so I’m always eating those (they are delicious!) but that’s it on the fruit front so I’m a bit jealous of your berries and tomatoes. I’d not heard about borage but now that I’ve read about it, it sounds amazing especially since you can eat it too!
p.s. Its not just you who has a love of Monty Don! If we had had a boy they were going to be called Monty! x
Love the name Monty; it also reminds me of a book I read when I was younger called Monty The Dog Who Wore Glasses so much so that years later I placed a bet on the Grand National on a horse called Monty’s Pass and it won!
Lolly this is ace! I’m sure you’ll be a natural veg grower and give Monty a run for his money.
We’ve yet to plant our little patch, but recently we decided to reconfigure a paved area at the side of our house. The previous owners used it as a double driveway, but it seems such a waste as it’s south facing. We’ve reconfigured it and put two raised beds in along with lots of pots to make it into a little kitchen garden.
I cant wait to start growing our own, you’ll have to keep us posted on how yours is getting on!
@Lottie – thats a really great tip about the Borage xx
Karen – the highlight of my year would be if Monty could read this and then pop along and pay my humble veggies a visit. Do you think it’s too much to ask? I love the idea of your kitchen garden at the side of your house. What are you growing?
Definitely tweet him. Do it.
I think we might look at putting some winter veg in, this summer is racing away already. Get some some root veg and brassica on the go – carrots, beetroot, kale (i saw your beetroot shout on Insta… defo!).
Elswhere in the garden we’ve got some asparagus ferns popping up in the greenhouse – but in all honesty I have NO idea what to do with them next to turn them into actual asparagus. We’re also waiting for our worcester berries to fully ripen (they make the most incredible jam).
I really need to plant up some herbs too, I keep buying the supermarket pots and then watching them slowly die instead of flourishing. What a waste of money!
I think like you it’s all a bit hit and miss, we’ll give it a go and see what happens. That’s the most exciting thing, when you dont quite know how to do it properly but somehow it all still works.
xx
I hate to break it to you love but those asparagus ferns are actually members of the lily family. Ain’t no asparagus coming out of them (did you know that Asparagus actually takes 5 years before you can harvest it – FIVE YEARS!! Monty told me) You can plant beetroot up until July so thinking of nipping that in actually but I totally get what you mean about the flying by the seat of your pants and then somehow everything is still alive and flourishing. You feel like a hero.
I had a feeling it was something like that after the asparagus farmer next door to work told me he’d never have the patience to grow his from ferns! haha.
FIVE YEARS??? I could be dead by then! x
Exactly! I thought it best to leave those out of the plot this time round. Figured you lot probably wouldn’t want to wait five years for an update.
Monty tweeted me recently in response to a comment I sent him. I nearly keeled over. Trufact
Sara I’m literally green right now. What did you say to him?
I was watching his French Gardens series. When doing a piece to camera he was ‘interrupted’ by the village church bells. He stopped, waited and enjoyed the moment before continuing talking to us. I commended him for letting the moment happen and not being irritated by it – the opposite in fact. he replied that the bells were far more eloquent than he could ever be!
So jealous!!!
If you got some autumn fruiting raspberry canes in now, you’d probably have fruit this year. This summer has been rubbish so far, I’m just hoping we get a sunny hot autumn to make up for it!
We’ve been lucky in that our landlords already had a raised bed with blackcurrants, strawbs and raspberries in it but we’ve added potatoes and loads of herbs (of which the parsley has gone completely INSANE!!). I proclaim that I like my veg patch full but really, the more plants you put in the less wedding you have to do!
the less wedding??
I do of course, mean weeding 🙂
Claire talk to me more about these fruiting raspberry canes – they sound awesome but I honestly have no idea…
Send some parsley my way – I love the stuff!
Oh now there’s an idea… the RMS ‘crop-swap’
Lets get sharing cuttings x
LOVE this!!
Love it! Hahaha
Basically, different varieties fruit at different times so if you go to the garden centre, ask them for an autumn fruiting variety. Canes are just the name for the raspberry plant (which is probably because in the winter they look like bare sticks hence my slight confusion and disappointment when my ex-mother in law bought me some for Christmas one year!)
I’m in the hubby’s bad books when it comes to our raspberry cage! It was very overgrown and I couldn’t reach the fruit so I basically started hacking and pulling up any of the plants that had no fruit on to make paths between the raspberries. Turns out those are our Autumn fruiting ones. Oops! No raspberries for me this autumn. x
Oh dear Lottie….
My mother in law gave me a courgette plant in a pot a couple of weeks ago as she had a spare. Given the amount of courgettes we eat I have high hopes for it (fingers crossed). I do need to go and get some more copper tape to put around my pots though otherwise my courgette plant and sweetpeas will be munched by the extraordinary amount of snails in our garden.
Sarah now this is something I need to ask – I have some copper tape somewhere but can’t find it. Where’s best to buy a replacement roll from?
I’m a newbie so I got mine at the local garden centre. If anyone else has a good source then please let me know.
Go Monty-Loz! When I was pregnant I too was inspired to plant a veg patch- visions of me pulling up carrots with a child on my hip to make fresh puree for her influenced the decision process!! I ordered a small salad garden from rocket gardens- it was ace, all the little plugs of plants arrived in a box nestled in hay ready to plant. Great for the slightly clueless gardener who was afraid of planting from seed/couldn’t be bothered. It was a great success and, helped by the great British weather and a hot summer, came to fruition quickly. Unfortunately the arrival of said plants co-incided with the arrival of the aforementioned baby and as you can probably imagine in those hazy first few weeks I was a little pre-occupied and unfortunately didn’t pick the leaves as frequently as I should have and we didn’t get to enjoy the fruits of my (ahem rocket’s) labour as much as we should have! I would definately do it again though now she’s here and life is easier! When we were little my mum used to teach us to grow plants and we used to have our own beds around her garden, great memories which I’d like to pass on to my little one. Good luck!! X
Monty-Loz! I love it. Definitely going to be my new best name. Thanks for the best wishes – will you perhaps be growing again this year or is your little one still too little?
I am another veg growing newbie… This spring my husband built some raised beds, and they are now filled with Lettuces, onions, shallots, carrots and runner beans. Its actually been easier than I expected! I grew everything from seed, and so far the only failure we’ve had is that the sparrows completely devoured the beetroot plants last week…I should have covered them really. Hopefully they won’t move on to the other plants now the beetroot has gone (hungry caterpillar style!)
Good luck with your veg, and I hope we see more posts like these on RMS!
Jane – thanks for letting me know re the beetroot as I’m thinking this could be a last minute addition to my plot (if I have the space). Very envious of all your veggies! Share some pics with us when you get a mo xx